Panasonic VDR M50 Dvd Camcorder - Page 101
SCENE, Deleting Scenes Delete
 |
UPC - 037988251209
View all Panasonic VDR M50 manuals
Add to My Manuals
Save this manual to your list of manuals |
Page 101 highlights
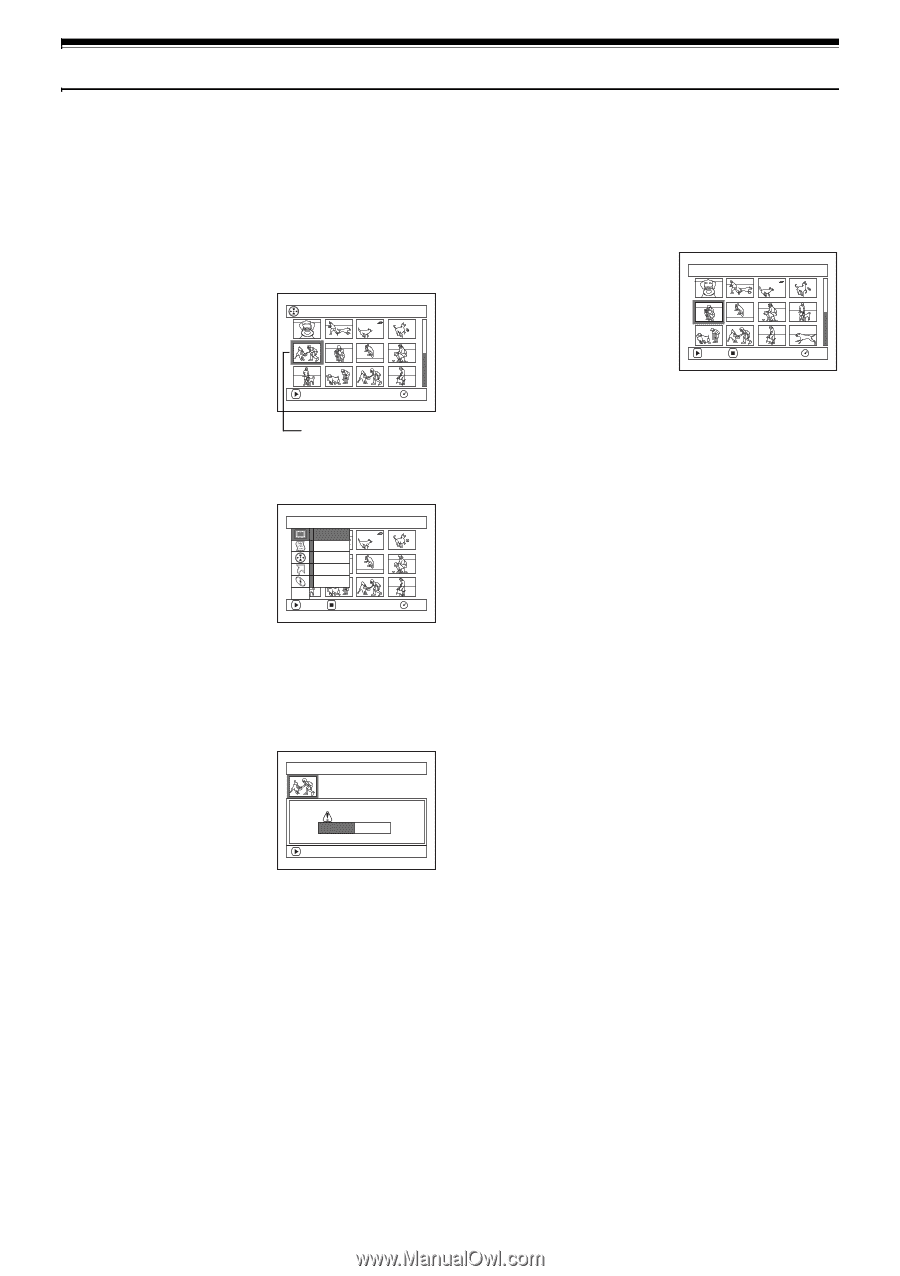
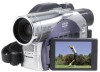
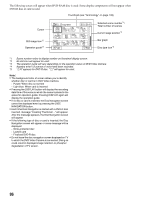
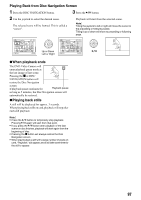
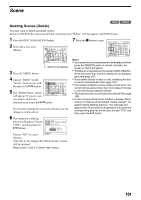
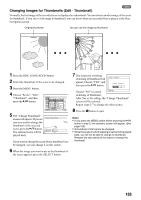
Scene Deleting Scenes (Delete) 13 You may want to delete unwanted scenes. Scenes on DVD-R disc cannot be deleted, and menu item "Delete" will not appear with DVD-R disc. 1 Press the DISC NAVIGATION button. 2 Select the scene to be deleted. All Programs 005/014 7 Press the g button to quit. De l e t e Scene 005/013 PLAY RAM Scene to be deleted 3 Press the MENU button. 4 Choose "Delete" on the "Scene" menu screen, and Scene De l e t e then press the A button. Ed i t Copy 5 The "Delete Scene" screen Se l ect Det a i l ETC will appear: If you are sure ENTER RETURN RAM you want to delete the selected scene, press the A button. If you want to change the scene to be deleted, you can change it on this screen. 6 The screen for verifying deletion will appear: Choose "YES", and then press the A button. De l e t e Scene SEP 30 2004 8 : 00:00AM Scene No. 005 De l e t e scene? YES NO Choose "NO" to cancel ENTER deletion. After Yes or No setting, the "Delete Scene" screen will be restored. Repeat steps 5 and 6 to delete other scenes. ENTER EX I T RAM Note: • If you point the cursor at the scene to be deleted, and then press the DELETE button on remote controller, the screen in step 5 will appear. • To delete an unwanted part of a scene on DVD-RAM disc, divide the scene first, and then delete the unnecessary part (See page 107). • If you delete all data on disc or card, initializing the disc or card is recommended (See page 125). • If the length of deleted scenes (stills) is quite short, the remaining free space of disc may not increase in the disc or card remaining capacity indicator. • The locked scenes on card cannot be deleted (See page 109). • If even one play list has been created, message "Same scenes on PlayList will be deleted. Delete scenes?" will appear before deleting scene(s). This message will appear even if the scene(s) to be deleted is not used in the corresponding play list. In this case, choose "YES" and then press the A button. 101
-
 1
1 -
2
-
3
-
4
-
5
-
6
-
7
-
8
-
9
-
10
-
11
-
12
-
13
-
14
-
15
-
16
-
17
-
18
-
19
-
20
-
21
-
22
-
23
-
24
-
25
-
26
-
27
-
28
-
29
-
30
-
31
-
32
-
33
-
34
-
35
-
36
-
37
-
38
-
39
-
40
-
41
-
42
-
43
-
44
-
45
-
46
-
47
-
48
-
49
-
50
-
51
-
52
-
53
-
54
-
55
-
56
-
57
-
58
-
59
-
60
-
61
-
62
-
63
-
64
-
65
-
66
-
67
-
68
-
69
-
70
-
71
-
72
-
73
-
74
-
75
-
76
-
77
-
78
-
79
-
80
-
81
-
82
-
83
-
84
-
85
-
86
-
87
-
88
-
89
-
90
-
91
-
92
-
93
-
94
-
95
-
 96
96 -
 97
97 -
 98
98 -
 99
99 -
 100
100 -
 101
101 -
 102
102 -
 103
103 -
 104
104 -
 105
105 -
 106
106 -
107
-
108
-
109
-
110
-
111
-
112
-
113
-
114
-
115
-
116
-
117
-
118
-
119
-
120
-
121
-
122
-
123
-
124
-
125
-
126
-
127
-
128
-
129
-
130
-
131
-
132
-
133
-
134
-
135
-
136
-
137
-
138
-
139
-
140
-
141
-
142
-
143
-
144
-
145
-
146
-
147
-
148
-
149
-
150
-
151
-
152
-
153
-
154
-
155
-
156
-
157
-
158
-
159
-
160
-
161
-
162
-
163
-
164
-
165
-
166
-
167
-
168
-
169
-
170
-
171
-
172
-
173
-
174
 |
 |