Panasonic VDR M50 Dvd Camcorder - Page 89
Self Timer, The self timer function is valid only when recording photos stills. - review
 |
UPC - 037988251209
View all Panasonic VDR M50 manuals
Add to My Manuals
Save this manual to your list of manuals |
Page 89 highlights
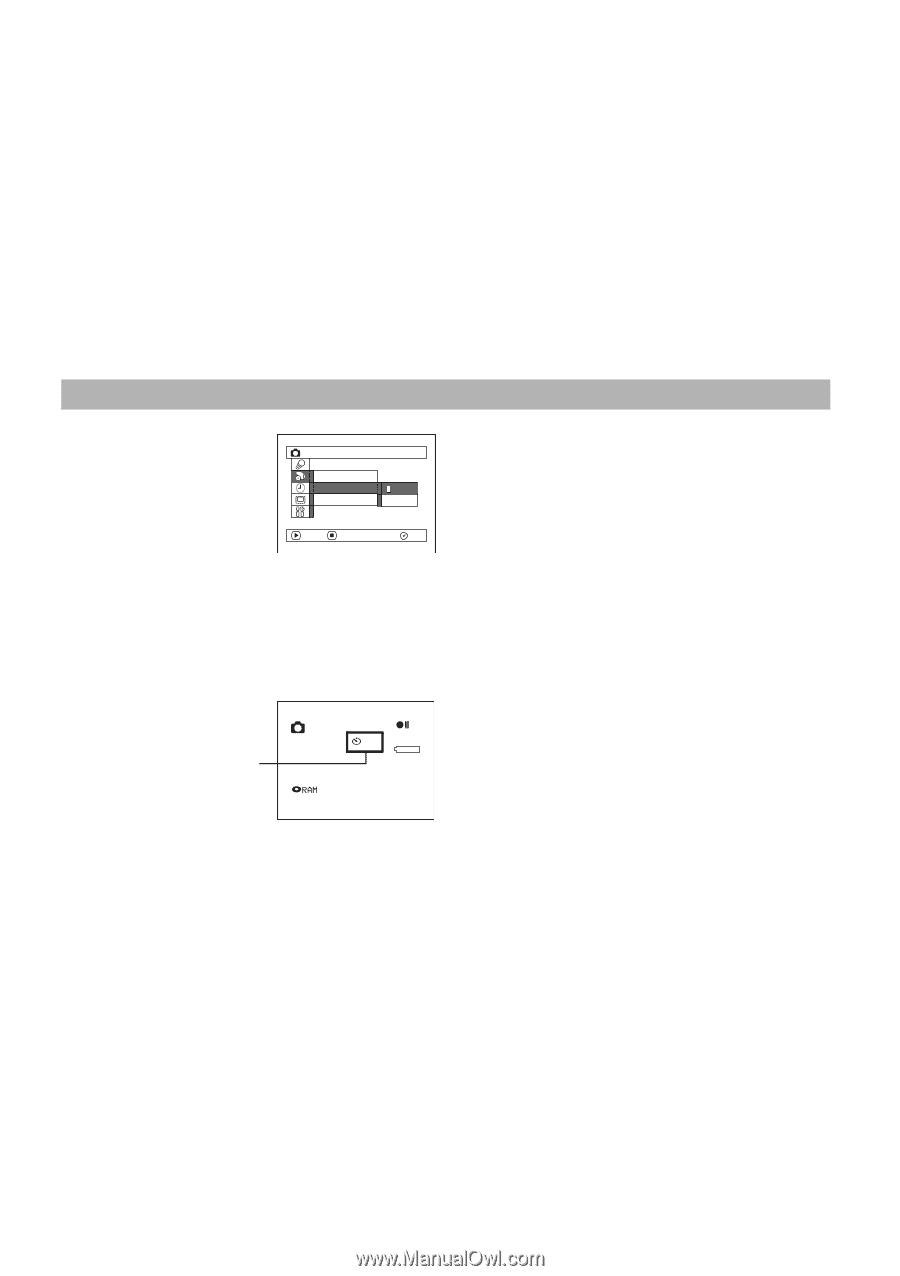
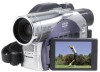
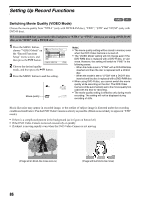
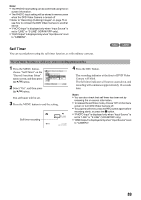
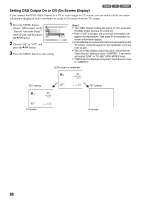
Note: • The PHOTO Input setting can be confirmed using the on- screen information. • The PHOTO Input setting will be stored in memory even when the DVD Video Camera is turned off. • Refer to "Recording (Dubbing) Images" on page 75 to see how to connect the DVD Video Camera to another device. • "PHOTO Input" is displayed only when "Input Source" is set to "LINE" or "S LINE" (VDR-M70PP only). • "OSD Output" is displayed only when "Input Source" is set to "CAMERA". Self Timer You can record photos using the self timer function, as with ordinary cameras. 13 The self timer function is valid only when recording photos (stills). 1 Press the MENU button, choose "Self Timer" on the "Record Functions Setup" menu screen, and then press the A button. 2 Select "On", and then press the A button. Record Func t i ons Setup Input Source Se l f T i mer On OSD Ou t p u t Of f ENTER RETURN RAM The self timer will be set. 3 Press the MENU button to end the setting. Self timer recording 1 0 REM 9 9 9 8 : 00AM SEP 30 2 00 4 4 Press the REC button. The recording indicator at the front of DVD Video Camera will blink. The Self timer indicator will start to count down, and recording will commence approximately 10 seconds later. Note: • You can also check that self timer has been set by reviewing the on-screen information. • To release the self timer mode, choose "Off" on the menu screen or turn DVD Video Camera off. • To suspend self timer, press the REC button again before recording starts, or press the g button. • "PHOTO Input" is displayed only when "Input Source" is set to "LINE" or "S LINE" (VDR-M70PP only). • "OSD Output" is displayed only when "Input Source" is set to "CAMERA". 89
-
 1
1 -
2
-
3
-
4
-
5
-
6
-
7
-
8
-
9
-
10
-
11
-
12
-
13
-
14
-
15
-
16
-
17
-
18
-
19
-
20
-
21
-
22
-
23
-
24
-
25
-
26
-
27
-
28
-
29
-
30
-
31
-
32
-
33
-
34
-
35
-
36
-
37
-
38
-
39
-
40
-
41
-
42
-
43
-
44
-
45
-
46
-
47
-
48
-
49
-
50
-
51
-
52
-
53
-
54
-
55
-
56
-
57
-
58
-
59
-
60
-
61
-
62
-
63
-
64
-
65
-
66
-
67
-
68
-
69
-
70
-
71
-
72
-
73
-
74
-
75
-
76
-
77
-
78
-
79
-
80
-
81
-
82
-
83
-
 84
84 -
 85
85 -
 86
86 -
 87
87 -
 88
88 -
 89
89 -
 90
90 -
 91
91 -
 92
92 -
 93
93 -
 94
94 -
95
-
96
-
97
-
98
-
99
-
100
-
101
-
102
-
103
-
104
-
105
-
106
-
107
-
108
-
109
-
110
-
111
-
112
-
113
-
114
-
115
-
116
-
117
-
118
-
119
-
120
-
121
-
122
-
123
-
124
-
125
-
126
-
127
-
128
-
129
-
130
-
131
-
132
-
133
-
134
-
135
-
136
-
137
-
138
-
139
-
140
-
141
-
142
-
143
-
144
-
145
-
146
-
147
-
148
-
149
-
150
-
151
-
152
-
153
-
154
-
155
-
156
-
157
-
158
-
159
-
160
-
161
-
162
-
163
-
164
-
165
-
166
-
167
-
168
-
169
-
170
-
171
-
172
-
173
-
174
 |
 |