Panasonic VDR M50 Dvd Camcorder - Page 34
Setups, Setting Up The Dvd Video Camera
 |
UPC - 037988251209
View all Panasonic VDR M50 manuals
Add to My Manuals
Save this manual to your list of manuals |
Page 34 highlights
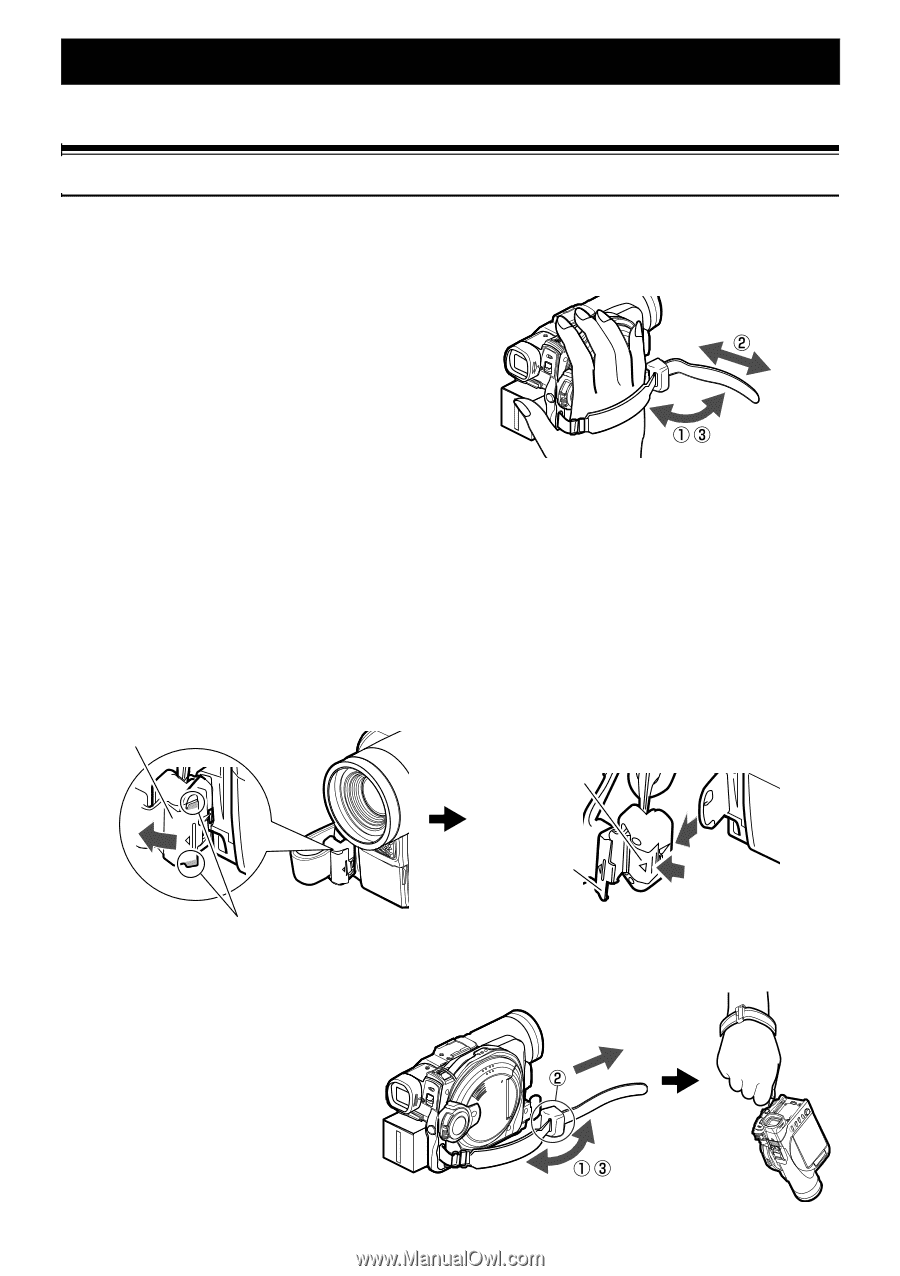
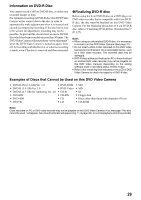
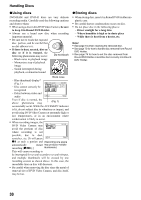
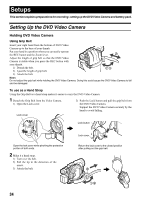
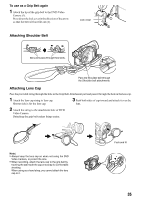
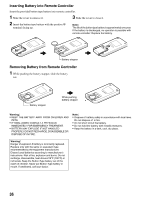
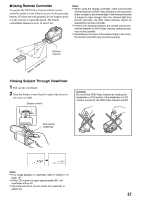
Setups This section explains preparations for recording - setting up the DVD Video Camera and battery pack. Setting Up the DVD Video Camera Holding DVD Video Camera Using Grip Belt Insert your right hand from the bottom of DVD Video Camera up to the base of your thumb. Put your hand in a position where you can easily operate the REC button and the Zoom lever. Adjust the length of grip belt so that the DVD Video Camera is stable when you press the REC button with your thumb. 1) Detach the belt. 2) Ajust the length of grip belt. 3) Attach the belt. Note: Do not adjust the grip belt while holding the DVD Video Camera: Doing this could cause the DVD Video Camera to fall and be damaged. To use as a Hand Strap Using the Grip Belt as a hand strap makes it easier to carry the DVD Video Camera. 1 Detach the Grip Belt from the Video Camera. 1) Open the Lock cover. 2) Push the Lock button and pull the grip belt from the DVD Video Camera. Support the DVD Video Camera securely by the hand to avoid falling. Lock cover Lock button Open the lock cover while pinching the protection portion of both ends. 2 Make it a hand strap. 1) Turn over the belt. 2) Pull the tip in the derection of the arrow. 3) Attach the belt. Lock cover Return the lock cover to the closed position after pulling out the grip belt. 34
-
 1
1 -
2
-
3
-
4
-
5
-
6
-
7
-
8
-
9
-
10
-
11
-
12
-
13
-
14
-
15
-
16
-
17
-
18
-
19
-
20
-
21
-
22
-
23
-
24
-
25
-
26
-
27
-
28
-
 29
29 -
 30
30 -
 31
31 -
 32
32 -
 33
33 -
 34
34 -
 35
35 -
 36
36 -
 37
37 -
 38
38 -
 39
39 -
40
-
41
-
42
-
43
-
44
-
45
-
46
-
47
-
48
-
49
-
50
-
51
-
52
-
53
-
54
-
55
-
56
-
57
-
58
-
59
-
60
-
61
-
62
-
63
-
64
-
65
-
66
-
67
-
68
-
69
-
70
-
71
-
72
-
73
-
74
-
75
-
76
-
77
-
78
-
79
-
80
-
81
-
82
-
83
-
84
-
85
-
86
-
87
-
88
-
89
-
90
-
91
-
92
-
93
-
94
-
95
-
96
-
97
-
98
-
99
-
100
-
101
-
102
-
103
-
104
-
105
-
106
-
107
-
108
-
109
-
110
-
111
-
112
-
113
-
114
-
115
-
116
-
117
-
118
-
119
-
120
-
121
-
122
-
123
-
124
-
125
-
126
-
127
-
128
-
129
-
130
-
131
-
132
-
133
-
134
-
135
-
136
-
137
-
138
-
139
-
140
-
141
-
142
-
143
-
144
-
145
-
146
-
147
-
148
-
149
-
150
-
151
-
152
-
153
-
154
-
155
-
156
-
157
-
158
-
159
-
160
-
161
-
162
-
163
-
164
-
165
-
166
-
167
-
168
-
169
-
170
-
171
-
172
-
173
-
174
 |
 |