Panasonic VDR M50 Dvd Camcorder - Page 103
Changing Images for Thumbnails Edit - Thumbnail, After Yes or No setting, the Change Thumbnail
 |
UPC - 037988251209
View all Panasonic VDR M50 manuals
Add to My Manuals
Save this manual to your list of manuals |
Page 103 highlights
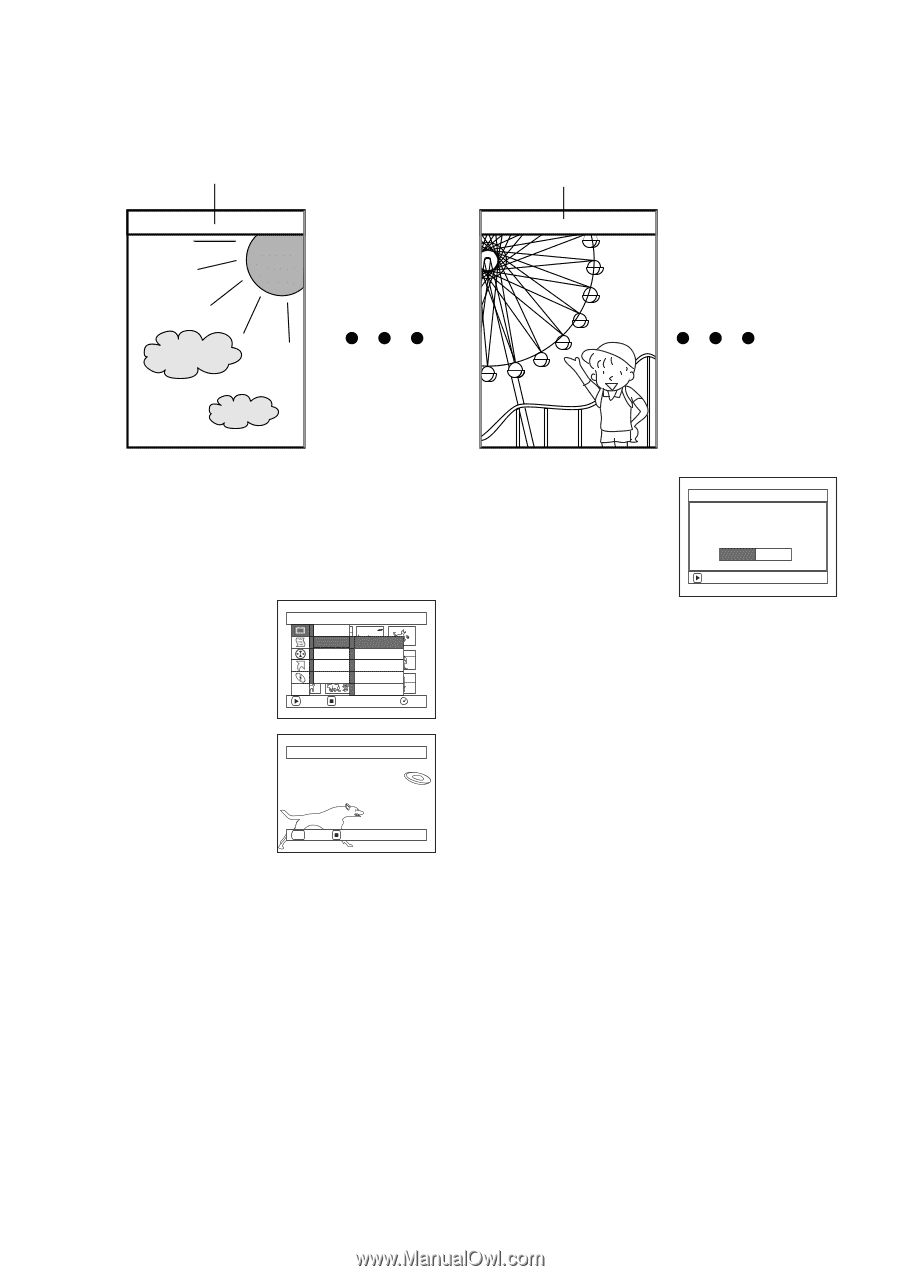
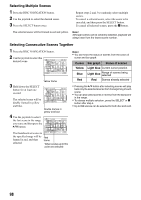
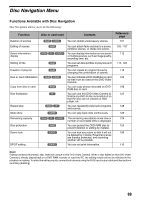
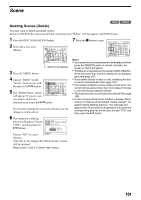
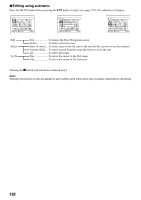
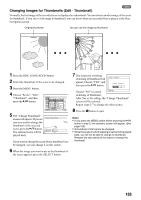
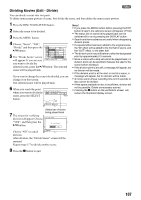
Changing Images for Thumbnails (Edit - Thumbnail) 1 Normally, the first image of the recorded scene is displayed as a thumbnail: You can choose another image of the scene for thumbnail. If you set a vivid image to thumbnail, you can know what you recorded from a glance at the Disc Navigation screen. Original thumbnail You can use this image as thumbnail. 1 Press the DISC NAVIGATION button. 2 Select the thumbnail of the scene to be changed. 3 Press the MENU button. 4 Choose "Scene", "Edit", "Thumbnail", and then press the A button. Scene De l e t e Ed i t T h umbna i l Copy Sk i p Se l ect Fade De t a i l Comb i ne ETC Di v i de ENTER RETURN RAM 5 The "Change Thumbnail" screen will appear: If you are sure you want to change the thumbnail of the selected scene, press the A button: The selected scene will be played back. Select Thumbnail Point SEL ENTER CANCEL If you want to change the scene whose thumbnail is to be changed, you can change it on this screen. 6 When the image you want to use as the thumbnail of the scene appears, press the SELECT button. 7 The screen for verifying switching of thumbnail will appear: Choose "YES", and then press the A button. Change Thumbna i l Change thumbna i l ? YES NO Choose "NO" to cancel ENTER switching of thumbnail. After Yes or No setting, the "Change Thumbnail" screen will be restored. Repeat steps 5-7 to change the other scenes. 8 Press the g button to quit. Note: • If you press the MENU button before pressing the A button in step 5, the submenu screen will appear. (See page 102) • A thumbnail of still cannot be changed. • Since the scene to which skipping is set cannot be played back, you will not be able to change its thumbnail: Release the skip setting of the scene to change the thumbnail. 103
-
 1
1 -
2
-
3
-
4
-
5
-
6
-
7
-
8
-
9
-
10
-
11
-
12
-
13
-
14
-
15
-
16
-
17
-
18
-
19
-
20
-
21
-
22
-
23
-
24
-
25
-
26
-
27
-
28
-
29
-
30
-
31
-
32
-
33
-
34
-
35
-
36
-
37
-
38
-
39
-
40
-
41
-
42
-
43
-
44
-
45
-
46
-
47
-
48
-
49
-
50
-
51
-
52
-
53
-
54
-
55
-
56
-
57
-
58
-
59
-
60
-
61
-
62
-
63
-
64
-
65
-
66
-
67
-
68
-
69
-
70
-
71
-
72
-
73
-
74
-
75
-
76
-
77
-
78
-
79
-
80
-
81
-
82
-
83
-
84
-
85
-
86
-
87
-
88
-
89
-
90
-
91
-
92
-
93
-
94
-
95
-
96
-
97
-
 98
98 -
 99
99 -
 100
100 -
 101
101 -
 102
102 -
 103
103 -
 104
104 -
 105
105 -
 106
106 -
 107
107 -
 108
108 -
109
-
110
-
111
-
112
-
113
-
114
-
115
-
116
-
117
-
118
-
119
-
120
-
121
-
122
-
123
-
124
-
125
-
126
-
127
-
128
-
129
-
130
-
131
-
132
-
133
-
134
-
135
-
136
-
137
-
138
-
139
-
140
-
141
-
142
-
143
-
144
-
145
-
146
-
147
-
148
-
149
-
150
-
151
-
152
-
153
-
154
-
155
-
156
-
157
-
158
-
159
-
160
-
161
-
162
-
163
-
164
-
165
-
166
-
167
-
168
-
169
-
170
-
171
-
172
-
173
-
174
 |
 |