Panasonic VDR M50 Dvd Camcorder - Page 107
Dividing Movies Edit - Divide
 |
UPC - 037988251209
View all Panasonic VDR M50 manuals
Add to My Manuals
Save this manual to your list of manuals |
Page 107 highlights
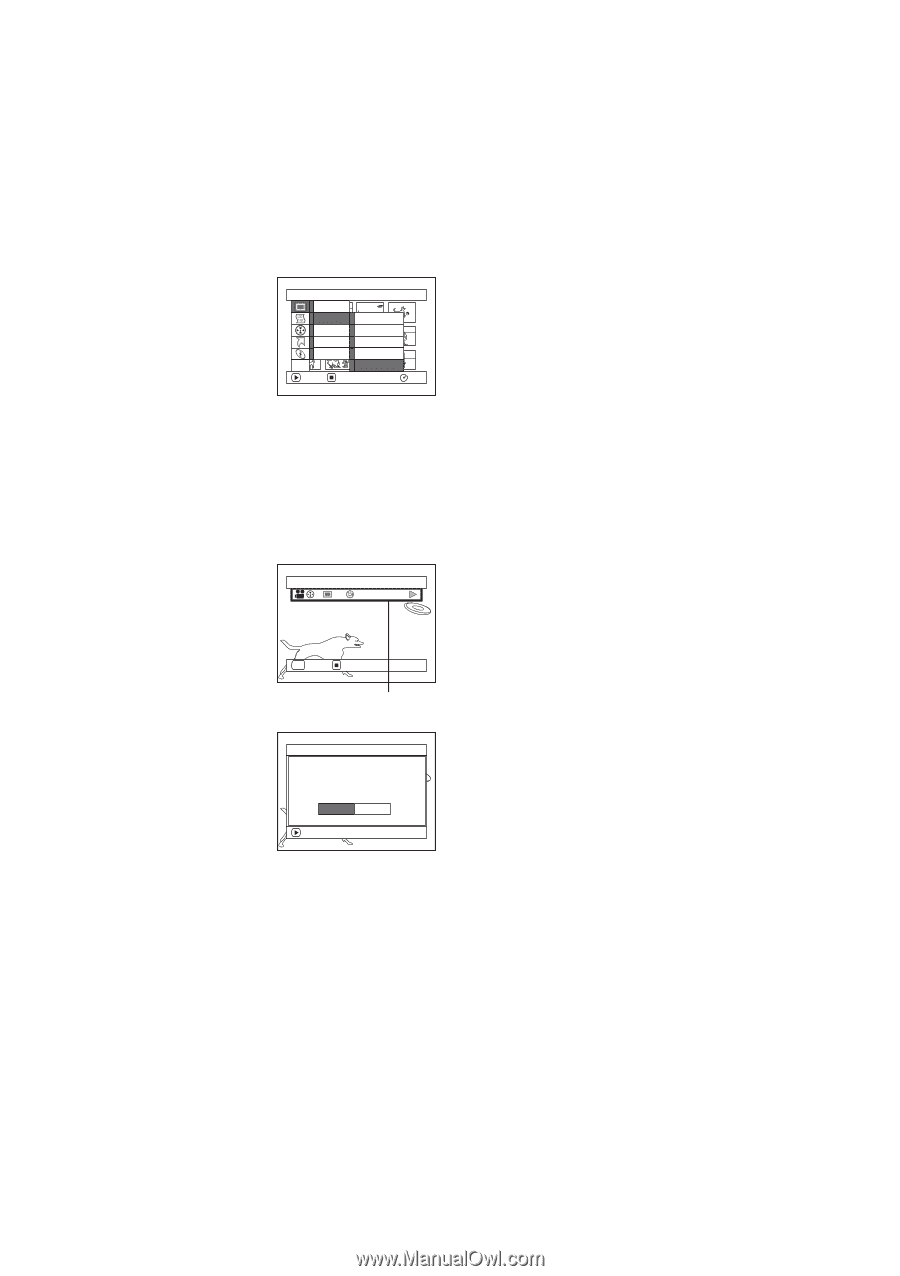
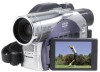
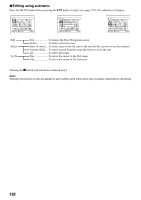
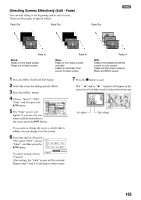
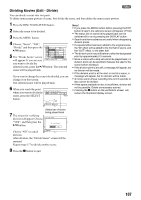
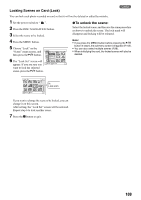
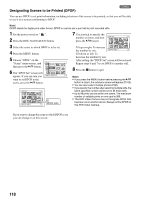
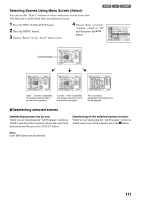
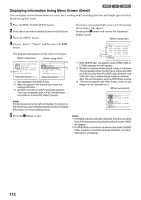
Dividing Movies (Edit - Divide) 1 You can divide a scene into two parts. To delete unnecessary portion of scene, first divide the scene, and then delete the unnecessary portion. 1 Press the DISC NAVIGATION button. 2 Select the scene to be divided. 3 Press the MENU button. 4 Choose, "Scene", "Edit", "Divide" and then press the A button. 5 The "Divide Scene" screen will appear: If you are sure Scene De l e t e Ed i t Thumbna i l Copy Sk i p Se l ect Fade Det a i l Combine ETC D i v i de ENTER RETURN RAM you want to divide the selected scene, press the A button: The selected scene will be played back. If you want to change the scene to be divided, you can change it on this screen. The selected scene will be played back. 6 When you reach the point where you want to divide the scene, press the SELECT button. Sel ect D i v i s i on Po i n t 002 RAM 0 : 00 : 18 Note: • If you press the MENU button before pressing the A button in step 5, the submenu screen will appear. (P.102) • The status bar of scene being played back can be switched off or on by pressing the DISPLAY button. • Search and frame advance are useful when designating division points. • If a special effect has been added to the original scene, the "IN" effect will be added to the first half of scene, and the "OUT" effect, to the latter half. • The division point may drift before or after the designated point by approximately 0.5 seconds. • Since a scene with a skip set cannot be played back, no division point can be specified: Release the skip for the scene before dividing it. • If the division point is at a still, a message will appear, but no division will be made. • If the division point is at the start or end of a scene, a message will appear, but no division will be made. • A movie scene whose recording time is 0.5 seconds or less cannot be divided. • If free space available on disc is insufficient, division will not be possible: Delete unnecessary scenes. • Pressing the g button on the verification screen will restore the thumbnail display screen. SEL ENTER CANCEL 7 The screen for verifying division will appear: Choose "YES", and then press the A button. Status bar of scene being played back D i v i de Scene D i v i de Scene? YES NO Choose "NO" to cancel ENTER division. After division, the "Divide Scene" screen will be restored. Repeat steps 5-7 to divide another scene. 8 Press the g button to quit. 107
-
 1
1 -
2
-
3
-
4
-
5
-
6
-
7
-
8
-
9
-
10
-
11
-
12
-
13
-
14
-
15
-
16
-
17
-
18
-
19
-
20
-
21
-
22
-
23
-
24
-
25
-
26
-
27
-
28
-
29
-
30
-
31
-
32
-
33
-
34
-
35
-
36
-
37
-
38
-
39
-
40
-
41
-
42
-
43
-
44
-
45
-
46
-
47
-
48
-
49
-
50
-
51
-
52
-
53
-
54
-
55
-
56
-
57
-
58
-
59
-
60
-
61
-
62
-
63
-
64
-
65
-
66
-
67
-
68
-
69
-
70
-
71
-
72
-
73
-
74
-
75
-
76
-
77
-
78
-
79
-
80
-
81
-
82
-
83
-
84
-
85
-
86
-
87
-
88
-
89
-
90
-
91
-
92
-
93
-
94
-
95
-
96
-
97
-
98
-
99
-
100
-
101
-
 102
102 -
 103
103 -
 104
104 -
 105
105 -
 106
106 -
 107
107 -
 108
108 -
 109
109 -
 110
110 -
 111
111 -
 112
112 -
113
-
114
-
115
-
116
-
117
-
118
-
119
-
120
-
121
-
122
-
123
-
124
-
125
-
126
-
127
-
128
-
129
-
130
-
131
-
132
-
133
-
134
-
135
-
136
-
137
-
138
-
139
-
140
-
141
-
142
-
143
-
144
-
145
-
146
-
147
-
148
-
149
-
150
-
151
-
152
-
153
-
154
-
155
-
156
-
157
-
158
-
159
-
160
-
161
-
162
-
163
-
164
-
165
-
166
-
167
-
168
-
169
-
170
-
171
-
172
-
173
-
174
 |
 |