Panasonic VDR M50 Dvd Camcorder - Page 77
Recording Dubbing Images on Other Video Devices, Press the DISC NAVIGATION button.
 |
UPC - 037988251209
View all Panasonic VDR M50 manuals
Add to My Manuals
Save this manual to your list of manuals |
Page 77 highlights
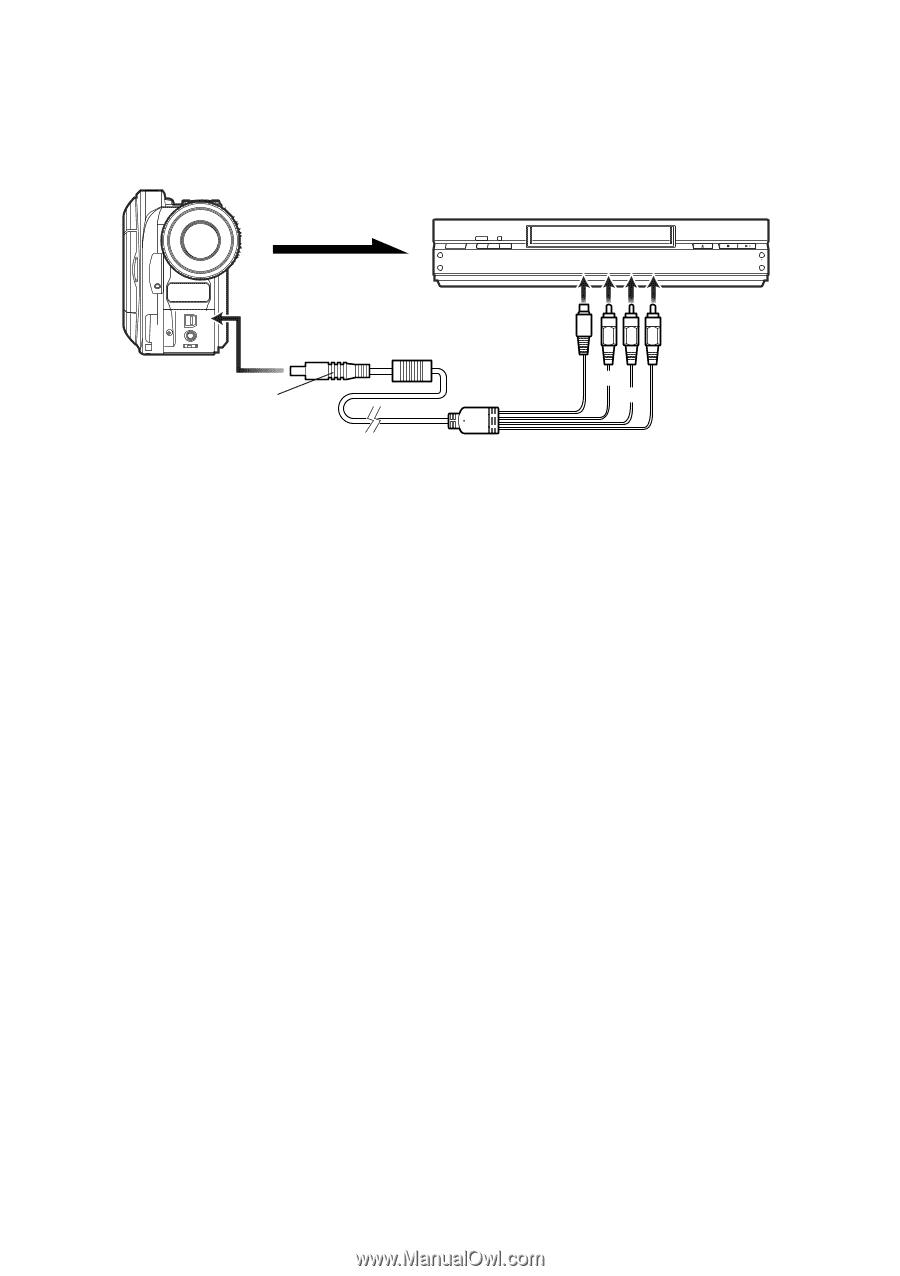
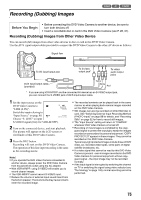
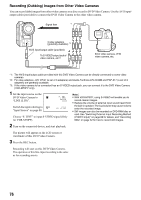
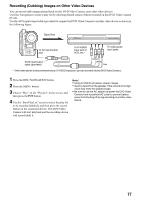
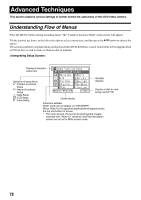
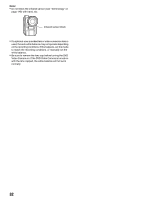
Recording (Dubbing) Images on Other Video Devices You can record (dub) images played back on this DVD Video Camera, onto other video devices. Use Disc Navigation to create a play list by selecting desired scenes of those recorded on this DVD Video Camera (P.116). Use the AV/S input/output cable (provided) to connect the DVD Video Camera to another video device as shown in the following figure: Signal flow A/V To AV input/output MIC jack To S-VIDEO input jack of VCR, etc.* To video/audio input jacks AV/S input/output cable (provided) Yellow White Red * If the video device to be connected has an S-VIDEO input jack, you can connect it to the DVD Video Camera. 1 Press the DISC NAVIGATION button. 2 Press the MENU button. 3 Choose "Play" on the "PlayList" menu screen, and then press the A button. 4 Use the "Start PlayList" screen to select the play list to be recorded (dubbed), and then press the record button on the connected device: The DVD Video Camera will start playback and the recording device will record (dub) it. Note: • Using S-VIDEO will deliver clearer images. • Audio is heard from the speaker: If the volume is too high, noise may enter the dubbed image. • Be sure to use the AC adaptor to power the DVD Video Camera from household AC outlet to prevent battery power from shutting off during recording on another video device. 77
-
 1
1 -
2
-
3
-
4
-
5
-
6
-
7
-
8
-
9
-
10
-
11
-
12
-
13
-
14
-
15
-
16
-
17
-
18
-
19
-
20
-
21
-
22
-
23
-
24
-
25
-
26
-
27
-
28
-
29
-
30
-
31
-
32
-
33
-
34
-
35
-
36
-
37
-
38
-
39
-
40
-
41
-
42
-
43
-
44
-
45
-
46
-
47
-
48
-
49
-
50
-
51
-
52
-
53
-
54
-
55
-
56
-
57
-
58
-
59
-
60
-
61
-
62
-
63
-
64
-
65
-
66
-
67
-
68
-
69
-
70
-
71
-
 72
72 -
 73
73 -
 74
74 -
 75
75 -
 76
76 -
 77
77 -
 78
78 -
 79
79 -
 80
80 -
 81
81 -
 82
82 -
83
-
84
-
85
-
86
-
87
-
88
-
89
-
90
-
91
-
92
-
93
-
94
-
95
-
96
-
97
-
98
-
99
-
100
-
101
-
102
-
103
-
104
-
105
-
106
-
107
-
108
-
109
-
110
-
111
-
112
-
113
-
114
-
115
-
116
-
117
-
118
-
119
-
120
-
121
-
122
-
123
-
124
-
125
-
126
-
127
-
128
-
129
-
130
-
131
-
132
-
133
-
134
-
135
-
136
-
137
-
138
-
139
-
140
-
141
-
142
-
143
-
144
-
145
-
146
-
147
-
148
-
149
-
150
-
151
-
152
-
153
-
154
-
155
-
156
-
157
-
158
-
159
-
160
-
161
-
162
-
163
-
164
-
165
-
166
-
167
-
168
-
169
-
170
-
171
-
172
-
173
-
174
 |
 |