Panasonic VDR M50 Dvd Camcorder - Page 78
Advanced Techniques, Underestanding Flow Of Menus
 |
UPC - 037988251209
View all Panasonic VDR M50 manuals
Add to My Manuals
Save this manual to your list of manuals |
Page 78 highlights
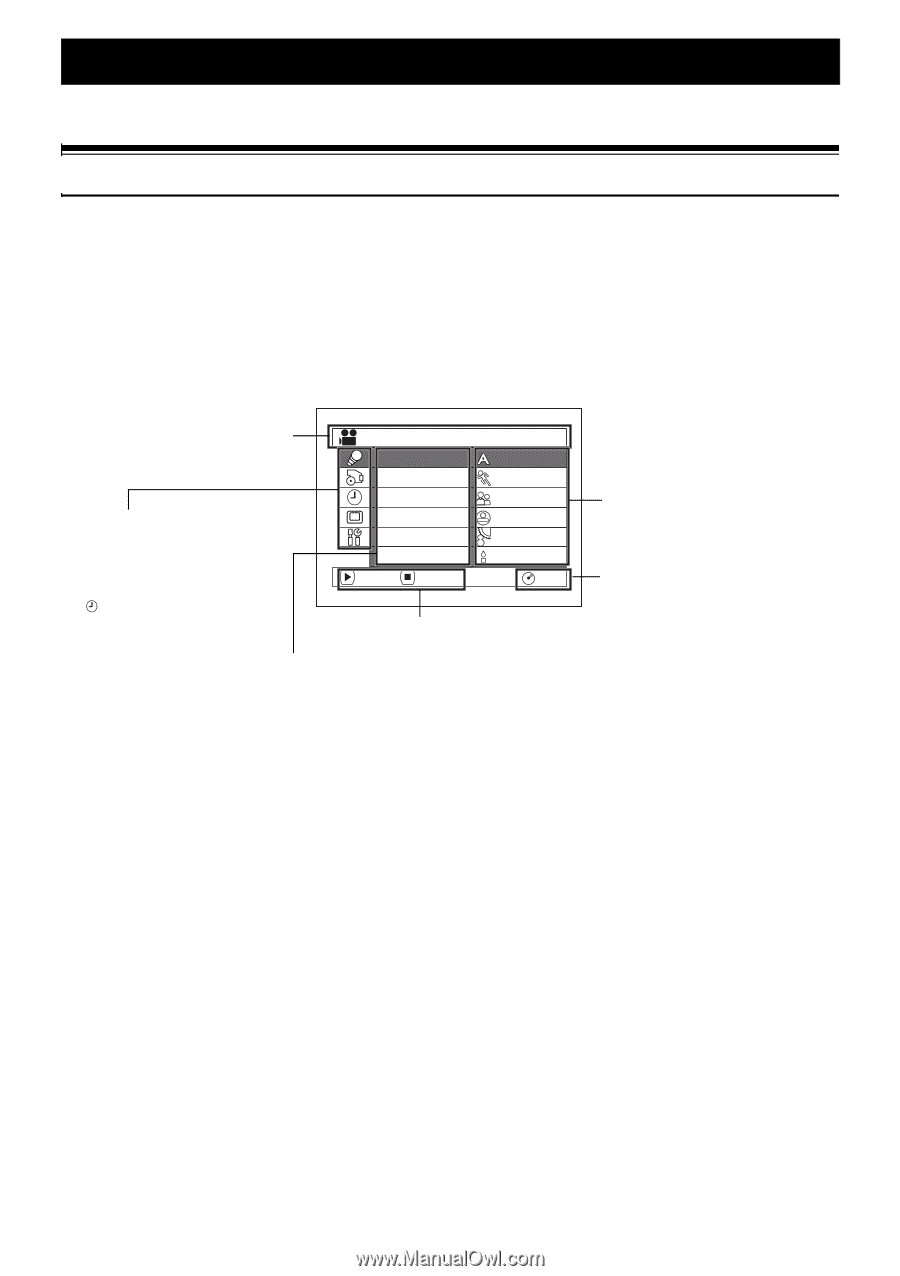
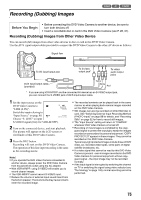
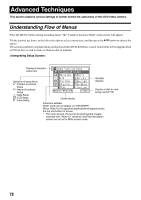
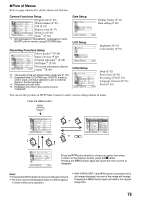
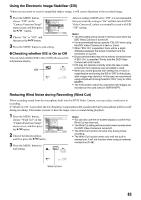
Advanced Techniques This section explains various settings to further extend the usefulness of this DVD Video Camera. Understanding Flow of Menus Press the MENU button during recording pause: The "Camera Functions Setup" menu screen will appear. Tilt the joystick up, down, to the left or the right to select a menu item, and then press the A button to choose the option. The screens used here to explain menus are displayed when DVD-RAM disc is used. Some items will not appear when a DVD-R disc or card is used, or when no disc is inserted. Display of selected setup item Camer a F u nc t i on s S e t u p P r o g r am AE Auto Wh i t e Ba l . Spo r t s EIS Por t r a i t Settable Selection of setup items S : Camera Functions D i g . Zoom Wind Cut Spo t l i ght S u r f &S n o w Options Setup T : Record Functions Setup Wide Low L i gh t ENTER RETURN RAM Display of disc or card being used (P. 55) : Date Setup V: LCD Setup W : Initial Setup Guide display Functions settable WIDE mode will not appear on VDR-M50PP. When "Wide 16:9" is specified, black bands will appear across the top and bottom of screen. * The menu screen, the screen for playing back images recorded with "Wide 4:3" specified, and Disc Navigation screen are not set to Wide screen mode. 78
-
 1
1 -
2
-
3
-
4
-
5
-
6
-
7
-
8
-
9
-
10
-
11
-
12
-
13
-
14
-
15
-
16
-
17
-
18
-
19
-
20
-
21
-
22
-
23
-
24
-
25
-
26
-
27
-
28
-
29
-
30
-
31
-
32
-
33
-
34
-
35
-
36
-
37
-
38
-
39
-
40
-
41
-
42
-
43
-
44
-
45
-
46
-
47
-
48
-
49
-
50
-
51
-
52
-
53
-
54
-
55
-
56
-
57
-
58
-
59
-
60
-
61
-
62
-
63
-
64
-
65
-
66
-
67
-
68
-
69
-
70
-
71
-
72
-
 73
73 -
 74
74 -
 75
75 -
 76
76 -
 77
77 -
 78
78 -
 79
79 -
 80
80 -
 81
81 -
 82
82 -
 83
83 -
84
-
85
-
86
-
87
-
88
-
89
-
90
-
91
-
92
-
93
-
94
-
95
-
96
-
97
-
98
-
99
-
100
-
101
-
102
-
103
-
104
-
105
-
106
-
107
-
108
-
109
-
110
-
111
-
112
-
113
-
114
-
115
-
116
-
117
-
118
-
119
-
120
-
121
-
122
-
123
-
124
-
125
-
126
-
127
-
128
-
129
-
130
-
131
-
132
-
133
-
134
-
135
-
136
-
137
-
138
-
139
-
140
-
141
-
142
-
143
-
144
-
145
-
146
-
147
-
148
-
149
-
150
-
151
-
152
-
153
-
154
-
155
-
156
-
157
-
158
-
159
-
160
-
161
-
162
-
163
-
164
-
165
-
166
-
167
-
168
-
169
-
170
-
171
-
172
-
173
-
174
 |
 |