Samsung SCH-U470 User Manual (ENGLISH) - Page 65
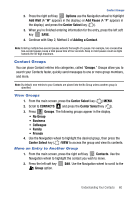
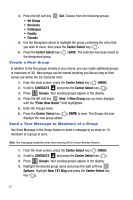
Center Select, CONTACTS, Groups, Options, Picture Msg, My Pics, Sound
 |
View all Samsung SCH-U470 manuals
Add to My Manuals
Save this manual to your list of manuals |
Page 65 highlights
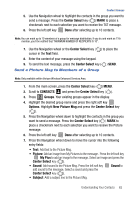
Contact Groups 5. Use the Navigation wheel to highlight the contacts in the group you want to send a message. Press the Center Select key ( ) MARK to place a checkmark next to each selection you want to receive the TXT message. 6. Press the left soft key Done after selecting up to 10 contacts. Note: You can mark up to 10 members of a group for message distribution. If you try and mark an 11th member, you'll be notified that "MAXIMUM NUMBER OF RECIPIENTS IS 10". 7. Use the Navigation wheel or the Center Select key ( ) to place the cursor in the Text field. 8. Enter the content of your message using the keypad. 9. To send the text message, press the Center Select key ( ) SEND. Send a Picture Msg to Members of a Group Note: Only available within Verizon Wireless Enhanced Services Area. 1. From the main screen, press the Center Select key ( ) MENU. 2. Scroll to CONTACTS and press the Center Select key ( ). 3. Press 3 def Groups. Your existing groups appear in the display. 4. Highlight the desired group name and press the right soft key Options. Highlight New Picture Msg and press the Center Select key ( ). 5. Press the Navigation wheel down to highlight the contacts in the group you want to send a message. Press the Center Select key ( ) MARK to place a checkmark next to each selection you want to receive the Picture message. 6. Press the left soft key Done after selecting up to 10 contacts. 7. Press the Navigation wheel down to move the cursor into the following entry fields: • Text: Add text to the Picture Msg. • Picture: Add an image from My Pictures to the message. Press the left soft key My Pics to add an image to the message. Select an image and press the Center Select key ( ). • Sound: Add sound to the Picture Msg. Press the left soft key Sound to add sound to the message. Select a sound and press the Center Select key ( ). • Subject: Add a subject line to the Picture Msg. Understanding Your Contacts 62
-
 1
1 -
2
-
3
-
4
-
5
-
6
-
7
-
8
-
9
-
10
-
11
-
12
-
13
-
14
-
15
-
16
-
17
-
18
-
19
-
20
-
21
-
22
-
23
-
24
-
25
-
26
-
27
-
28
-
29
-
30
-
31
-
32
-
33
-
34
-
35
-
36
-
37
-
38
-
39
-
40
-
41
-
42
-
43
-
44
-
45
-
46
-
47
-
48
-
49
-
50
-
51
-
52
-
53
-
54
-
55
-
56
-
57
-
58
-
59
-
 60
60 -
 61
61 -
 62
62 -
 63
63 -
 64
64 -
 65
65 -
 66
66 -
 67
67 -
 68
68 -
 69
69 -
 70
70 -
71
-
72
-
73
-
74
-
75
-
76
-
77
-
78
-
79
-
80
-
81
-
82
-
83
-
84
-
85
-
86
-
87
-
88
-
89
-
90
-
91
-
92
-
93
-
94
-
95
-
96
-
97
-
98
-
99
-
100
-
101
-
102
-
103
-
104
-
105
-
106
-
107
-
108
-
109
-
110
-
111
-
112
-
113
-
114
-
115
-
116
-
117
-
118
-
119
-
120
-
121
-
122
-
123
-
124
-
125
-
126
-
127
-
128
-
129
-
130
-
131
-
132
-
133
-
134
-
135
-
136
-
137
-
138
-
139
-
140
-
141
-
142
-
143
-
144
-
145
-
146
-
147
-
148
-
149
-
150
-
151
-
152
-
153
-
154
-
155
-
156
-
157
-
158
-
159
-
160
-
161
-
162
 |
 |
