Samsung SCH-U470 User Manual (ENGLISH) - Page 76
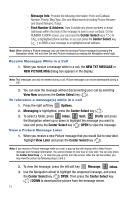
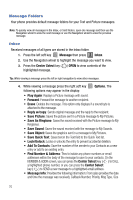
Enh. Delivery Ack, Cancel Message, Center Select, Message, New Message, Picture Message, Options
 |
View all Samsung SCH-U470 manuals
Add to My Manuals
Save this manual to your list of manuals |
Page 76 highlights
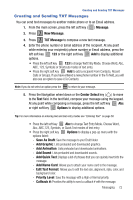
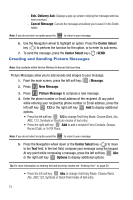
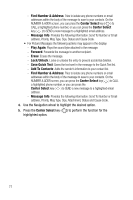
- Enh. Delivery Ack: Displays a pop-up screen notifying the message sent has been received. - Cancel Message: Cancels the message and allows you to save it in the Drafts folder. Note: If you do not select an option press the CLR to return to your message. 6. Use the Navigation wheel to highlight an option. Press the Center Select key ( ) to perform the function for the option, or to enter its sub-menu. 7. To send the message, press the Center Select key ( ) SEND. Creating and Sending Picture Messages Note: Only available within Verizon Wireless Enhanced Services Area. Picture Messages allow you to add sounds and images to your message. 1. From the main screen, press the left soft key ( 2. Press 1 New Message. ) Message. 3. Press 2 abc Picture Message to compose a new message. 4. Enter the phone number or Email address of the recipient. At any point while entering your recipient(s) phone number or Email address, press the left soft key 123 or the right soft key Add to display additional options. • Press the left soft key 123 to change Text Entry Mode. Choose Word, Abc, ABC, 123, Symbols or Shortcuts modes of text entry. • Press the right soft key Add to add a recipient From Contacts, Groups, Recent Calls, or To PIX Place. Note: If you do not select an option press the CLR to return to your message. 5. Press the Navigation wheel down or the Center Select key ( ) to move to the Text field. In the text field, compose your message using the keypad. At any point while composing a message, press the left soft key Abc or the right soft key Options to display additional options. Tip: For more information on entering text and text entry modes see "Entering Text" on page 50. • Press the left soft key Abc to change Text Entry Mode. Choose Word, Abc, ABC,123, Symbols or Quick Text modes of text entry. 73
-
 1
1 -
2
-
3
-
4
-
5
-
6
-
7
-
8
-
9
-
10
-
11
-
12
-
13
-
14
-
15
-
16
-
17
-
18
-
19
-
20
-
21
-
22
-
23
-
24
-
25
-
26
-
27
-
28
-
29
-
30
-
31
-
32
-
33
-
34
-
35
-
36
-
37
-
38
-
39
-
40
-
41
-
42
-
43
-
44
-
45
-
46
-
47
-
48
-
49
-
50
-
51
-
52
-
53
-
54
-
55
-
56
-
57
-
58
-
59
-
60
-
61
-
62
-
63
-
64
-
65
-
66
-
67
-
68
-
69
-
70
-
 71
71 -
 72
72 -
 73
73 -
 74
74 -
 75
75 -
 76
76 -
 77
77 -
 78
78 -
 79
79 -
 80
80 -
 81
81 -
82
-
83
-
84
-
85
-
86
-
87
-
88
-
89
-
90
-
91
-
92
-
93
-
94
-
95
-
96
-
97
-
98
-
99
-
100
-
101
-
102
-
103
-
104
-
105
-
106
-
107
-
108
-
109
-
110
-
111
-
112
-
113
-
114
-
115
-
116
-
117
-
118
-
119
-
120
-
121
-
122
-
123
-
124
-
125
-
126
-
127
-
128
-
129
-
130
-
131
-
132
-
133
-
134
-
135
-
136
-
137
-
138
-
139
-
140
-
141
-
142
-
143
-
144
-
145
-
146
-
147
-
148
-
149
-
150
-
151
-
152
-
153
-
154
-
155
-
156
-
157
-
158
-
159
-
160
-
161
-
162
 |
 |
