Samsung SCH-U470 User Manual (ENGLISH) - Page 77
Add Quick Text
 |
View all Samsung SCH-U470 manuals
Add to My Manuals
Save this manual to your list of manuals |
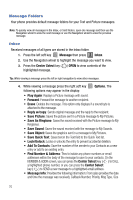
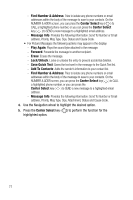
Page 77 highlights
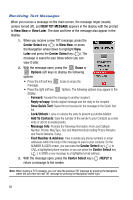
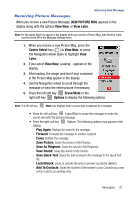
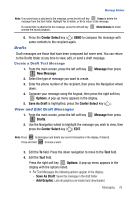
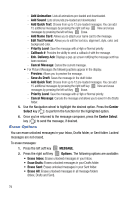
Creating and Sending Picture Messages • Press the right soft key Options to display a pop-up menu with the options listed: - Preview: Shows the message before it is sent. - Save As Draft: Save the message to your Draft folder. - Add Quick Text: Choose from up to 12 pre-loaded messages. You can add 15 additional messages by pressing the right soft key New and erase messages by pressing the left soft key Erase. - Priority Level: Save the message with a High or Normal priority. - Cancel Message: Cancels the message and allows you to save it in the Drafts folder. Note: If you do not select an option press the CLR to return to your message. 6. Press the Navigation wheel down to highlight the Picture field. Press the left soft key My Pics to add a Picture, using the Navigation wheel highlight a picture you want to attach and press the Center Select key ( ) to attach the picture. 7. Press the Navigation wheel up or down to highlight the Sound field. Press the left soft key Sounds to select a sound. Press the Navigation wheel up or down to highlight the desired sound and press the Center Select key ( ). 8. Press the Navigation wheel down to highlight the Subject field. Press the left soft key Abc to change entry mode. Select the desired entry mode, and press the Center Select key ( ). Press the right soft key Options, to highlight Add Quick Text and press the Center Select key ( ). Press the Navigation wheel up or down to highlight the desired Quick Text phrase, and press the Center Select key ( ). 9. Press the Navigation wheel down to highlight the Name Card field. Press the left soft key Add to add a Name Card, the Add pop-up menu displays. • Press 1 My Name Card to create and add your Name Card, press the Center Select key ( ). • Press 2 abc Contact to add a Contact entry as a Name Card, press the Center Select key ( ). 10. Once all fields are complete, press the Center Select key ( ) to send the message to the intended recipient(s). Messaging 74
-
 1
1 -
2
-
3
-
4
-
5
-
6
-
7
-
8
-
9
-
10
-
11
-
12
-
13
-
14
-
15
-
16
-
17
-
18
-
19
-
20
-
21
-
22
-
23
-
24
-
25
-
26
-
27
-
28
-
29
-
30
-
31
-
32
-
33
-
34
-
35
-
36
-
37
-
38
-
39
-
40
-
41
-
42
-
43
-
44
-
45
-
46
-
47
-
48
-
49
-
50
-
51
-
52
-
53
-
54
-
55
-
56
-
57
-
58
-
59
-
60
-
61
-
62
-
63
-
64
-
65
-
66
-
67
-
68
-
69
-
70
-
71
-
 72
72 -
 73
73 -
 74
74 -
 75
75 -
 76
76 -
 77
77 -
 78
78 -
 79
79 -
 80
80 -
 81
81 -
 82
82 -
83
-
84
-
85
-
86
-
87
-
88
-
89
-
90
-
91
-
92
-
93
-
94
-
95
-
96
-
97
-
98
-
99
-
100
-
101
-
102
-
103
-
104
-
105
-
106
-
107
-
108
-
109
-
110
-
111
-
112
-
113
-
114
-
115
-
116
-
117
-
118
-
119
-
120
-
121
-
122
-
123
-
124
-
125
-
126
-
127
-
128
-
129
-
130
-
131
-
132
-
133
-
134
-
135
-
136
-
137
-
138
-
139
-
140
-
141
-
142
-
143
-
144
-
145
-
146
-
147
-
148
-
149
-
150
-
151
-
152
-
153
-
154
-
155
-
156
-
157
-
158
-
159
-
160
-
161
-
162
 |
 |