Seagate OneTouch II OneTouch II Installation Guide - Page 14
If you did the Full Installation, including Retrospect Express HD - with windows 7
 |
View all Seagate OneTouch II manuals
Add to My Manuals
Save this manual to your list of manuals |
Page 14 highlights
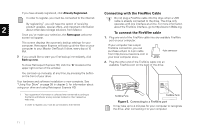
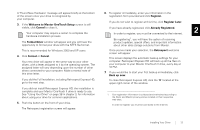
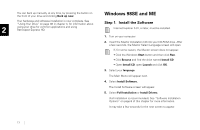
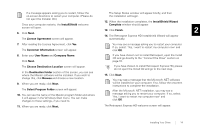
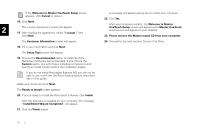
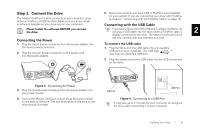
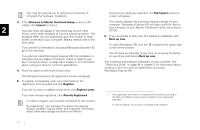
A 'Found New Hardware' message will appear briefly at the bottom 6. To register immediately, enter your information in the of the screen once your drive is recognized by registration form provided and click Register. your computer. If you do not wish to register at this time, click Register Later. 3. If the Welcome to Maxtor OneTouch Setup screen is still visible, click Cancel to close it. Your computer may require a restart to complete the If you have already registered, click Already Registered. 2 In order to register, you must be connected to the internet. hardware installation process. By registering1, you will have the option of receiving The Format Drive window will appear and you will have the product updates, special offers, and important information opportunity to format your drive with the NTFS file format. about other data storage solutions from Maxtor. This is recommended for Windows 2000 and XP users. 4. Click Format or Cancel. Your new drive will appear in the same way as your other drives, with a letter assigned to it by the operating system. The assigned letter will vary depending upon the number of other drives connected to your computer. Make a mental note of this drive letter. If you did the Full Installation, including Retrospect Express HD, go to the next step. Once you've made your selection, the Retrospect welcome screen will appear. This screen displays the automatic backup settings for your computer. Retrospect Express HD will back up all the files on your computer to your Maxtor OneTouch II drive, every day at 10 PM. 7. If you would like to start your first backup immediately, click Back up now. To close Retrospect Express HD, click the 'X' located at the upper right corner of the window. If you did not install Retrospect Express HD, the installation is complete and your Maxtor OneTouch II drive is ready to use. See "Using Your Drive" on page 38 in chapter 3, for information about using your drive for common applications. 5. Push the button on the front of your drive. The Retrospect registration screen will appear. 1. Your registration information is collected and maintained according to the Dantz and Maxtor privacy policies located on their respective web sites. In order to register, you must be connected to the Internet. Installing Your Drive 12
-
 1
1 -
2
-
3
-
4
-
5
-
6
-
7
-
8
-
 9
9 -
 10
10 -
 11
11 -
 12
12 -
 13
13 -
 14
14 -
 15
15 -
 16
16 -
 17
17 -
 18
18 -
 19
19 -
20
-
21
-
22
-
23
-
24
-
25
-
26
-
27
-
28
-
29
-
30
-
31
-
32
-
33
-
34
-
35
-
36
-
37
-
38
-
39
-
40
-
41
-
42
-
43
-
44
-
45
-
46
-
47
-
48
-
49
-
50
-
51
-
52
-
53
-
54
-
55
-
56
-
57
-
58
-
59
-
60
-
61
-
62
-
63
-
64
-
65
-
66
-
67
-
68
 |
 |