Seagate OneTouch II OneTouch II Installation Guide - Page 45
Underst, ng the restore po, nts w, ng Restore Po - not showing up
 |
View all Seagate OneTouch II manuals
Add to My Manuals
Save this manual to your list of manuals |
Page 45 highlights
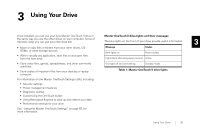
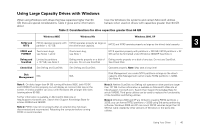
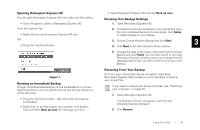
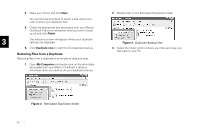
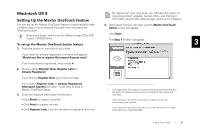
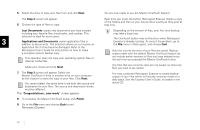
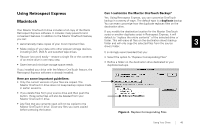
3. Select a restore point from which you wish to recover your data and click Next. Retrospect Express HD will now scan your computer. highlighted. The drive for the restore point will also be shown. A green icon will appear before the date if the backup was successful, a yellow icon if the backup succeeded with some nonfatal errors, and a red icon if the backup failed 4. Place a check in each box containing data you wish to restore If you manually cancel a backup, it is considered to be a fatal error. 5. Use the search field to find specific files (e.g., music If the restore point has a yellow or red icon, you can right-click the 3 files, Word documents, etc.) 6. Click Next. restore point to show the operation log, which will show you more information about the error. You will now be asked where you wish to restore your files to. You have two options: •Their original location •The following location Locking Restore Points Retrospect Express HD's Grooming Technology manages your restore points by automatically adding the latest restore points and removing the oldest. However, there may be times that you do not want certain restore points removed from your system. In order to prevent restore points from being deleted, you must lock them. 7. Make your choice and click Restore. 1. Open Retrospect Express. Retrospect Express HD will then restore the files to your pre-selected location and provide you with the time that it will take to complete the restore. When finished, the Retrospect Express HD window will appear. Understanding the restore points window 2. Click Restore. 3. Highlight a restore point that you wish to use to lock your data and click Lock located in the upper right corner of the restore point screen. The restore points window shows a calendar with the date in bold for the days that restore points were created. It will also list all the restore points in ascending order in a list box. 4. To unlock a restore point, simply repeat this procedure and the restore point will be unlocked when you click Lock again. When you select a date on the calendar, the list of restore points will automatically scroll to show all those that are associated with that specific date. The latest backup on that date will be 43
-
 1
1 -
2
-
3
-
4
-
5
-
6
-
7
-
8
-
9
-
10
-
11
-
12
-
13
-
14
-
15
-
16
-
17
-
18
-
19
-
20
-
21
-
22
-
23
-
24
-
25
-
26
-
27
-
28
-
29
-
30
-
31
-
32
-
33
-
34
-
35
-
36
-
37
-
38
-
39
-
 40
40 -
 41
41 -
 42
42 -
 43
43 -
 44
44 -
 45
45 -
 46
46 -
 47
47 -
 48
48 -
 49
49 -
 50
50 -
51
-
52
-
53
-
54
-
55
-
56
-
57
-
58
-
59
-
60
-
61
-
62
-
63
-
64
-
65
-
66
-
67
-
68
 |
 |