Seagate OneTouch II OneTouch II Installation Guide - Page 28
The Apple Disk Utility program opens.
 |
View all Seagate OneTouch II manuals
Add to My Manuals
Save this manual to your list of manuals |
Page 28 highlights
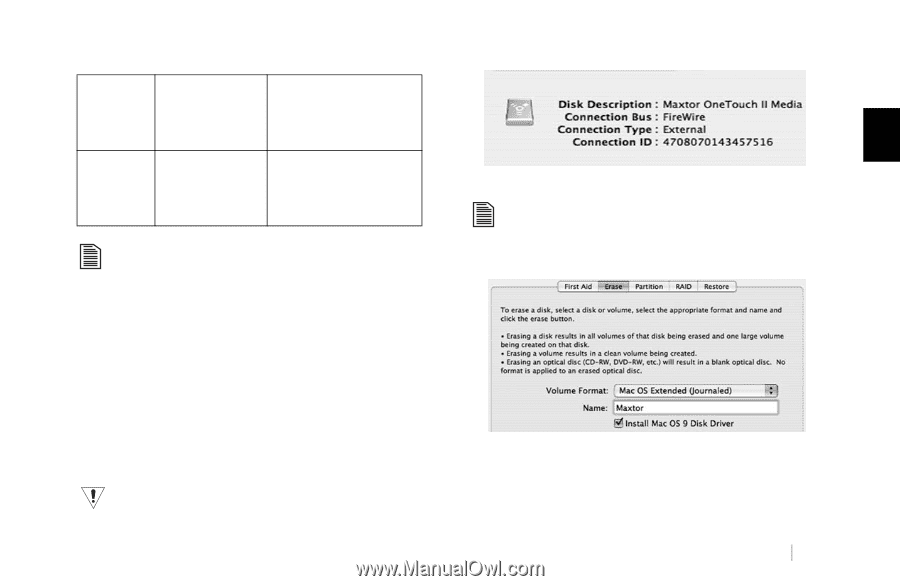
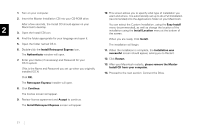
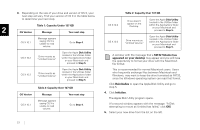
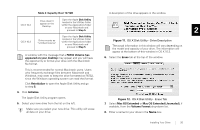
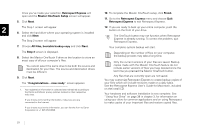
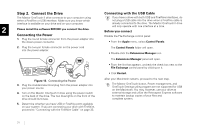
Table 4: Capacity Over 137 GB A description of the drive appears in the window. OS X 10.2 Drive doesn't appear on the Desktop. Open the Apple Disk Utility located in the Utilities folder within the Applications folder on your Macintosh and proceed to Step 5. 2 OS X 10.3 Drive mounts as "Untitled Volume." Open the Apple Disk Utility located in the Utilities folder within the Applications folder on your Macintosh and proceed to Step 5. A window with the message that a FAT32 Volume has appeared on your desktop may appear and you will have the opportunity to format your drive with the Macintosh file format. Figure 11. OS X Disk Utility - Drive Description The actual information in this window will vary depending on the model and capacity of your drive. The information will appear at the bottom of this window in OS X 10.3. 6. Select the Erase tab at the top of the window. This is recommended for normal Macintosh users. Users who frequently exchange files between Macintosh and Windows, may want to keep the drive formatted as FAT32, since the Windows operating system can read that format. Click Reinitialize to open the Apple Disk Utility and go to step 5. 4. Click Initialize. The Apple Disk Utility program opens. 5. Select your new drive from the list on the left. Make sure you select your new drive. This utility will erase all data on your drive. Figure 12. OS X Disk Utility - Erase Tab 7. Select Mac OS Extended or Mac OS Extended (Journaled), if available, from the Volume Format drop-down list. 8. Enter a name for your drive in the Name box. Installing Your Drive 26
-
 1
1 -
2
-
3
-
4
-
5
-
6
-
7
-
8
-
9
-
10
-
11
-
12
-
13
-
14
-
15
-
16
-
17
-
18
-
19
-
20
-
21
-
22
-
 23
23 -
 24
24 -
 25
25 -
 26
26 -
 27
27 -
 28
28 -
 29
29 -
 30
30 -
 31
31 -
 32
32 -
 33
33 -
34
-
35
-
36
-
37
-
38
-
39
-
40
-
41
-
42
-
43
-
44
-
45
-
46
-
47
-
48
-
49
-
50
-
51
-
52
-
53
-
54
-
55
-
56
-
57
-
58
-
59
-
60
-
61
-
62
-
63
-
64
-
65
-
66
-
67
-
68
 |
 |