Seagate OneTouch II OneTouch II Installation Guide - Page 46
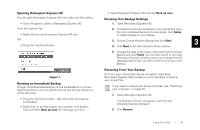
Open Retrospect Express HD.
 |
View all Seagate OneTouch II manuals
Add to My Manuals
Save this manual to your list of manuals |
Page 46 highlights
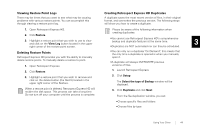
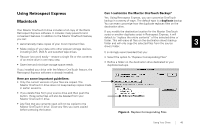
Viewing Restore Point Logs There may be times that you want to see what may be causing problems with various restore points. You can accomplish this through viewing a restore point log. Creating Retrospect Express HD Duplicates A duplicate saves the most recent version of files, in their original format, and overwrites the previous version. The following steps will show you how to create a duplicate. 1. Open Retrospect Express HD. 2. Click Restore. 3. Highlight a restore point that you wish to use to view and click on the View Log button located in the upper right corner of the restore point screen. Deleting Restore Points Retrospect Express HD provides you with the ability to manually delete restore points. To manually delete a restore to point. 1. Open Retrospect Express 2. Click Restore. 3. Highlight a restore point that you wish to remove and click on the delete button (the Red X) located in the upper right corner of the Restore. When a restore point is deleted, Retrospect Express HD will reclaim the disk space. This process can take a long time. Do not turn off your computer until the process is complete. Please be aware of the following information when creating duplicates: •You cannot use Retrospect Express HD's comprehensive backup and duplicate features at the same time. 3 •Duplicates are NOT automated nor can they be scheduled. •You can only run a duplicate "On Demand"; this means that the only time a duplicate is opened is when you manually open it. •A duplicate will always OVERWRITE previous versions of files. 1. Launch Retrospect Express 2. Click Setup. The Select the type of Backup window will be displayed. 3. Click Duplicate and click Next. From the file duplication window, you can: •Choose specific files and folders •Choose files by type Using Your Drive 44
-
 1
1 -
2
-
3
-
4
-
5
-
6
-
7
-
8
-
9
-
10
-
11
-
12
-
13
-
14
-
15
-
16
-
17
-
18
-
19
-
20
-
21
-
22
-
23
-
24
-
25
-
26
-
27
-
28
-
29
-
30
-
31
-
32
-
33
-
34
-
35
-
36
-
37
-
38
-
39
-
40
-
 41
41 -
 42
42 -
 43
43 -
 44
44 -
 45
45 -
 46
46 -
 47
47 -
 48
48 -
 49
49 -
 50
50 -
 51
51 -
52
-
53
-
54
-
55
-
56
-
57
-
58
-
59
-
60
-
61
-
62
-
63
-
64
-
65
-
66
-
67
-
68
 |
 |