Sharp DX-B350P DX-B350P DX-B450P Operation Manual
Sharp DX-B350P Manual
 |
View all Sharp DX-B350P manuals
Add to My Manuals
Save this manual to your list of manuals |
Sharp DX-B350P manual content summary:
- Sharp DX-B350P | DX-B350P | DX-B450P Operation Manual - Page 1
LASER PRINTER User's Guide MODEL: DX-B350P DX-B450P - Sharp DX-B350P | DX-B350P | DX-B450P Operation Manual - Page 2
- Sharp DX-B350P | DX-B350P | DX-B450P Operation Manual - Page 3
Printer On ...2-4 Turning the Printer Off...2-4 Available Printer Drivers ...2-4 Paper Usage...2-5 Paper Sizes ...2-5 Custom Sizes ...2-6 Paper Types...2-6 Printing Transparencies...2-7 Printing Envelopes ...2-8 Printing Toner Cartridge...2-15 Power Save Mode...2-17 Understanding Printing Printing PCL - Sharp DX-B350P | DX-B350P | DX-B450P Operation Manual - Page 4
and PostScript 3 Drivers 4-1 Setting Default Values ...4-2 Printing a Test Page...4-4 Cancelling Printing ...4-5 Cancelling a Print Job at the Printer 4-5 Cancelling Print Jobs at the Computer 4-5 Accessing the Driver from an Application 4-6 Navigating the Printer Properties Window 4-7 Saved - Sharp DX-B350P | DX-B350P | DX-B450P Operation Manual - Page 5
...9-6 Printing is Not Clear ...9-7 Paper Incorrectly Fed ...9-7 Noise ...9-8 Error and Warning Messages...9-8 Warning Messages...9-8 Error Messages ...9-9 10 Clearing Paper Jams 10-1 At the Paper Trays...10-2 At the Fuser Unit...10-4 At the Toner Cartridge...10-6 At the Duplex Module ...10-8 User - Sharp DX-B350P | DX-B350P | DX-B450P Operation Manual - Page 6
Duplex at the paper exit ...10-8 Duplex at the interior of the top cover 10-9 At the Offset Catch Tray...10-10 11 Windows Utilities 11-1 Font and Macro Manager Utility ...11-1 Status Monitor Utility...11-2 PCL5 Tray Mapping Utility ...11-2 Direct PDF Utility ...11-4 TOC-4 User's Guide - Sharp DX-B350P | DX-B350P | DX-B450P Operation Manual - Page 7
ppm on A4 paper. The DX-B450P prints 45 ppm on Letter paper and 43 ppm on A4 paper. This guide contains all of the information necessary to operate and care for your printer and accessories. It is intended to be used after the printer is installed. See the Installation Manual supplied in the box for - Sharp DX-B350P | DX-B350P | DX-B450P Operation Manual - Page 8
Notes For your own safety, please read these carefully before using the machine. • Do not place the machine in a combustible materials, such as curtains, that may catch fire. Printer Orientation Throughout this guide, the four sides of the printer are referred to as front, rear, right, and left - Sharp DX-B350P | DX-B350P | DX-B450P Operation Manual - Page 9
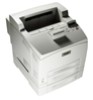
Components Front View 1 2 3 4 5 6 7 11 12 10 In this Chapter... • Components • Turning the Printer On and Off • Available Printer Drivers • Paper Usage • Loading Paper • Replacing the Toner Cartridge • Power Save Mode • Understanding Printing Options 9 8 No. Name 1 Paper Stop 2 Operator - Sharp DX-B350P | DX-B350P | DX-B450P Operation Manual - Page 10
6 Optional Duplex Module 7 Rear Cover, access to Fuser 8 Offset Catch Tray Rear Cover Data I/O connector settings can be configured via the Operator Panel's Interface Menu. There are settings for each of the I/O ports including IEEE-1284, USB2, Serial RS-232, and Ethernet. 2-2 User's Guide - Sharp DX-B350P | DX-B350P | DX-B450P Operation Manual - Page 11
the toner and the photosensitive drum. Open this when replacing the Toner Cartridge and removing jammed paper. Fixes the toner on the paper. Do not touch this when using the printer as it is hot. Transfers the toner image on the surface of the photosensitive drum to the paper. User's Guide 2-3 - Sharp DX-B350P | DX-B350P | DX-B450P Operation Manual - Page 12
at the end of the day or when the printer will not be used for an extended period of time. NOTE: When the printer is turned off, all print data still in memory will be erased. Available Printer Drivers Drivers are available for the following Microsoft Windows operating systems: Vista 32/64, XP 32/64 - Sharp DX-B350P | DX-B350P | DX-B450P Operation Manual - Page 13
(148 x 210mm)* A6 (105 x 148mm) B5 (182 x 257mm)* C5 (162 x 229mm) DL (110 x 220mm) Custom *These sizes are automatically sensed by the printer. If you want to use a size that is not auto sensed, you must select the size on the Operator Panel. See section "Paper Menu" on page 3-6. User's Guide 2-5 - Sharp DX-B350P | DX-B350P | DX-B450P Operation Manual - Page 14
See section "Custom Size Paper" on page 4-14.When using the EWS, turn Auto-Sense OFF and press Submit to gain access to Custom Size settings. Paper Types The printer supports the following paper types Paper Types Plain (64-105 gsm DX-B350P) (68-105 gsm DX-B450P) Transparency Pre-Punched Letter Head - Sharp DX-B350P | DX-B350P | DX-B450P Operation Manual - Page 15
results using Thick3 on the DX-B450P because of the lower fuser temperature and slower paper speed in the printer. The fuser temperature progression is DX-B350P: (Low) Transparency Normal Thick1 Thick2 (High) and DX-B450P: (Low) Transparency Thin Thick3 Normal Thick1 Thick2 (High) Printing - Sharp DX-B350P | DX-B350P | DX-B450P Operation Manual - Page 16
be used. 6. In the printer driver or the computer application program, select Envelope as the paper type you wish to use, and select the size and orientation of the image to be printed. Printing Labels Labels can be printed from any tray. Use labels that were designed for use in laser printers. See - Sharp DX-B350P | DX-B350P | DX-B450P Operation Manual - Page 17
other media that are supported for this printer. Paper Type Paper Name Plain, Pre-Punched, Letter, Color, Pre-Printed Xerox 4200DP 20lb Xerox Transparency Transparency Transparency Transparency A4 Letter Letter Letter A4 Part Number 3R2047 3R91720 10246-7 10127-9 AMA157091 3R91832 V883 67393 - Sharp DX-B350P | DX-B350P | DX-B450P Operation Manual - Page 18
Paper Usage Getting to Know Your Printer Paper Type Paper Name Weight (gsm) Size 3M Transparency(CG3300) A4 4200 DP Bond 75 A4 Xerox 4200 DP Bond 75 letter Thin (DX-B450P) EP_R 64 B5 Part Number CG3300 A4 3R91798A 3R93011 40801 3R3041 15445 3R91798 NEE04631 DK245 3R11540 3R2594 - Sharp DX-B350P | DX-B350P | DX-B450P Operation Manual - Page 19
. • Envelopes with windows or metal fasteners • Labels which do not fully cover the adhesive backing • Transparencies which are not designed for laser printers (i.e., inkjet transparencies) • Paper that cannot be heated. Loading Paper 1. Place the paper tray on a flat surface. User's Guide 2-11 - Sharp DX-B350P | DX-B350P | DX-B450P Operation Manual - Page 20
Loading Paper Getting to Know Your Printer 2. Remove the lid. 3. If the base plate of the paper tray is raised, push it down. 4. Squeeze the length guide and slide it to the desired paper size. 2-12 User's Guide - Sharp DX-B350P | DX-B350P | DX-B450P Operation Manual - Page 21
Loading Paper Getting to Know Your Printer 5. Squeeze the right width guide and slide it to the desired paper size. 6. Fan the paper well. 7. Load the paper with the side to be printed facing up and all 4 corners aligned. Make sure the right width guide is correctly aligned with the paper. NOTE: - Sharp DX-B350P | DX-B350P | DX-B450P Operation Manual - Page 22
the lid of the paper tray and firmly close the lid. 9. Firmly insert the tray in the printer. Loading Paper Larger Than A4/Letter Size In The Paper Tray 1. Place the paper tray on a flat surface. 2. Remove the lid of the tray. 3. Slide - Sharp DX-B350P | DX-B350P | DX-B450P Operation Manual - Page 23
tray. 9. Push the paper tray firmly into the printer. Replacing the Toner Cartridge The Toner Cartridge should be replaced when it reaches the end of its print life. The Toner Cartridge prints up to 18K (DX-B350P)/ 21K (DX-B450P) images. The printer will produce a warning on the Operator Panel to - Sharp DX-B350P | DX-B350P | DX-B450P Operation Manual - Page 24
offer resistance and a firm pull may be necessary to extract it from the Toner Cartridge. NOTE: When pulling out the seal, pull it out horizontally. The tape might break if it is pulled out diagonally. After the seal has been pulled out, do not shake or bump the Toner Cartridge. 2-16 User's Guide - Sharp DX-B350P | DX-B350P | DX-B450P Operation Manual - Page 25
at the printer. The Embedded Web Server (EWS) provides remote access via a network. The printer driver provides access to printing options from your computer. Printing options set through an application on your computer supersede settings entered on the Operator Panel or the EWS. User's Guide 2-17 - Sharp DX-B350P | DX-B350P | DX-B450P Operation Manual - Page 26
Understanding Printing Options Getting to Know Your Printer 2-18 User's Guide - Sharp DX-B350P | DX-B350P | DX-B450P Operation Manual - Page 27
that allow you to view and change default printer settings. All features of the printer are accessible through the Operator Panel. These changes affect all documents printed unless instructions are provided through your application's printer settings. In this Chapter... • Operator Panel Features - Sharp DX-B350P | DX-B350P | DX-B450P Operation Manual - Page 28
the current status of various items on the printer. Return to the previous menu, submenu, or option within the same level of the menu structure. Move up one level in the menu structure to return to the menu shown on the first line of the display. Print a Configuration Summary. 3-2 User's Guide - Sharp DX-B350P | DX-B350P | DX-B450P Operation Manual - Page 29
printer menu system when options are installed. Sample Navigation The following figure shows the sequence of push buttons and display messages that would allow you to change the number of copies printed SELECT Paper Menu Copies SELECT Paper Menu Copies RETURN Menu Paper Menu User's Guide 3-3 - Sharp DX-B350P | DX-B350P | DX-B450P Operation Manual - Page 30
the number of copies printed. 7. Printing a Configuration Summary Your printer can print used to traverse to view menu settings. Menu items summaries can printed. No Menu mode changes are allowed. The remainder of panel functionality is available. Panel is completely functional. 3-4 User's Guide - Sharp DX-B350P | DX-B350P | DX-B450P Operation Manual - Page 31
from the Windows Driver is described in section "Job Accounting" on page 4-19. Items available in this menu are described below. Menu Item Enabled Print Info Reset Info Value Yes/No Default Yes Description Prints the Job Accounting File. Resets Job Accounting Information. User's Guide 3-5 - Sharp DX-B350P | DX-B350P | DX-B450P Operation Manual - Page 32
Copies Value 1-999 Default 1 Description Sets number of copies printed. Duplex Duplex Bind Default Source Manual Feed Output Tray Media printing Choose the binding edge during duplex printing Choose a default paper source from a list of all installed trays. When enabled, the printer User's Guide - Sharp DX-B350P | DX-B350P | DX-B450P Operation Manual - Page 33
a PCL job. The printer can automatically select the paper that is the closest in size to the paper requested by the printer job. The printer will then scale the job to fit the available paper. This includes scaling A4 to letter and letter to A4. Prints a blank page between print jobs. User's Guide - Sharp DX-B350P | DX-B350P | DX-B450P Operation Manual - Page 34
print jobs are scanned for special binary control codes. RAW=no processing Normal = "Adobe Standard Protocol" (ASP) Binary = "Binary Control Protocol" (BCP) When Interpreter setting is Auto Switch and this setting is Raw, the printer will automatically determine the control code method, defaulting - Sharp DX-B350P | DX-B350P | DX-B450P Operation Manual - Page 35
rate Serial data bits Serial stop bits Serial parity If On, the DTR signal will reflect the Ready/ Busy status. If On, the DTR signal will reflect the Online/ Offline status. If On, the DTR signal will reflect the Error status. If On, the RTS signal will reflect the Ready/ Busy status. User's Guide - Sharp DX-B350P | DX-B350P | DX-B450P Operation Manual - Page 36
Off Off Auto Switch PCL PostScript 3 Raw Normal Binary Auto Switch Raw Description If On, the RTS signal will reflect the Online/ Offline status. If On setting is Raw, the printer will automatically determine the control code method, defaulting to Normal if no codes are found. 3-10 User's Guide - Sharp DX-B350P | DX-B350P | DX-B450P Operation Manual - Page 37
PSERVER Default NA Description Displays MAC address of manually here If ON, prints a special "banner page" before each LPR print job. When ON, the printer will wait until the job is completely printed used primarily by Bonjour protocol) When On, allows the printer to have multiple network print - Sharp DX-B350P | DX-B350P | DX-B450P Operation Manual - Page 38
to factory network defaults. Configures the Ethernet connection speed (10 or 100 printer terminates the connection. Specifies the TCP port number to use for HTTP connection to the printers embedded web server. (available via web server only): Allows an administrator to control access to printing - Sharp DX-B350P | DX-B350P | DX-B450P Operation Manual - Page 39
Choose to either print or not print PS errors. PCL Menu The PCL menu allows to set a variety of PCL settings. Items available in this menu are described below Parameter Orientation Font Source Font Number Value Default Portrait Landscape Portrait Internal User FLASH Hard Disk Compact - Sharp DX-B350P | DX-B350P | DX-B450P Operation Manual - Page 40
Page CR Mode LF Mode FF Mode Print Area Parameter Values Paper Source Paper Size Value 0.08 - 100.00 Default 10.00 Description Change the default = FF Normal Change the default number of lines per page. Default value varies by paper size selected. Define the default action prompted by a carriage - Sharp DX-B350P | DX-B350P | DX-B450P Operation Manual - Page 41
is first displayed. When the print cartridge is low on toner, the Operator Panel displays this message. The printer normally has about 500 pages left to print before the print density fades. In its default state, the printer will stop printing when it detects the toner is low. You can continue - Sharp DX-B350P | DX-B350P | DX-B450P Operation Manual - Page 42
the toner is to be applied to the page. Functions Menu The Functions menu provides a variety of performance and summary reports. Items available in this menu are described below Parameter Print Usage Rep Value Default Description Prints the usage report. Reset Printer Print Summary Network - Sharp DX-B350P | DX-B350P | DX-B450P Operation Manual - Page 43
of files SELECT CANCEL Print Summary Default Description Prints the selected file. Deletes the selected file. Formats user flash. All data stored on the device will be erased. Prints the summary file. from GMT -12 through + 0 12 hours 0 or 30 minutes Select your time zone. User's Guide 3-17 - Sharp DX-B350P | DX-B350P | DX-B450P Operation Manual - Page 44
used. It also provides Toner status (consumable life tracking). Usage Count displays the current amount of usage of the printer. Information This listing on the Configuration Summary provides data about the printer such as the product version, PostScript version and images printed. Options - Sharp DX-B350P | DX-B350P | DX-B450P Operation Manual - Page 45
* Description Shows the name of the current zone for EtherTalk networking Allows you to choose from a list of existing zones. * uses the default zone. Model Name plus last 7 digits of MAC (Network) address empty empty 0 Model Name plus last 7 digits of MAC (Network) address User's Guide 3-19 - Sharp DX-B350P | DX-B350P | DX-B450P Operation Manual - Page 46
Counter Type Image Counter Toner Page Count Sheet Counter Usage Count Fuser Count Definition This counter reflects the number of images (sides) printed for the printer. This counter reflects the number of pages printed using the installed cartridge. This counter displays the number of sheets (one - Sharp DX-B350P | DX-B350P | DX-B450P Operation Manual - Page 47
dialog appears. In this Chapter... • Installing PCL5e and PostScript 3 Drivers • Setting Default Values • Printing a Test Page • Cancelling Printing • Accessing the Driver from an Application • Navigating the Printer Properties Window • Saved Settings • Main Tab • Paper Tab • Advanced Tab • Job - Sharp DX-B350P | DX-B350P | DX-B450P Operation Manual - Page 48
either SHARP DX-B450P or SHARP DX-B350P driver, depending on your model. 12. The Name Your Printer screen appears. 13. Click Next. 14. The Printer Sharing screen appears. 15. Click Next. 16. The Print Test Page screen appears. 17. Click Next. The Wizard is complete. 18. Click Finish. Setting Default - Sharp DX-B350P | DX-B350P | DX-B450P Operation Manual - Page 49
The Printer's configuration window appears. Setting Default Values Windows Operations The driver can automatically recognize all the installed options for your printer. To get the installed options, click the Configuration tab and then the Auto Configuration button. You can also manually install - Sharp DX-B350P | DX-B350P | DX-B450P Operation Manual - Page 50
Test Page Windows Operations 3. On the General Tab, click Printing Preferences The Printing Preferences window appears. 4. Any options set in any tab become your default values. Printing a Test Page You can print a Test page to verify printer connectivity and operation. To print a test page through - Sharp DX-B350P | DX-B350P | DX-B450P Operation Manual - Page 51
then press the Start button on the Operator Panel. Pages being printed at the moment will continue to be printed. Cancelling Print Jobs at the Computer Double-click the printer icon at the bottom right of the taskbar in Windows. From the displayed window, click the document name that you wish to - Sharp DX-B350P | DX-B350P | DX-B450P Operation Manual - Page 52
application settings supersede any other setting. To access Printer Properties from an application: 1. Select the Print option from your application. 2. Select the desired DX-B350P/B450P printer. 3. Click the Printer's Properties button. The Printer's Properties window appears. 4-6 User's Guide - Sharp DX-B350P | DX-B350P | DX-B450P Operation Manual - Page 53
the Printer Properties Window Windows Operations Navigating the Printer Properties Window The driver screens are divided in to five groups of functionality as described in the table below. Tab Main Paper Advanced Job Handling Watermark Functions Copies Document Style N-up Printing Finishing - Sharp DX-B350P | DX-B350P | DX-B450P Operation Manual - Page 54
Main Tab Windows Operations Main Tab Selecting Number of Copies You can select the number of copies to print via your Printer Properties. When selecting the number of copies, you should also decide if those copies are collated. To select number of copies: 1. Select the Main tab within your Printer - Sharp DX-B350P | DX-B350P | DX-B450P Operation Manual - Page 55
page. So, ten page number 1's will print and then ten page number 2's will print. Collated jobs will print all pages in sets, pages 1 through 10, until all sets have been printed.The default for Collating is On when there is more than one copy being printed. To select collating through your Printer - Sharp DX-B350P | DX-B350P | DX-B450P Operation Manual - Page 56
the document in poster printing mode. Poster Print prints the document to the edges of paper with no border and breaks the document up into multiple pages. The pages can then be placed together, edge-to-edge, to create a large version of the printed page. To print in poster mode: 4-10 User's Guide - Sharp DX-B350P | DX-B350P | DX-B450P Operation Manual - Page 57
the Main tab within your Printer Properties. 2. Select the PosterPrint Document Style. 3. Click Options. The PosterPrint window appears. 4. Enter the desired parameters. Enter the X and y axis enlargement and orientation. 5. Click OK. 6. Click OK. Main Tab Windows Operations User's Guide 4-11 - Sharp DX-B350P | DX-B350P | DX-B450P Operation Manual - Page 58
sheet. To select the number of pages to print on a single page: 1. Select the Main tab within your Printer Properties. 2. Select the number of pages to print from the N-Up pulldown menu. 3. Check the Border box if a page border is desired. 4. Select the Order in which the pages should be placed on - Sharp DX-B350P | DX-B350P | DX-B450P Operation Manual - Page 59
) to keep it separate from the previous print job. The Offset Catch Tray must be installed to use this option. Once installed, this feature is enabled by default. To disable Job Offset through your Printer Properties: 1. Select the Main tab within your Printer Properties. 2. Select No Offset in the - Sharp DX-B350P | DX-B350P | DX-B450P Operation Manual - Page 60
about custom sizes. To load and print custom paper: 1. Load the paper in the desired tray and set the custom paper size as described in section "Custom Sizes" on page 2-6. 2. Select the Paper tab within your Printer Properties. 3. Click Custom Size. The Custom Size window appears. 4. Enter the paper - Sharp DX-B350P | DX-B350P | DX-B450P Operation Manual - Page 61
to fit the paper size being used. Zoom settings are unavailable if you have chosen a Document style of N-Up or Pamphlet. Fit to Page is unavailable if you have chosen Pamphlet. To scale the print image to fit on a page: 1. Select the Paper tab within your Printer Properties. 2. Click the Fit to - Sharp DX-B350P | DX-B350P | DX-B450P Operation Manual - Page 62
. 2. Check Media Check. 3. Click OK. When Media Check is disabled: The printer will print from the default paper tray. The size or type of paper in the tray is not a factor in paper tray selection. Skip Blank Pages If pages exist in your document that do not contain text, you may select not to - Sharp DX-B350P | DX-B350P | DX-B450P Operation Manual - Page 63
: 1. Select the Paper tab within your Printer Properties. 2. Check Tray 1 is Manual Feed. 3. Click OK. Advanced Tab Manual Adjustments You can make a variety of adjustments to the Brightness and Contrast of your printed pages when using the PCL6 driver. This feature is not available for PostScript - Sharp DX-B350P | DX-B350P | DX-B450P Operation Manual - Page 64
DX-B350P or DX-B450P printer. 4. Click Properties. 5. Select the Advanced tab. 6. Click Overlay Options. The Overlay Window appears. 7. Select the desired Overlay. Overlay options are: All Pages, First Page Only, and All Pages but First Page. 8. Click OK to close the Overlay window. 9. Click Print - Sharp DX-B350P | DX-B350P | DX-B450P Operation Manual - Page 65
number Name from the authoring application ID supplied by the user from the driver. Name supplied by the user from the driver. The port from which the job was printed The protocol used. The number of sides printed. The number of sheets (2 sided) printed. Date and time job was printed. User's Guide - Sharp DX-B350P | DX-B350P | DX-B450P Operation Manual - Page 66
be downloaded as a .csv file by an administrator via the printer EWS and processed off line by the users accounting application. Job Retention and Storage You can store print jobs for future use or hold a job at the printer. A held job may be released with a Password/PIN number when a password was - Sharp DX-B350P | DX-B350P | DX-B450P Operation Manual - Page 67
watermark by clicking the Edit button. To create a new watermark to be placed on a print job: 1. Select the Watermark tab within your Printer Properties. The Watermark Window appears. 2. Click Add. The New Watermark window appears. 3. Enter the watermark text. 4. Click OK. User's Guide 4-21 - Sharp DX-B350P | DX-B350P | DX-B450P Operation Manual - Page 68
Tab Windows Operations The text is shown centered on the page. 5. Use the sliders to change the size, position, and angle of the text. Click the center button if you wish to recenter the text. Click the First page only text box if you only want the text to appear only on the first page - Sharp DX-B350P | DX-B350P | DX-B450P Operation Manual - Page 69
Chapter 5: Macintosh Operations Installing the Driver The Mac driver is installed by installing the PPD for the desired printer. The PPD is located on the installation CD. PPD installation may vary by Mac operating system. To install the PPD: 1. Open System Preferences. In this Chapter... • - Sharp DX-B350P | DX-B350P | DX-B450P Operation Manual - Page 70
Installing the Driver Macintosh Operations 2. Select Print & Fax from the Hardware menu. 3. Click + to add the printer. 4. Enter a name for the printer. 5. Enter the IP address of the printer in the location field. 5-2 User's Guide - Sharp DX-B350P | DX-B350P | DX-B450P Operation Manual - Page 71
from the Print Using pulldown. Accessing the Driver Macintosh Operations A browse window is displayed. 7. Browse to the CD to select the desired PPD. 8. Click Open. 9. Click Add. The printer is installed. Accessing the Driver The Driver can be accessed from your application's Print menu. NOTE - Sharp DX-B350P | DX-B350P | DX-B450P Operation Manual - Page 72
by Mac operating system. In general, the driver provides a group of "always there" option at the top of the driver window and a pulldown of Printer features available towards the middle of the window. The following table provides a general overview of available features and navigation 5-4 User - Sharp DX-B350P | DX-B350P | DX-B450P Operation Manual - Page 73
Page Orientation Prints the page image upside down. Color Matching This printer is monochrome. This Mac feature is settable but not applicable. ColorSync, In NA Printer Profile: Default is "Automatic" Paper Handling Pages to Print: Sets the desired pages to print. Options are: All Pages - Sharp DX-B350P | DX-B350P | DX-B450P Operation Manual - Page 74
Navigating the Driver Macintosh Operations Navigation Level 1 Navigation Level 2 Navigation Level 3 Description and Available Items Scale down only Prints smaller page sizes on the current page size. Checked by default. . Page Order: Determines the order in which pages are printed. Options are: - Sharp DX-B350P | DX-B350P | DX-B450P Operation Manual - Page 75
Navigating the Driver Macintosh Operations Navigation Level 1 Navigation Level 2 Navigation Level 3 Description and Available Items Tray Switching Checked by default Jam Recovery Checked by default User's Guide 5-7 - Sharp DX-B350P | DX-B350P | DX-B450P Operation Manual - Page 76
Navigating the Driver Macintosh Operations 5-8 User's Guide - Sharp DX-B350P | DX-B350P | DX-B450P Operation Manual - Page 77
features and presents them as HTML web pages. The changes made via the EWS change the printer settings in the same manner as the Operator Panel. To change settings for specific documents, use your Printer Properties options within the driver. In this Chapter... • Accessing the EWS • Navigating - Sharp DX-B350P | DX-B350P | DX-B450P Operation Manual - Page 78
the EWS The EWS interface consists of a left-navigation area and a display area. Use the left-navigation area to locate the desired items and make any configuration changes in effect. The Update button refreshes the screen to show you the current status of the displayed functions. 6-2 User's Guide - Sharp DX-B350P | DX-B350P | DX-B450P Operation Manual - Page 79
require an Administrator Login. The default password is "admin". Functions that require the Administrator Login are shown in Italics. Left-Navigation Item Top Level Top Page Status Status Left-Navigation Item Second Level Display Area Functions Device Status Network Status Product Version - Sharp DX-B350P | DX-B350P | DX-B450P Operation Manual - Page 80
Settings Copies, Duplex, Duplex Bind, Default Source, Manual Feed, Output Tray, Output Linking, Blank Pages, Auto Resize, Separator Page, Edge to Edge Common print settings such as number of copies and input and output trays. TAB: PCL Orientation, Font Source, Font Number, Pitch, Symbol Set, Lines - Sharp DX-B350P | DX-B350P | DX-B450P Operation Manual - Page 81
Recoverable Error, Service Call Required, Usage Report See chapter "SNMP" on page 8-1. Save Job Log Delete Job Log See section "Job Accounting" on page 4-19 See section "Job Accounting" on page 4-19 EWS only feature. Change EWS login Administrator password. To reset a lost password XXX. Server - Sharp DX-B350P | DX-B350P | DX-B450P Operation Manual - Page 82
Navigating the EWS Embedded Web Server 6-6 User's Guide - Sharp DX-B350P | DX-B350P | DX-B450P Operation Manual - Page 83
Chapter 7: Networking Protocols The DX-B350P/B450P is a fast network capable printer and supports an Ethernet 10/100 Base-Tx network connection. The following protocols are supported: TCP/IPv4, UDP, BOOTP, DHCP, ARP, ICMP, DDNS, WINS, LPR HTTP for Embedded Web Server IPv6, ICMPv6, Address Auto - Sharp DX-B350P | DX-B350P | DX-B450P Operation Manual - Page 84
Configuring the Driver Networking Setting the Network Configuration Manually You can make changes to the printer's default network configuration using the Operator Panel. Once the settings for DHCP or IP address are changed, the printer automatically re-initializes. To manually set the printer's IP - Sharp DX-B350P | DX-B350P | DX-B450P Operation Manual - Page 85
Link Speed/Duplex Configuration The network interface configuration includes a menu for setting Hub Link Speed and duplex. This menu includes the following settings: Auto Negotiate (default) 10Base-T Full 10Base-T Half 100Base-T Full 100Base-T Half User's Guide 7-3 - Sharp DX-B350P | DX-B350P | DX-B450P Operation Manual - Page 86
of IP filtering is to limit access to the printer to only those Host computers that have IP addresses within IP ranges predefined on the configuration page. The IP configuration page, accessible from the EWS (when logged in as administrator), has enable and disable parameters. When IP filtering is - Sharp DX-B350P | DX-B350P | DX-B450P Operation Manual - Page 87
). No manual configuration of IPv6 addresses is supported, nor is there support for DHCPv6, and the printer does not default. In cases where a particular network is configured to run only one IP version, it makes sense to disable the other one (for better resource utilization). SNMP SNMP can be used - Sharp DX-B350P | DX-B350P | DX-B450P Operation Manual - Page 88
Jet Administrative Compatibility This product operates with HP WebJet Admin in a basic mode where WJA provides generic support for any printer that has Printer MIB implemented. There is no special recognition of this printer by WJA other than that supported by Printer MIB. SNMP Alerts Support for - Sharp DX-B350P | DX-B350P | DX-B450P Operation Manual - Page 89
Chapter 8: Accessories The following optional accessories are available for this printer: In this Chapter... • Tray module (A4/ Letter, 550 sheets) • Paper trays • Duplex module 1 2 • Offset Catch Tray • Memory Expansion Module • Hard Disk Drive • Compact Flash (CF) - Sharp DX-B350P | DX-B350P | DX-B450P Operation Manual - Page 90
injuries to your back. The weight of this printer, without the optional accessories, paper trays, Toner Cartridge and paper, is 22.0 kg/48 lbs. Before moving the printer, you must uninstall the optional accessories first. When lifting the printer, there should be 2 persons, 1 in front and 1 behind - Sharp DX-B350P | DX-B350P | DX-B450P Operation Manual - Page 91
the tray module to be installed at the lowest level on a flat location. NOTE: Proceed to Step 5 if you are installing only one tray module. User's Guide 8-3 - Sharp DX-B350P | DX-B350P | DX-B450P Operation Manual - Page 92
and back corners of the top and bottom tray modules, and slowly lower the top module so that the guide pins at the 4 corners of the bottom module fit into the holes at the base plate of the top module and 2 locations at the back of the tray module. Insert the fasteners securely. 8-4 User's Guide - Sharp DX-B350P | DX-B350P | DX-B450P Operation Manual - Page 93
Switch off the power to the printer. Tray module (A4/Letter, 550 sheets) Accessories 6. Pull out the power cord from the power outlet and then the printer. 7. Remove any paper in the Standard Output Tray (1) and return the Paper Stop to its original position if it's raised (2). User's Guide 8-5 - Sharp DX-B350P | DX-B350P | DX-B450P Operation Manual - Page 94
sheets) Accessories 8. Pull the paper tray out of the printer. 9. Lift up the printer by holding the recessed areas as shown in the diagram. 10. Align the corners of the printer and the tray modules, and lower the printer gently so that the guide pins at the 4 corners of the tray modules fit into - Sharp DX-B350P | DX-B350P | DX-B450P Operation Manual - Page 95
the Tray Module NOTE: This procedure explains the uninstalling of two tray modules as an example. You can use the same procedure for uninstalling one tray module. 1. Switch off the power to the printer. 2. Pull out the power cord from the power outlet and then the printer. User's Guide 8-7 - Sharp DX-B350P | DX-B350P | DX-B450P Operation Manual - Page 96
paper in the Standard Output Tray (1) and return the Paper Stop to its original position if it's raised (2). 4. Pull the paper tray out of the printer. 5. Remove the fasteners found at the 2 locations inside and at the 2 locations at the back of the - Sharp DX-B350P | DX-B350P | DX-B450P Operation Manual - Page 97
Tray module (A4/Letter, 550 sheets) Accessories 6. Lift up the printer by holding the recessed areas as shown in the diagram and then remove it from the tray modules. 7. Remove by holding the recessed areas as shown in the diagram and then remove it from the bottom tray module. User's Guide 8-9 - Sharp DX-B350P | DX-B350P | DX-B450P Operation Manual - Page 98
is the same. The DX-B450P Duplex module is slightly larger and weighs more than the DX-B350P model Duplex module. . CAUTION: Be sure to switch off the power and unplug the power cord from the outlet before carrying out the operations. If not, you might get an electric shock. 8-10 User's Guide - Sharp DX-B350P | DX-B350P | DX-B450P Operation Manual - Page 99
of the printer. Duplex module Accessories 2. Pull out the power cord from the power outlet and then the printer. 3. Remove the rear cover of the printer after pushing the two tabs as shown in the diagram. Next, remove the connector cover of the printer as shown in the diagram. User's Guide 8-11 - Sharp DX-B350P | DX-B350P | DX-B450P Operation Manual - Page 100
of the duplex module with the printer. Ensure that the connector of the duplex module is connected to the connector of the printer. 5. Tighten the screws at the both ends of the bottom of the duplex module. Uninstalling the Duplex Module 1. Switch off the power to the printer. 8-12 User's Guide - Sharp DX-B350P | DX-B350P | DX-B450P Operation Manual - Page 101
power outlet and then the printer. Duplex module Accessories 3. Loosen the screws at the both ends of the bottom of the duplex module. 4. While supporting the duplex module with module away from the printer. NOTE: You must support the duplex module with your hand as once it is unlocked. - Sharp DX-B350P | DX-B350P | DX-B450P Operation Manual - Page 102
the printer. 6. Push in the cover and connector cover, which were removed during installation of the duplex module, until it clicks into the back of the printer. Offset Catch Tray Install this tray to the printer to enable print jobs to be offset. Maximum capacity is 500 sheets. 8-14 User's Guide - Sharp DX-B350P | DX-B350P | DX-B450P Operation Manual - Page 103
Catch Tray You can install an optional Offset Catch Tray to this printer. Offset Catch Tray Accessories CAUTION: Be sure to switch off the power Offset Catch Tray 1. Switch off the power to the printer. 2. Pull out the power cord from the power outlet and then the printer. User's Guide 8-15 - Sharp DX-B350P | DX-B350P | DX-B450P Operation Manual - Page 104
Offset Catch Tray Accessories 3. Lift up the second lever from the top left corner of the back of the printer. 4. Open the rear cover. NOTE: Do not touch any parts inside the printer. 5. Loosen the right and left thumb screws as shown in the diagram to uninstall the top cover of the paper - Sharp DX-B350P | DX-B350P | DX-B450P Operation Manual - Page 105
Tray Accessories 6. Insert the right and left tabs of the Offset Catch Tray into the holes at the top of the printer (1) and put it down to the top of the printer slowly (2). 7. Secure the screws at both ends of the bottom of the Offset Catch Tray. 8. Pull out the extension tray - Sharp DX-B350P | DX-B350P | DX-B450P Operation Manual - Page 106
Offset Catch Tray Accessories Uninstalling the Offset Catch Tray 1. Switch off the power to the printer. 2. Pull out the power cord from the power outlet and then the printer. 3. Close the stopper and the extension tray of the Offset Catch Tray. 8-18 User's Guide - Sharp DX-B350P | DX-B350P | DX-B450P Operation Manual - Page 107
the second lever (1) from the top left corner of the back of the printer to open the rear cover (2). 5. Remove the screws on both sides of Catch Tray, remove the right and left tabs from the holes at the top of the printer (2). 6. Fasten the right and left thumb screws of the top cover of the paper - Sharp DX-B350P | DX-B350P | DX-B450P Operation Manual - Page 108
screws as shown below: 5. Pull the inside panel away from the printer by the top edge. 6. Carefully insert a Memory Module into the covers in reverse order (Steps 3, 4, and 5). 8. Connect the power cord to the wall outlet. Turn the printer power switch to the ON position. 8-20 User's Guide - Sharp DX-B350P | DX-B350P | DX-B450P Operation Manual - Page 109
the Hard Drive and reinstall. NOTE: Improper alignment will damage the hard drive and the printer. 7. Insert the plastic rivet through the aligned hole until it clicks. 8. Reinstall the covers in reverse order (see "Memory Expansion Module" on page 8-20- Steps 3, 4, and 5). User's Guide 8-21 - Sharp DX-B350P | DX-B350P | DX-B450P Operation Manual - Page 110
that the hard drive can be used. The installation of your Hard Disk option in your printer is now complete. Compact Flash (CF) Card 1. Carefully review the safety precautions in the front of this guide before starting this installation procedure. 2. Ensure that the printer power switch is set to the - Sharp DX-B350P | DX-B350P | DX-B450P Operation Manual - Page 111
Chapter 9: Troubleshooting This chapter provides information to help you trouble shoot problems. It explains what to if the printer is not printing at all, is not printing correctly, or if error messages are displayed. In this Chapter... • Poor Print Quality • No Power • Cannot Print • Printing is - Sharp DX-B350P | DX-B350P | DX-B450P Operation Manual - Page 112
Is the Toner Cartridge defective or damaged? Printer may have malfunctioned. Replace it with a new Toner Cartridge. Contact Technical Support. Printout Is Faded, Stained, Missing, Wrinkled, or Blurred Status Printing is faded and blurred. Items to check Is the correct type of paper used? Action - Sharp DX-B350P | DX-B350P | DX-B450P Operation Manual - Page 113
pages to remove the stains. Replace it with a new Toner Cartridge. Hair-like streaks are printed inside or outside the black halftone areas. Are you using paper that has been left unwrapped for a long period of time (especially when the humidity is low)? Replace with paper from a new ream. User - Sharp DX-B350P | DX-B350P | DX-B450P Operation Manual - Page 114
from a new ream. White dots appear in black Is the correct type of paper used? filled areas. Is the Toner Cartridge defective or damaged? Load the correct type of paper. Replace it with a new Toner Cartridge. Printed image smudges when rubbed with your finger. Is the paper damp? Is the correct - Sharp DX-B350P | DX-B350P | DX-B450P Operation Manual - Page 115
. Envelopes are wrinkled. Envelopes may be wrinkled depending on the type used. Open the rear cover of the printer and push up the levers at both ends of the Fuser Unit. Wrinkles can be reduced. User's Guide After printing the envelopes, you must return the levers to their original positions - Sharp DX-B350P | DX-B350P | DX-B450P Operation Manual - Page 116
No Power Troubleshooting Status Text is blurred. Items to check Is the paper damp? Is the correct type of paper used? Action the cord to the power outlet and printer again. Then, switch on the power. Cannot Print Status Print instruction was sent but processing did not start. . 9-6 User's Guide - Sharp DX-B350P | DX-B350P | DX-B450P Operation Manual - Page 117
set? Is the paper damp? Is the correct type of paper used? Is the paper tray pushed in? Is the paper jammed? Is the printer placed on a flat location? Are the paper tray guides set in the correct positions? Did you print any picture postcards? Action Load the paper correctly. For transparencies - Sharp DX-B350P | DX-B350P | DX-B450P Operation Manual - Page 118
to the tray. Add paper to the tray. Add paper to the tray. Remove paper from the tray. Remove paper from the tray. Replace the Toner Cartridge soon. Users can press the Start button to continue printing with low toner. See "System Menu" on page 3-15 for more information - Sharp DX-B350P | DX-B350P | DX-B450P Operation Manual - Page 119
is Remove Toner Cartridge and install the installed. correct one. Press the next key several times noting all the numbers shown. Power the printer off and wait 30 seconds and power on again. Contact your printer support desk if the error reoccurs quoting the numbers displayed. User's Guide 9-9 - Sharp DX-B350P | DX-B350P | DX-B450P Operation Manual - Page 120
If the problem reoccurs, contact an authorized service provider. The duplexer was removed or has failed. The main motor has failed. The engine has failed. The fan has failed. OCT Error. Offset Catch Tray failure Call Service Toner Cartridge reaching Replace cartridge end of life Printer has - Sharp DX-B350P | DX-B350P | DX-B450P Operation Manual - Page 121
the printer and the host. Printer is offline Press Start Controller failure Restart printer. If the problem reoccurs, call service The job is too complex for Add optional memory the installed memory The printer panel has been Contact the administrator locked to prevent changes Printer is - Sharp DX-B350P | DX-B350P | DX-B450P Operation Manual - Page 122
and Warning Messages Troubleshooting Error Message Line 1 Printing Processing Ready Resetting User FLASH Error Waiting Error Message Line 2 Select To Format Possible Cause Action Job printing None Normal Printer Operation Data received None Normal Printer Operation Printer is ready and - Sharp DX-B350P | DX-B350P | DX-B450P Operation Manual - Page 123
your service provider. In this Chapter... • At the Paper Trays • At the Fuser Unit • At the Toner Cartridge • At the Duplex Module • At the Offset Catch Tray NOTE: Paper jams could be due to the printer installation environment and type of paper used. The diagram below shows the printer with - Sharp DX-B350P | DX-B350P | DX-B450P Operation Manual - Page 124
the paper may be damaged. NOTE: If the paper is jammed inside the printer and behind the first level paper tray, pull out both the first and printer and behind the second level paper tray, pull out only the second level paper tray. 2. Remove any wrinkled paper in the paper tray. 10-2 User's Guide - Sharp DX-B350P | DX-B350P | DX-B450P Operation Manual - Page 125
the printer. At the Paper Trays Clearing Paper Jams NOTE: If the printer is installed with the two optional tray modules, examine the interior of all the tray modules. 4. Push the paper tray completely into the printer. 5. Open and close the top cover to clear the Jam message. User's Guide 10-3 - Sharp DX-B350P | DX-B350P | DX-B450P Operation Manual - Page 126
Tray. NOTE: If the duplex unit is installed, open the cover of the Duplex module first. See"At the Duplex Module" on page 10-8. 2. Lift the second lever from the top left corner of the back of the printer. 3. Open the rear cover. NOTE: Do not touch any parts inside the printer. 10-4 User's Guide - Sharp DX-B350P | DX-B350P | DX-B450P Operation Manual - Page 127
jam. If you let go of the cover of the Fuser Unit, it will return to its original position. 5. Close the rear cover. NOTE: Make sure that the levers at the rear of the printer, as shown in the diagram, are returned to the positions they were in before clearing the jam. User's Guide 10-5 - Sharp DX-B350P | DX-B350P | DX-B450P Operation Manual - Page 128
At the Toner Cartridge Clearing Paper Jams 6. Open and close the top cover to clear the Jam message. At the Toner Cartridge 1. Remove any paper in the Standard Output Tray. 2. Open the top cover to clear the Jam message. NOTE: Do not touch any parts inside the printer. 10-6 User's Guide - Sharp DX-B350P | DX-B350P | DX-B450P Operation Manual - Page 129
diagram, the paper will be loosened and can be removed easily. If paper is torn, check for any remaining torn pieces of paper. 6. Hold the Toner Cartridge by the grip and insert it into the slot inside the printer. User's Guide 10-7 - Sharp DX-B350P | DX-B350P | DX-B450P Operation Manual - Page 130
the Duplex Module Clearing Paper Jams NOTE: Do not touch any parts inside the printer. Ensure that the Toner Cartridge is correctly installed. 7. Close the top cover securely. At the Duplex Module Duplex section, See "Duplex at the interior of the top cover" on page 10-9 10-8 User's Guide - Sharp DX-B350P | DX-B350P | DX-B450P Operation Manual - Page 131
module. 2. Examine the interior of the top cover and remove any jammed paper. If paper is torn, check for any remaining torn pieces of paper. User's Guide 10-9 - Sharp DX-B350P | DX-B350P | DX-B450P Operation Manual - Page 132
At the Offset Catch Tray Clearing Paper Jams 3. Close the top cover of the duplex module to clear the Jam message. At the Offset Catch Tray 1. Open the Offset Catch Tray cover by pulling the tab at the top left of the cover. 2. Remove any jammed paper. 10-10 User's Guide - Sharp DX-B350P | DX-B350P | DX-B450P Operation Manual - Page 133
left corner of the back of the printer to open the rear cover. 5. Remove any jammed paper. Fuser Unit is hot. Be careful not to touch it as you can get burned. Make sure that the levers at both ends of the Fuser Unit are returned to the positions they were in before clearing the jam. User's Guide 10 - Sharp DX-B350P | DX-B350P | DX-B450P Operation Manual - Page 134
At the Offset Catch Tray Clearing Paper Jams 6. Close the rear cover to clear the Jam message. 10-12 User's Guide - Sharp DX-B350P | DX-B350P | DX-B450P Operation Manual - Page 135
. These utilities allow direct communication with your printer to accomplish specific tasks. Font and Macro Manager Utility The Font and Macro Manager (FMM) utility supports the downloading of PCL soft fonts and macros to User Flash, Compact Flash, and Disk. PCL font formats 0, 5, 15, and 20 can be - Sharp DX-B350P | DX-B350P | DX-B450P Operation Manual - Page 136
. This is useful to programs that generate printer data directly without going through the Windows Printer Driver. Older MS-DOS programs are typically the programs that require tray ID remapping. Once the tray IDs are changed, the new mapping affects all users of the printer. 11-2 User's Guide - Sharp DX-B350P | DX-B350P | DX-B450P Operation Manual - Page 137
PCL5 Tray Mapping Utility Windows Utilities To use the program: 1. Select the target printer. The printer must be installed on a Windows system to be a target printer. 2. Enter new tray IDs. 3. Click OK. User's Guide 11-3 - Sharp DX-B350P | DX-B350P | DX-B450P Operation Manual - Page 138
The printer's Direct PDF Utility allows you to send a Version 1.3 PDF file directly to the printer without the use of Adobe Acrobat on the host computer and without using the printer driver. To start Direct PDF Print, right-click on the PDF document and select Direct PDF Print. 11-4 User's Guide - Sharp DX-B350P | DX-B350P | DX-B450P Operation Manual - Page 139
Symbols SNMP Alerts 7-6 Numerics 2-Sided Printing 4-9 A A4 2-5 A5 2-5 A6 2-5 About 1-1 Access panel 2-1 Accessing the Driver 4-6 Accessories 8-1 acid paper 2-11 Actions 9-8 Active 3-2 Address Ranges/Permissions 6-5 adhesive backing 2-11 Administrator Address 6-5 Adobe 2-4 Advanced tab 4-7, 4-17 - Sharp DX-B350P | DX-B350P | DX-B450P Operation Manual - Page 140
7-1 Direct PDF Utility 11-4 Disk 3-17 Display 3-1 Display Area 6-2 Display Language 3-15, 6-3, 6-4 DL 2-5 DNS 6-5 DNS Settings 6-4 Driver 4-1 Driver access 4-6 Driver Configure 7-2 Drivers 2-4 Duplex 3-6, 4-9, 6-4 Duplex Bind 3-6, 6-4 Duplex Module 2-2, 8-10, 10-8 DX-B350P 1-1 DX-B450P 1-1 E Edge - Sharp DX-B350P | DX-B350P | DX-B450P Operation Manual - Page 141
3-4, 4-14 Lock tabs 2-15 Login 6-3 Logout 6-3 Low power mode 2-17 M MAC 2-4 Mac Driver 5-1 Macintosh 5-1 Main tab 4-7, 4-8 Maintenance Reqd 9-11 Manual Feed 3-6, 4-17, 6-4 Manual IP 7-2 Manually install 4-3 User's Guide Mass Storage Error 6-5 mDNS 6-5 Media suggested 2-9 Media Check 4-15, 5-6 Media - Sharp DX-B350P | DX-B350P | DX-B450P Operation Manual - Page 142
Log 3-16 Print Fonts 3-16 Print PS Errors 3-13, 6-4 Print Server Name 6-5 Print Summary 3-16 Print Test 3-16 Print Usage Rep 3-16 Printer Drivers 2-4 Printer Features 5-6 Printer Properties 4-6 Printers and Faxes Menu 4-2 Printing Options 2-17 Printing Preferences 4-4 Properties 4-2 User's Guide - Sharp DX-B350P | DX-B350P | DX-B450P Operation Manual - Page 143
Text to Black 4-17 TextEdit 5-5 Thick 1 2-6 Thick 2 2-6 Thick 3 2-7 Thin 2-7 Toner Cartridge 2-1, 2-3, 2-15, 10-6 Toner Low 3-15, 6-4, 9-8 Toner Low/Toner Out 6-5 Toner Page Count 3-20 Toner Page Count 6-4 Toner Save 4-17 Toner Saver 3-16, 5-6, 6-4 too thick 2-11 too thin 2-11 Top Cover 2-3 Transfer - Sharp DX-B350P | DX-B350P | DX-B450P Operation Manual - Page 144
6-4 Tray Module 2-1, 8-2 Tray Settings 4-13 Treated colored paper 2-11 Troubleshooting 9-1 TrueType fonts 4-18 Turn off 2-4 Turn on 2-4 Two-sided 5-5 Windows Driver 4-1 Windows Utilities 11-1 WINS 6-5 WINS Settings 6-4 Wrinkled 9-2 X XP 2-4 Y Year 3-17 Z Zone Name 6-5 Zoom 4-15 I-6 User's Guide - Sharp DX-B350P | DX-B350P | DX-B450P Operation Manual - Page 145
- Sharp DX-B350P | DX-B350P | DX-B450P Operation Manual - Page 146
DX-B350P/DX-B450P User's Guide For North America SHARP ELECTRONICS CORPORATION 1 Sharp Plaza, Mahwah, New Jersey 07495-1163. www.sharpusa.com SHARP ELECTRONICS OF CANADA LTD. 335 Britannia Road East, Mississauga, Ontario, L4Z 1W9 This manual has been printed using a vegetable-based soy oil ink to
-
 1
1 -
 2
2 -
 3
3 -
 4
4 -
 5
5 -
 6
6 -
 7
7 -
8
-
9
-
10
-
11
-
12
-
13
-
14
-
15
-
16
-
17
-
18
-
19
-
20
-
21
-
22
-
23
-
24
-
25
-
26
-
27
-
28
-
29
-
30
-
31
-
32
-
33
-
34
-
35
-
36
-
37
-
38
-
39
-
40
-
41
-
42
-
43
-
44
-
45
-
46
-
47
-
48
-
49
-
50
-
51
-
52
-
53
-
54
-
55
-
56
-
57
-
58
-
59
-
60
-
61
-
62
-
63
-
64
-
65
-
66
-
67
-
68
-
69
-
70
-
71
-
72
-
73
-
74
-
75
-
76
-
77
-
78
-
79
-
80
-
81
-
82
-
83
-
84
-
85
-
86
-
87
-
88
-
89
-
90
-
91
-
92
-
93
-
94
-
95
-
96
-
97
-
98
-
99
-
100
-
101
-
102
-
103
-
104
-
105
-
106
-
107
-
108
-
109
-
110
-
111
-
112
-
113
-
114
-
115
-
116
-
117
-
118
-
119
-
120
-
121
-
122
-
123
-
124
-
125
-
126
-
127
-
128
-
129
-
130
-
131
-
132
-
133
-
134
-
135
-
136
-
137
-
138
-
139
-
140
-
141
-
142
-
143
-
144
-
145
-
146
 |
 |
LASER PRINTER
User's Guide
MODEL: DX-B350P
DX-B450P