Sharp DX-B350P DX-B350P DX-B450P Operation Manual - Page 107
Offset Catch Tray, remove the right and left tabs from the holes at the top of the printer
 |
View all Sharp DX-B350P manuals
Add to My Manuals
Save this manual to your list of manuals |
Page 107 highlights
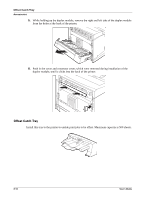
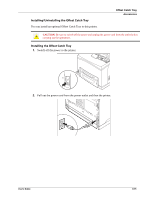
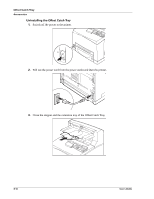
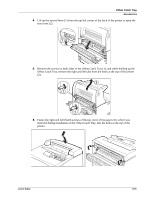
Offset Catch Tray Accessories 4. Lift up the second lever (1) from the top left corner of the back of the printer to open the rear cover (2). 5. Remove the screws on both sides of the Offset Catch Tray (1), and while holding up the Offset Catch Tray, remove the right and left tabs from the holes at the top of the printer (2). 6. Fasten the right and left thumb screws of the top cover of the paper exit, which was removed during installation of the Offset Catch Tray, into the holes at the top of the printer. User's Guide 8-19
-
 1
1 -
2
-
3
-
4
-
5
-
6
-
7
-
8
-
9
-
10
-
11
-
12
-
13
-
14
-
15
-
16
-
17
-
18
-
19
-
20
-
21
-
22
-
23
-
24
-
25
-
26
-
27
-
28
-
29
-
30
-
31
-
32
-
33
-
34
-
35
-
36
-
37
-
38
-
39
-
40
-
41
-
42
-
43
-
44
-
45
-
46
-
47
-
48
-
49
-
50
-
51
-
52
-
53
-
54
-
55
-
56
-
57
-
58
-
59
-
60
-
61
-
62
-
63
-
64
-
65
-
66
-
67
-
68
-
69
-
70
-
71
-
72
-
73
-
74
-
75
-
76
-
77
-
78
-
79
-
80
-
81
-
82
-
83
-
84
-
85
-
86
-
87
-
88
-
89
-
90
-
91
-
92
-
93
-
94
-
95
-
96
-
97
-
98
-
99
-
100
-
101
-
 102
102 -
 103
103 -
 104
104 -
 105
105 -
 106
106 -
 107
107 -
 108
108 -
 109
109 -
 110
110 -
 111
111 -
 112
112 -
113
-
114
-
115
-
116
-
117
-
118
-
119
-
120
-
121
-
122
-
123
-
124
-
125
-
126
-
127
-
128
-
129
-
130
-
131
-
132
-
133
-
134
-
135
-
136
-
137
-
138
-
139
-
140
-
141
-
142
-
143
-
144
-
145
-
146
 |
 |
User’s Guide
8-19
Offset Catch Tray
Accessories
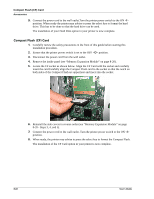
4.
Lift up the second lever (1) from the top left corner of the back of the printer to open the
rear cover (2).
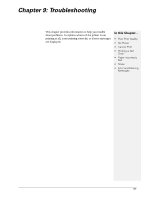
5.
Remove the screws on both sides of the Offset Catch Tray (1), and while holding up the
Offset Catch Tray, remove the right and left tabs from the holes at the top of the printer
(2).
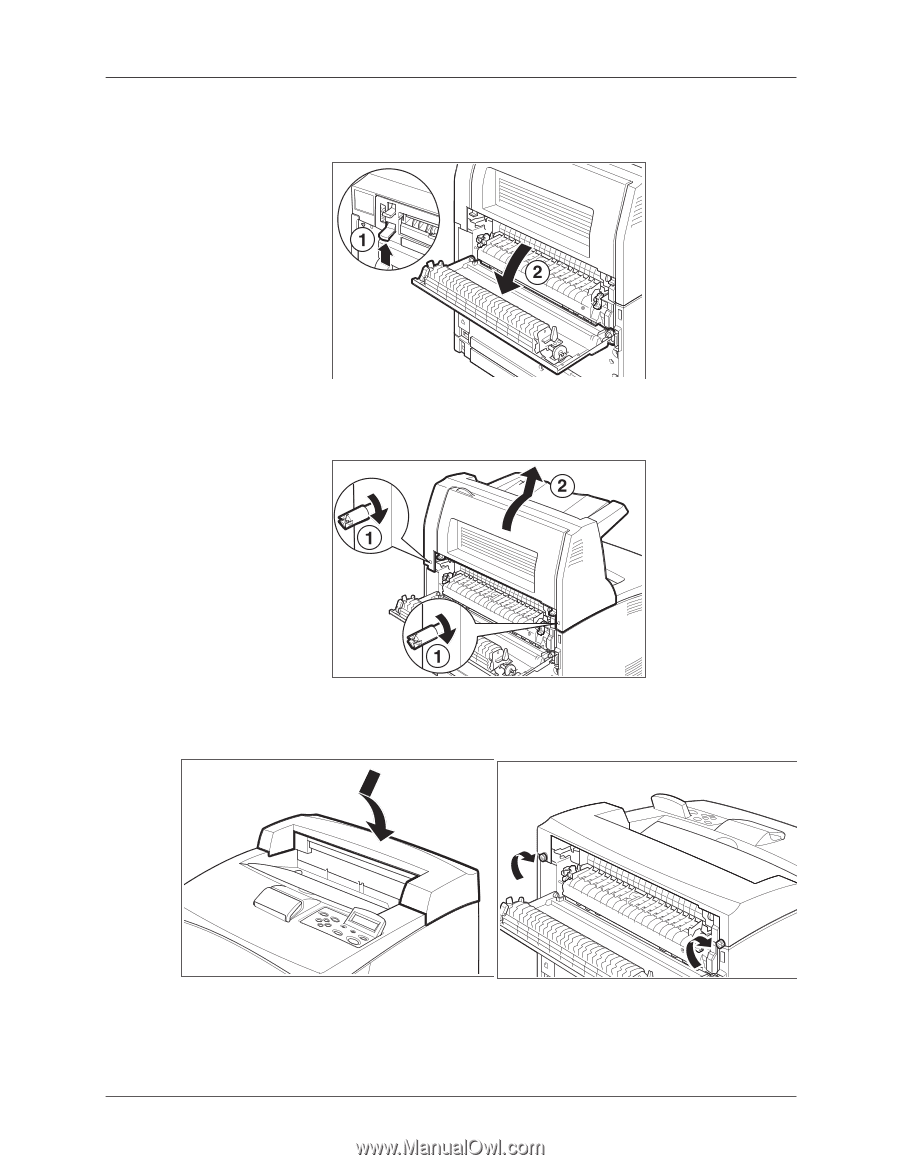
6.
Fasten the right and left thumb screws of the top cover of the paper exit, which was
removed during installation of the Offset Catch Tray, into the holes at the top of the
printer.