Sharp DX-B350P DX-B350P DX-B450P Operation Manual - Page 55
Collating Copies, Setting Image Orientation, Output Destination - printing pages out of order
 |
View all Sharp DX-B350P manuals
Add to My Manuals
Save this manual to your list of manuals |
Page 55 highlights
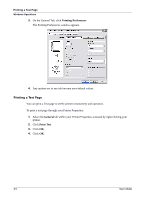
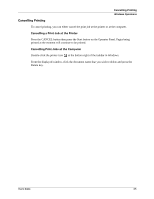
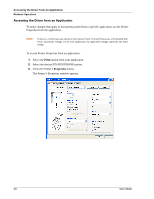
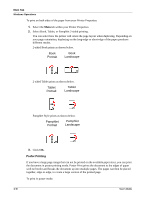
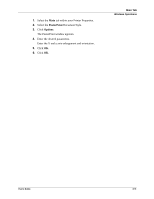
Collating Copies Main Tab Windows Operations When printing multiple copies of a job, the output can be automatically collated. When copies are collated, they are printed in groups by the print job, not by the page. If you do not select the collate option, your copies will be printed by page. So, ten page number 1's will print and then ten page number 2's will print. Collated jobs will print all pages in sets, pages 1 through 10, until all sets have been printed.The default for Collating is On when there is more than one copy being printed. To select collating through your Printer Properties: 1. Select the Main tab within your Printer Properties. 2. Click Collate. 3. Click OK. Setting Image Orientation Select portrait or landscape orientation or select to rotate the existing orientation by 180 degrees. To select orientation through your Printer Properties: 1. Select the Main tab within your Printer Properties. 2. Select the desired orientation. You can choose Portrait, Landscape, or to rotate the page 180 degrees. 3. Click OK. Output Destination You can choose the output tray where your print job will be placed. To select the paper destination through your Printer Properties: 1. Select the Main tab within your Printer Properties. 2. Select the desired tray from the Output pulldown. 3. Click OK. Document Style (2-Sided Printing/Duplex) The printer can automatically print on both sides of paper when the optional Duplex module is installed. See"Paper Types" on page 2-6 for information about what paper cannot be duplexed. With two-sided printing, you can print a document in the form of a small book. You can use any paper size that duplex printing supports. The printer automatically reduces pages to fit within the pamphlet parameters. It prints two pages per side and prints the pages in the order needed to accommodate a center fold. You can specify the binding edge (see "Finishing" on page 4-12) to specify the room left for binding your book. User's Guide 4-9
-
 1
1 -
2
-
3
-
4
-
5
-
6
-
7
-
8
-
9
-
10
-
11
-
12
-
13
-
14
-
15
-
16
-
17
-
18
-
19
-
20
-
21
-
22
-
23
-
24
-
25
-
26
-
27
-
28
-
29
-
30
-
31
-
32
-
33
-
34
-
35
-
36
-
37
-
38
-
39
-
40
-
41
-
42
-
43
-
44
-
45
-
46
-
47
-
48
-
49
-
 50
50 -
 51
51 -
 52
52 -
 53
53 -
 54
54 -
 55
55 -
 56
56 -
 57
57 -
 58
58 -
 59
59 -
 60
60 -
61
-
62
-
63
-
64
-
65
-
66
-
67
-
68
-
69
-
70
-
71
-
72
-
73
-
74
-
75
-
76
-
77
-
78
-
79
-
80
-
81
-
82
-
83
-
84
-
85
-
86
-
87
-
88
-
89
-
90
-
91
-
92
-
93
-
94
-
95
-
96
-
97
-
98
-
99
-
100
-
101
-
102
-
103
-
104
-
105
-
106
-
107
-
108
-
109
-
110
-
111
-
112
-
113
-
114
-
115
-
116
-
117
-
118
-
119
-
120
-
121
-
122
-
123
-
124
-
125
-
126
-
127
-
128
-
129
-
130
-
131
-
132
-
133
-
134
-
135
-
136
-
137
-
138
-
139
-
140
-
141
-
142
-
143
-
144
-
145
-
146
 |
 |