Sharp MX-M200D Operation Manual - Page 31
Removing Misfeeds - drum
 |
View all Sharp MX-M200D manuals
Add to My Manuals
Save this manual to your list of manuals |
Page 31 highlights
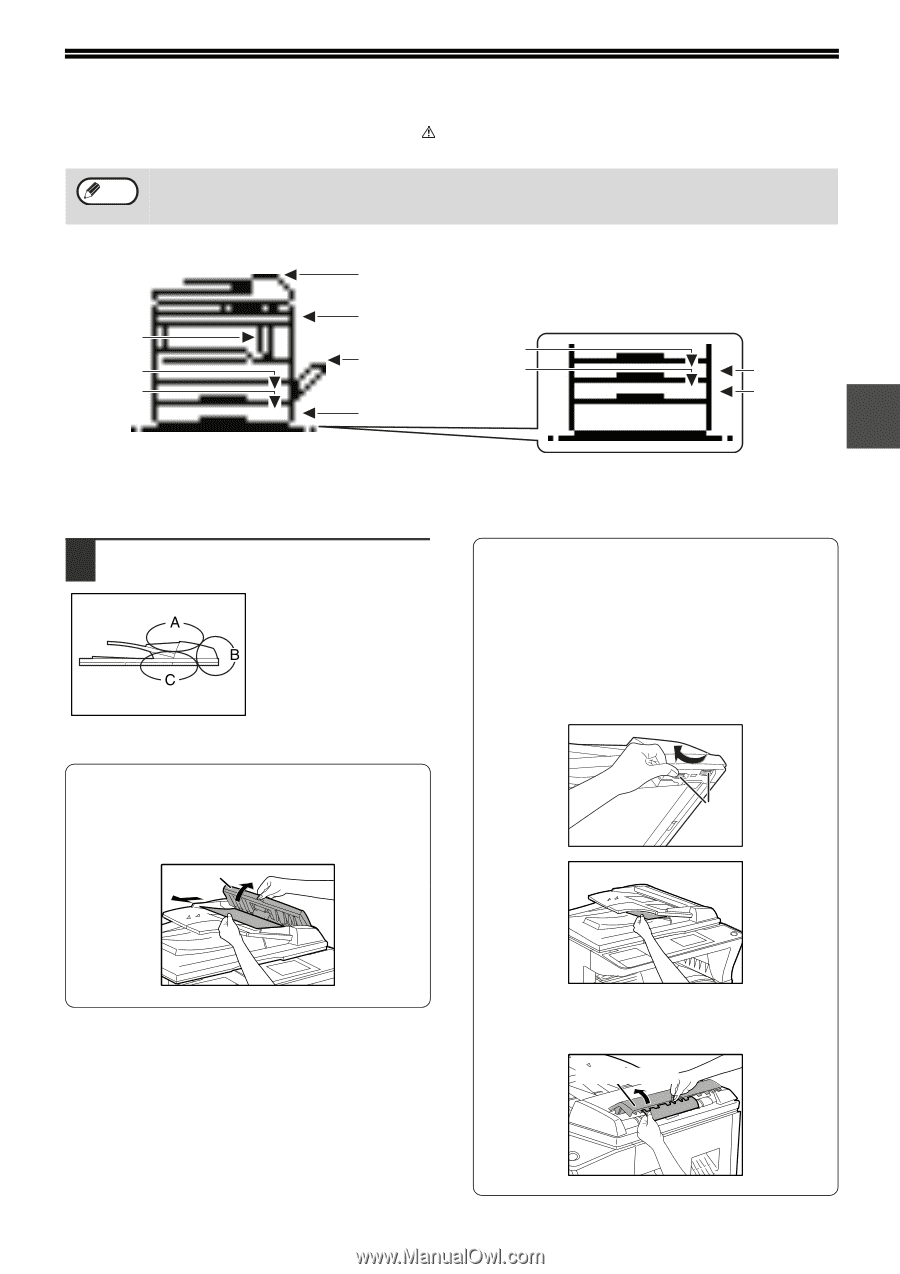
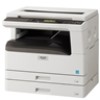
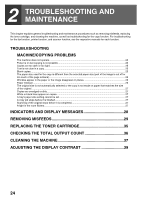
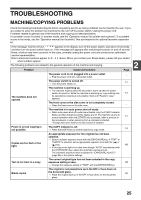
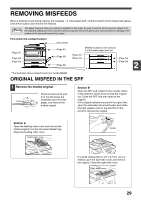
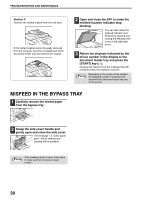
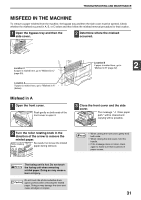
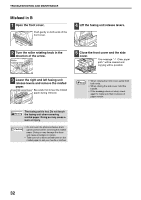
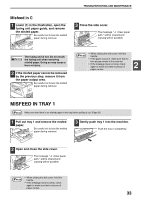
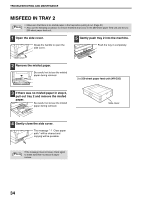
REMOVING MISFEEDS When a misfeed occurs during copying, the message " Clear paper path." and the location of the misfeed will appear. Check the location and remove the misfeed. Note The paper may tear when you remove a misfeed. In this event, be sure to remove all torn pieces of paper from the machine, taking care not to touch the photoconductive drum (the green part). Any scratches or damage to the surface of the drum will cause dirty copies. First check the misfeed location. (See below) (Page 31) (Page 33) (Page 34) (Page 31) (Page 30) (Page 34) (Page 34) (Page 34) Misfeed locations in the optional 2 x 250-sheet paper feed unit (Page 34) (Page 34) 2 * The illustration shows misfeed locations in the MX-M200D. ORIGINAL MISFEED IN THE SPF 1 Remove the misfed original. Check sections A, B, and C in the left shows the illustration (see the next page), and remove the misfed original. Section B Open the SPF and rotate the two release rollers in the direction of the arrow to feed the original out. Close the SPF and then remove the original. If the original misfeed occurred in the right roller, open the automatic document feeder and rotate the right release roller in the direction of the arrow to remove the original. Section A Open the feeding roller cover and remove the misfed original from the document feeder tray. Close the feeding roller cover. Feeding roller cover Roller If a small original (A5 (5-1/2" x 8-1/2"), etc.) is misfed, open the right side cover and remove the original. Close the right side cover. Right side cover 29
-
 1
1 -
2
-
3
-
4
-
5
-
6
-
7
-
8
-
9
-
10
-
11
-
12
-
13
-
14
-
15
-
16
-
17
-
18
-
19
-
20
-
21
-
22
-
23
-
24
-
25
-
 26
26 -
 27
27 -
 28
28 -
 29
29 -
 30
30 -
 31
31 -
 32
32 -
 33
33 -
 34
34 -
 35
35 -
 36
36 -
37
-
38
-
39
-
40
-
41
-
42
-
43
-
44
-
45
-
46
-
47
-
48
-
49
-
50
-
51
-
52
-
53
-
54
-
55
-
56
-
57
-
58
-
59
-
60
-
61
-
62
-
63
-
64
-
65
-
66
-
67
-
68
-
69
-
70
-
71
-
72
-
73
-
74
-
75
-
76
-
77
-
78
-
79
-
80
-
81
-
82
-
83
-
84
-
85
-
86
-
87
-
88
-
89
-
90
-
91
-
92
-
93
-
94
-
95
-
96
-
97
-
98
-
99
-
100
 |
 |