Sony DPP-EX50 Operating Instructions
Sony DPP-EX50 Manual
 |
UPC - 027242639546
View all Sony DPP-EX50 manuals
Add to My Manuals
Save this manual to your list of manuals |
Sony DPP-EX50 manual content summary:
- Sony DPP-EX50 | Operating Instructions - Page 1
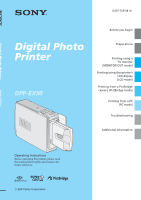
3-207-729-13 (1) Digital Photo Printer DPP-EX50 Before you begin Preparations Printing using a TV monitor (MONITOR OUT mode) Printing using the printer's LCD display (LCD mode) Printing from a PictBridge camera (PictBridge mode) Printing from a PC (PC mode) Troubleshooting Additional information - Sony DPP-EX50 | Operating Instructions - Page 2
digital device pursuant to Subpart B of Part 15 of Fcc Rules. If you have any questions about this product, you may contact: Sony's Customer Information Services Center (CISC) at 1-866-328-SONY (7669) or Sony Web site at www.sony.com Declaration of Conformity Trade Name: SONY Model No.: DPP-EX50 - Sony DPP-EX50 | Operating Instructions - Page 3
© 1995- 2002 Jean-loup Gailly and Mark Adler •This product uses "Exif Toolkit For Windows Ver.2.4 (Copyright © 1998 FUJI PHOTO FILM CO., LTD. All rights reserved)." Exif is the exchangeable image file format for digital still cameras specified by the JEIDA (Japan Electronics Industrial Development - Sony DPP-EX50 | Operating Instructions - Page 4
do with this printer 6 Operation flows 8 Features 9 Preparations 1 Checking the contents of the package 11 2 Preparing the printing pack (not supplied 12 Sizes of print paper 12 Optional printing packs 12 3 Loading the print cartridge 13 4 Inserting the print paper 15 Printing using a TV - Sony DPP-EX50 | Operating Instructions - Page 5
85 System requirements 85 Installing the printer driver 87 Installing the PictureGear Studio 92 Printing photos from the PictureGear Studio 96 Printing from other application software 102 Troubleshooting If trouble occurs 104 If an error message appears 120 If paper jams 124 Cleaning the - Sony DPP-EX50 | Operating Instructions - Page 6
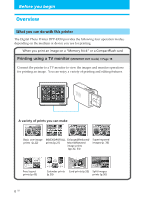
Overview What you can do with this printer The Digital Photo Printer DPP-EX50 provides the following four operation modes, depending on the medium or device you use for printing. When you print an image on a "Memory Stick" or a CompactFlash card Printing using a TV monitor (MONITOR OUT mode) c Page - Sony DPP-EX50 | Operating Instructions - Page 7
. Prints you can make Basic one-image INDEX/DPOF/ prints (p.74) ALL prints (p.76) Printing from a PictBridge camera (PictBridge mode) c Page 81 Connect a PictBridge-compliant digital camera to the printer to print images using the camera. Printing from a PC (PC mode) c Page 85 Connect the - Sony DPP-EX50 | Operating Instructions - Page 8
LCD mode PictBridge mode PC mode Get the printer ready for printing • Prepare the printing pack (not supplied) (page 12) • Load the print cartridge (page 13) • Insert the print paper (page 15) Connect to a TV monitor (page 18) Install the supplied software on the PC (page 87) Connect to a PC - Sony DPP-EX50 | Operating Instructions - Page 9
digital camera and prints it with optimal picture quality. • When you use the supplied PictureGear Studio software to print an image from your PC, you can choose Exif Print picture correction in addition to the conventional OS picture correction. In Exif Print correction, the supplied printer driver - Sony DPP-EX50 | Operating Instructions - Page 10
operating the printer. Paper tray allowing bulk printing of 25/30 sheets (page 15) With the supplied paper tray, you digital camera. Windows PC support with a convenient USB connection (page 85) By connecting the printer to your computer via a USB connector and installing the supplied printer driver - Sony DPP-EX50 | Operating Instructions - Page 11
are supplied with your printer. Paper tray (1) Video connecting cable (1) CD-ROM (1) - Sony DPP-EX50 Printer Driver Software for Windows® 98SE/ Me/2000 Professional/XP Home Edition/XP Professional - PictureGear Studio V.2.0 Cleaning cartridge (1) Clamp filter (1) • Operating Instructions (this - Sony DPP-EX50 | Operating Instructions - Page 12
For Small size printing: bSVM-30SS • 30 sheets of Small size photo paper • Print cartridge for 30 prints To order printing packs, visit the following web site: www.sony.com/printers Notes • Use the printing pack for this printer only. • For high quality prints, avoid placing the printing pack in - Sony DPP-EX50 | Operating Instructions - Page 13
clicks into place. Sony logo Removing the print cartridge When the print cartridge runs out, the (cartridge error) indicator appears on the printer's LCD display. Open the cartridge compartment cover, push the green eject lever outsides, and remove the used print cartridge. Eject lever Continued - Sony DPP-EX50 | Operating Instructions - Page 14
it in its original bag. • Never put your hand into the cartridge compartment. The thermal head reaches high temperatures, especially after repeated printing. • Do not rewind the ink ribbon and use the rewound print cartridge for printing. Otherwise, proper printing result will not be obtained, or - Sony DPP-EX50 | Operating Instructions - Page 15
the spacer towards outsides until it clicks into place at the most outside arrow marker. Paper feed direction Preparations 2 Adjust the spacer to the paper size you want to use. On the bottom inside of the paper tray, there are three arrow markers showing the slider stopper positions for the three - Sony DPP-EX50 | Operating Instructions - Page 16
the printing surface. Fingerprints on the printing surface may result in imperfect printing. 4 Remove the protective sheet. Note You can use the protective sheet as cleaning sheet. Make sure to keep it together with the supplied cleaning cartridge. (page 124) 5 Close the paper tray cover. 16 GB - Sony DPP-EX50 | Operating Instructions - Page 17
it clicks into place. Notes • Do not remove the paper tray during printing. • To avoid paper jam or malfunctions of the printer, make sure the following before printing: - Do not write or type on the print paper. Use the oil ink pen to write on the paper after printing. You cannot type on the print - Sony DPP-EX50 | Operating Instructions - Page 18
• Searching an image (page 69) Video connecting cable (supplied) Notes • Before making connections, unplug the AC power cord of the printer and turn off a TV monitor. • When you do not use the supplied video connecting cable, use a commercially available video connecting cable shorter than 3 m. 18 - Sony DPP-EX50 | Operating Instructions - Page 19
clicks into place. For the varieties of "Memory Stick" that you can use with the printer, see page 127. AC power cord Note The AC power cord in the AC power cord for 100 to 240 V is different. Access indicator flashes while the printer is on. Insert it so that the b mark is on the upper left - Sony DPP-EX50 | Operating Instructions - Page 20
slowly. Note Do not attempt to insert a CompactFlash forcibly into or out of the slot. If you do so, the CompactFlash or the printer may be damaged. On using the memory card • To avoid potential loss of data, make a backup copy of the contents of the memory card. We cannot compensate for - Sony DPP-EX50 | Operating Instructions - Page 21
using inserted and no computer or digital camera is connected to the printer, you can display and print the printer's built-in images. Press of the printer's built-in image, and then press INPUT SELECT again. Image number Associated file/DPOF/ Protect indications* Print cartridge type (L:Postcard - Sony DPP-EX50 | Operating Instructions - Page 22
Basic printing operations 2 Press PRINT. Printing of the image selected with the cursor starts. Printing a selected image This section explains how to select an image and print it in full size. Borderless standard print 1 Press the arrow (B/b/V/v) button to move the yellow frame (cursor) to the - Sony DPP-EX50 | Operating Instructions - Page 23
, then press PICTURE. Printing using a TV monitor (MONITOR OUT mode) Notes • Do not remove the memory card while the access indicator is flashing; the memory card or printer may be damaged. • Never move or turn off the printer while it is printing; the print cartridge or paper may become stuck. If - Sony DPP-EX50 | Operating Instructions - Page 24
To display the preview of another image Press the arrow (B/b/V/v) button to display an image positioned left, right, upper, or below of the selected image in the image list. To print the previewed image Press PRINT. The previewed image is printed. Note Even if there are selected images and print - Sony DPP-EX50 | Operating Instructions - Page 25
Printing using a TV monitor (MONITOR OUT mode) 2 Press ENTER or CANCEL to set the print quantity. • To increase the print quantity one by one, press ENTER. • To - Sony DPP-EX50 | Operating Instructions - Page 26
the memory card while the access indicator is flashing; the memory card or printer may be damaged. • Never move or turn off the printer while it is printing; the print cartridge or paper may become stuck. If this happens, turn the printer off and then on, and resume printing from step 1 on page 24 - Sony DPP-EX50 | Operating Instructions - Page 27
numbers. Notes • For how to preset images for printing, see the manual of your digital camera. • Some types of digital camera do not support the DPOF function, or the printer may not support some of the functions of the digital camera. 1 Press AUTO PRINT repeatedly to display "INDEX," "DPOF," or - Sony DPP-EX50 | Operating Instructions - Page 28
To print DPOF-preset images: DPOF Only the DPOF-preset images are displayed with orange frames, each with the preset print quantity. DPOF indication To cancel selection (except for the DPOF printing) Press the arrow (B/b/V/v) button to move the yellow frame (cursor) to the image of which you want - Sony DPP-EX50 | Operating Instructions - Page 29
monitor. Tips • Even if the print cartridge runs out in the middle of printing, you can proceed with printing. If a message appears, follow the instructions on a TV monitor to replace the is complete and the print paper automatically emerges, remove the printed paper from the paper tray. 29 GB - Sony DPP-EX50 | Operating Instructions - Page 30
(page 34) • Reducing red-eye phenomenon (page 35) • Superimposing characters (page 36) x Saving and printing an edited image (pages 40 and 41) Buttons to be used in this section MENU ENTER Arrow (B/b/ V/v) button PRINT CANCEL 30 GB - Sony DPP-EX50 | Operating Instructions - Page 31
edit or press PICTURE to display its preview image. Cursor EDIT menu Printing using a TV monitor (MONITOR OUT mode) 2 Press MENU. The menu bar is menu icon Menu bar To exit the menu mode Press MENU again. The previous window is displayed. 3 Press the arrow (B/b) button to select (EDIT) and then - Sony DPP-EX50 | Operating Instructions - Page 32
Editing an image Enlarging and reducing the size of an image 1 Display the EDIT menu (page 31). 2 Press the arrow (B/b/V/v) button to select to enlarge an image or to reduce the size of it and then press ENTER. Each time you press ENTER, the image becomes larger or smaller: : up to 200% : up to 60% - Sony DPP-EX50 | Operating Instructions - Page 33
EDIT menu (page 31). 2 Press the arrow (B/b/V/v) button to select (Adjust) and then press ENTER. The Adjust menu is displayed. Adjust menu Adjustment tool Printing using a TV monitor (MONITOR OUT mode) Continued 33 GB - Sony DPP-EX50 | Operating Instructions - Page 34
faded colors. • Monochrome: Changes the image into a monochrome picture. • Paint: Makes the image look like a painted picture. • Fish-eye: Makes the image look like a photo taken with a fish-eye lens. • Clear Filter: Removes the filter from the image. 4 Press ENTER. The filter takes effect. 34 GB - Sony DPP-EX50 | Operating Instructions - Page 35
a TV monitor (MONITOR OUT mode) Reducing the red-eye phenomenon You can reduce the red-eye phenomenon of a subject shot using a flash. Note If you perform editions such as enlarging, reducing the size of, rotating or moving an image after the red-eye reduction adjustment, the - Sony DPP-EX50 | Operating Instructions - Page 36
the red-eye reduction adjustment. The adjustment takes place. To reset the adjustment Press CANCEL in step 5. The red-eye reduction is canceled and the window of step 2 is displayed. Superimposing characters You can enter up to 5 lines of characters to be superimposed on an image. 1 Display the EDIT - Sony DPP-EX50 | Operating Instructions - Page 37
Printing using a TV monitor (MONITOR OUT mode) 3 Select a font. The characters are input following: 1 Press the arrow (B/b/V/v) button to select "COLOR" and press ENTER. The color selection window is displayed. 2 Press the arrow (B/b/V/v) button to select the desired color and press ENTER. Note - Sony DPP-EX50 | Operating Instructions - Page 38
•To insert a character among the input characters Press the arrow (B/b/V/v) button to select "B" or "b" on the window and then press ENTER repeatedly until the cursor (|) moves to the position where you want to insert a character. 6 After you finish entering the remaining characters, - Sony DPP-EX50 | Operating Instructions - Page 39
input characters are registered as a message. To load a registered message In step 3 above, select "Load" to display the window used for selecting a message. Printing using a TV monitor (MONITOR OUT mode) 3 Press the arrow (B/b) button to select "Save" and then press ENTER. The message selection - Sony DPP-EX50 | Operating Instructions - Page 40
box to notify the new file number is displayed. 4 Press ENTER. Note While saving the image, do not turn off the printer or remove the memory card from the printer. The memory card may be damaged. The dialog box for setting date is displayed. You can save the date with the image - Sony DPP-EX50 | Operating Instructions - Page 41
done in the EDIT window and reset the edited displayed. Even while editing an image, you can change some printer settings or option menu items such as "Finish," "Date edited image, follow the steps in "Saving an edited image." Printing using a TV monitor (MONITOR OUT mode) 2 Set the print quantity. - Sony DPP-EX50 | Operating Instructions - Page 42
the image of the "Memory Stick" or CompactFlash card. This section explains how to make a print as follows: Buttons to be used in this section MENU ENTER Arrow (B/b/ V/v) button PRINT CANCEL Displaying the Creative Print menu (page 43) x Making a Creative print • Making a free layout print (page - Sony DPP-EX50 | Operating Instructions - Page 43
Printing using a TV monitor (MONITOR OUT mode) Displaying the Creative Print menu 1 Press MENU. The menu bar is displayed. Creative Print menu icon Menu bar To exit the menu mode Press MENU. The previous window is displayed. 2 Press the arrow (B/b) button to select (Creative Print) and then press - Sony DPP-EX50 | Operating Instructions - Page 44
selection window is displayed. 5 Press the arrow (B/b/V/v) button to select (Image) and press ENTER. The frame selection window is displayed to place wallpaper on the image, select "No Wallpaper." The preview window of the selected wallpaper is displayed. Selected wallpaper 6 Press the arrow - Sony DPP-EX50 | Operating Instructions - Page 45
. Adjustment tools 9 Press the arrow (B/b/V/v) button to select "Execute" and press ENTER. The window used for adjusting the framed image size and position is displayed. Adjustment tools Printing using a TV monitor (MONITOR OUT mode) 8 Press the arrow (B/b/V/v) button to select the desired - Sony DPP-EX50 | Operating Instructions - Page 46
" and press ENTER. The framed image is displayed. Using the items in this window, you can add your favorite effects on the print the arrow (B/b/V/v) button to select (Stamp) and press ENTER. The stamp selection window is displayed. 12 Check the preview, then save and print your Creative print. - Sony DPP-EX50 | Operating Instructions - Page 47
. 3 Press the arrow (B/b/V/v) button to select the desired color and then press ENTER. The window used for adjusting the message size and position is displayed. To cancel the operation Press CANCEL. The window of the previous step is displayed. 4 Adjust the size and position of the message. For - Sony DPP-EX50 | Operating Instructions - Page 48
arrow (B/b/V/v) button to select (Calendar) and press ENTER. The window used for selecting a calendar type is displayed. 2 Press the arrow (B/b/V/v) button to select the desired calendar type and press ENTER. The calendar setting window is displayed. 3 Set the calendar. Press the arrow (V/v) button - Sony DPP-EX50 | Operating Instructions - Page 49
4 Press the arrow (B/b/V/v) button to select "Execute" and then press ENTER. The window used for adjusting the calendar size and position is displayed. x Superimposing characters Press the arrow (B/b/V/v) button to select (Text) and press ENTER. The keyboard is displayed. - Sony DPP-EX50 | Operating Instructions - Page 50
The preview of the selected template is displayed. Image area Calendar area . 3 Press the arrow (B/b) button to select the print size, then press ENTER. The window used for selecting the calendar type is displayed. Tip You can select and set an image area or calendar area in any order. 5 Select an - Sony DPP-EX50 | Operating Instructions - Page 51
a TV monitor (MONITOR OUT mode) 2 Press the arrow (B/b/V/v) button to select the desired image, then press ENTER. The window used for adjusting the image size and position is displayed. Adjustment tools 3Press the arrow (B/b/V/v) button to select the desired adjustment tool, then press ENTER. Item - Sony DPP-EX50 | Operating Instructions - Page 52
Color of Day Set the color of Sunday and Saturday to be displayed in the calendar. Press the arrow (b) button and then the arrow (V/v) button to select the desired color for Sunday and Saturday. Then press ENTER. 2 Set the calendar. Press the arrow (V/v) button to select the following items and - Sony DPP-EX50 | Operating Instructions - Page 53
Printing using a TV monitor (MONITOR OUT mode) Making a card You can add a greeting ). 2 Press the arrow (B/b/V/v) button to select "Card", then press ENTER. The print size selection window is displayed. 4 Press the arrow (B/b/V/v) button to select the desired template and press ENTER. The preview - Sony DPP-EX50 | Operating Instructions - Page 54
to select the desired image, then press ENTER. The window used for adjusting the image size and position is displayed. Adjustment button to select the message area, then press ENTER. The message selection window is displayed. 3Press the arrow (B/b/V/v) button to select the desired adjustment tool, - Sony DPP-EX50 | Operating Instructions - Page 55
Superimposing characters" on pages 36 to 39. 9 Check the preview, then save and print your Creative print. For details, see page 58. Printing using a TV monitor (MONITOR OUT mode) 8 After you enter and adjust the characters, press the arrow (V/ v) button to select "Execute", then press ENTER. The - Sony DPP-EX50 | Operating Instructions - Page 56
the Creative Print menu (page 43). 2 Press the arrow (B/b/V/v) button to select "Split Image", then press ENTER. The print size selection window is displayed. 4 Press the arrow (B/b/V/v) button to select the desired template, then press ENTER. The preview of the selected template is displayed - Sony DPP-EX50 | Operating Instructions - Page 57
, select "No Frame." The image list is displayed. 7 Press the arrow (B/b/V/v) button to select the desired image, and then press ENTER. The window used for adjusting the image position is displayed. Adjustment tools Item Procedures Each time you press ENTER, the image becomes larger. Each time you - Sony DPP-EX50 | Operating Instructions - Page 58
box to notify the new file number is displayed. 4 Press ENTER. Note While saving the image, do not turn off the printer or remove the memory card from the printer. The memory card may be damaged. The dialog box for setting date is displayed. You can save the date with the image - Sony DPP-EX50 | Operating Instructions - Page 59
Printing using a TV monitor (MONITOR OUT mode) Printing an edited image 1 Press PRINT. The an image Press MENU. The menu bar is displayed. Even while editing an image, you can change some printer settings or option menu items such as "Finish," "Date Print" or "Beep." Exiting the Creative Print menu - Sony DPP-EX50 | Operating Instructions - Page 60
The SET UP menu allows you to change various print settings listed on pages 61 and 62. Buttons to be used in this section 2 Press the arrow (B/b) button to select (SET UP) and then press ENTER. The SET then press ENTER. To exit the menu mode Press MENU. The previous window is displayed. 60 GB - Sony DPP-EX50 | Operating Instructions - Page 61
Printing using a TV in PC mode, the Auto Fine Print 3 setting with the printer driver has priority over the setting here. In the LCD and PictBridge prints with Small (3.5 x 4 inch) size print paper. • When printing a standard 4:3 picture shot by a digital camera, the top and bottom edges of the - Sony DPP-EX50 | Operating Instructions - Page 62
system) format. To make a print with the date of shooting, shoot an image in the DCF file format. When the image is saved with the printer, the date of saving is printed. OFF* Prints an image without the date. Adjusts the colors and sharpness of a print. Press the arrow (B/b) button to - Sony DPP-EX50 | Operating Instructions - Page 63
Changing the printer preferences (OPTION) The OPTION menu allows you to change the preferences listed on page 64. Buttons to be used in this section 2 Press the arrow (B/b) button and cannot be selected. Printing using a TV monitor (MONITOR OUT mode) To exit the menu mode Press MENU. The previous - Sony DPP-EX50 | Operating Instructions - Page 64
as index) data will be displayed as an icon. In the image list window, the images without thumbnail (miniature image used as index) data will be displayed as its original image. In the image list window, image information (file type, shooting conditions, etc.) will be displayed. In the image list - Sony DPP-EX50 | Operating Instructions - Page 65
Memory Stick" or CompactFlash card. You can also manually print an image being displayed. Buttons to be used in this section 2 Press the arrow (B/b) button bar SLIDESHOW menu icon To exit the menu mode Press MENU. The previous window is displayed. 3 Press the arrow (V/v) button to select "Switch," - Sony DPP-EX50 | Operating Instructions - Page 66
images that are not displayed as thumbnails because they are damaged or for some other reason. Printing a displayed image While playing the slideshow manually, you can print a displayed image. 1 Press PRINT. The dialog box to specify the print quantity is displayed. 2 Set the print quantity. • To - Sony DPP-EX50 | Operating Instructions - Page 67
using a TV monitor (MONITOR OUT mode) Deleting images You can delete images in the "Memory Stick" or CompactFlash card. You can also format the "Memory Stick." Notes • During deleting or formatting, do not turn off the printer menu mode Press MENU. The previous window is displayed. 2 Press the arrow - Sony DPP-EX50 | Operating Instructions - Page 68
3 Press the arrow (V/v) button to select "Delete Image" and press ENTER. The image list is displayed. A trash icon is displayed on the image selected with the cursor before you pressed MENU in step 1. Trash icon 6 Press the arrow (B/b) button to select "OK" and press ENTER. The selected image is - Sony DPP-EX50 | Operating Instructions - Page 69
card for an image by file number or date. Buttons to be used in this section MENU ENTER Arrow (B/b/ V/v) button CANCEL 1 Press MENU. The menu bar is displayed. Menu bar IMAGE SEARCH menu icon Printing using a TV monitor (MONITOR OUT mode) 4 Press the arrow (B/b) button to - Sony DPP-EX50 | Operating Instructions - Page 70
to search for: Starting file number Ending file number 3 Press the arrow (V/v) button to select the search key and press ENTER. The dialog box used for specifying the criteria for searching is displayed. 4 Press the arrow (B/b) button to select an item and press the arrow (V/v) button to specify - Sony DPP-EX50 | Operating Instructions - Page 71
Printing using a TV monitor (MONITOR OUT mode) • When you select "By Folder No.": Specify the folder number of the images you want to search for: 6 Press ENTER. - Sony DPP-EX50 | Operating Instructions - Page 72
lights in red. To the wall outlet Image numbers To print using the printer's LCD display, you need to specify the image number for each or check the image numbers with your digital camera. The display of characters on the LCD The following can be displayed on the printer`s LCD. (, ), +, -, number - Sony DPP-EX50 | Operating Instructions - Page 73
slowly. Note Do not attempt to insert a CompactFlash forcibly into or out of the slot. If you do so, the CompactFlash or the printer may be damaged. On using the memory card • To avoid potential loss of data, make a backup copy of the contents of the memory card. We cannot compensate for - Sony DPP-EX50 | Operating Instructions - Page 74
Printing images Printing a selected image This section explains how to specify an image number and print the image. 1 Turn on the printer. The ON/STANDBY indicator lights in green. 3 Press INPUT SELECT repeatedly to select the memory card containing the images that you want to print. Display - Sony DPP-EX50 | Operating Instructions - Page 75
(V/v) button to select the folder (when multiple folders exist) and press the arrow (B/b) button to select the desired image number. Printing using the printer's LCD display (LCD mode) Print quantity increases or decreases. Image number 5 Press ENTER or CANCEL to set the print quantity. • To - Sony DPP-EX50 | Operating Instructions - Page 76
printer may be damaged. • Never move or turn off the printer while it is printing; the print cartridge or paper may become stuck. If this happens, turn the printer GB • DPOF preset image printing You can print all the DPOF (Digital Print Order Format) preset images. The images are printed with the - Sony DPP-EX50 | Operating Instructions - Page 77
manual of your digital camera. • Some types of digital camera do not support the DPOF function, or the printer may not support some of the functions of the digital camera. 1 Turn on the printer. The ON/STANDBY indicator of the printer using the printer's LCD display (LCD mode) Continued 77 GB - Sony DPP-EX50 | Operating Instructions - Page 78
INDEX, DPOF, or ALL disappears from the LCD display. Tips • Even if the print cartridge or print paper runs out in the middle of printing, you can continue printing by replacing the print cartridge or inserting print paper. • When the "Date Print" is set to "ON" with the menu, the recorded date - Sony DPP-EX50 | Operating Instructions - Page 79
using the printer's LCD display (LCD mode) Changing the print settings By connecting your printer to a TV monitor, you can display SET UP and OPTION menus and change the print settings. 1 Connect the printer to a TV monitor (page 18). 2 Turn on the printer Exif Print-compliant digital camera to its - Sony DPP-EX50 | Operating Instructions - Page 80
OPTION menu Listing Order You can select the order of the images to be displayed. (Ascending*/ Descending) Beep You can select whether or not operation and warning beeps sound. (On*/Off). * Factory settings For the details on how to make settings, see pages 60 and 63. 80 GB - Sony DPP-EX50 | Operating Instructions - Page 81
. The settings and operations that are necessary before connection differ depending on the digital camera. For details, see the operating instructions of the digital camera you use. 2 Connect the AC power cord of the printer to a wall outlet. The ON/STANDBY indicator lights in red. To the wall - Sony DPP-EX50 | Operating Instructions - Page 82
. The ON/STANDBY indicator of the printer lights in green. 4 Connect a PictBridge- compliant digital camera to the printer. Use the USB connecting cable supplied with the digital camera. To the PictBridge connector (USB ATYPE) To the PictBridge connector (USB) Notes • The connector is designed - Sony DPP-EX50 | Operating Instructions - Page 83
according to the print settings with the SET UP menu (page 60). Note • If you replace a print cartridge while the printer is connected to a digital camera, an image may not be printed properly. If this occurs, make the paper size setting of the digital camera again or disconnect and then connect the - Sony DPP-EX50 | Operating Instructions - Page 84
printing. (Photographical*/ Vivid/Off) Exif Print You can turn on or off the automatic adjustments of the images shot by an Exif Print-compliant digital camera to its optimum picture quality. (On*/Off) Borders You can select border or borderless prints. (Yes/No*) Finish You can select a glossy - Sony DPP-EX50 | Operating Instructions - Page 85
this manual. Installing the software System requirements To use the supplied software, your PC must meet the following system requirements: System requirements for the printer driver OS: Microsoft Windows 98SE/Windows Me/ Windows 2000 Professional/ Windows XP Home Edition/ Windows XP Professional - Sony DPP-EX50 | Operating Instructions - Page 86
(16-bit) or more On the supplied CD-ROM The supplied CD-ROM contains the following software: • Printer driver for DPP-EX50: The software describes the printer's requirements and enables printing from the computer. • PictureGear Studio: Sony's original software application that allows you to handle - Sony DPP-EX50 | Operating Instructions - Page 87
supplied CD-ROM into the CD-ROM drive of your computer. The setup starts automatically and the installation window is displayed. Note In case the installation window is not automatically displayed, double-click the "Setup.exe" of the CD-ROM. 4 Click "Installing Printer Driver." The "Sony DPP-EX50 - Sony DPP-EX50 | Operating Instructions - Page 88
agreement", you cannot proceed to the next step. The "Printer connection" dialog box is displayed. 8 Connect the AC power cord of the printer to the AC outlet. The ON/STANDBY indicator lights in red. To the wall outlet The "Ready to install the program" dialog box is displayed. AC power cord - Sony DPP-EX50 | Operating Instructions - Page 89
. Windows PC Note Use a commercially available A-B TYPE USB-compatible connecting cable shorter than 3m in length. The type of USB cable you should use may differ depending on the computer. For details, see the instructions manual of your computer. When you connect a PC The printer automatically - Sony DPP-EX50 | Operating Instructions - Page 90
After installation, the "Sony DPP-EX50" is not set as the default printer. Set the printer you use for each application. • Before you use the printer, read the Readme file (the Readme folder of the CDROMcEnglish foldercReadme.txt). Checking the installation Open the "Printers and Faxes" (Windows XP - Sony DPP-EX50 | Operating Instructions - Page 91
2 Insert the supplied CD-ROM into the CD-ROM drive of your computer. The setup starts automatically and the installation window is displayed. Note In case the installation window is not automatically displayed, double-click the "Setup.exe" of the CD-ROM. 3 Click "Installing Printer Driver." 4 Click - Sony DPP-EX50 | Operating Instructions - Page 92
check if the "DPP-EX50" is displayed. If not, the printer driver is successfully removed. Installing the PictureGear Studio Install the PictureGear Studio to your computer. 1 Turn on your computer and start Windows. • When installing or uninstalling the software in Windows® 2000 Professional, log - Sony DPP-EX50 | Operating Instructions - Page 93
2.7 and Jet 1.0 should be installed during the PictureGear Studio installation. If so, the dialog box used for installing the programs will be displayed automatically; Follow the on-screen instructions proceed with the installation. 3 Double-click "Installing PictureGear Studio." The dialog box to - Sony DPP-EX50 | Operating Instructions - Page 94
required when you uninstall or re-install the PictureGear Studio. Keep it in good order for possible future use. • The PictureGear Studio supplied with the DPP-EX50 has the following limitations: - In PhotoCollection, you cannot select paper other than "Sony." - In PrintStudio, you cannot create or - Sony DPP-EX50 | Operating Instructions - Page 95
Studio When the software becomes unnecessary, remove it from your PC hard disk as follows: 1 Remove the USB cable between the printer and the PC. 2 Insert the supplied CD-ROM into the CD-ROM drive of your computer. The setup starts automatically and the installation window is displayed. Note - Sony DPP-EX50 | Operating Instructions - Page 96
photo category folder. For explanations, "Sample" folder is selected in the following example. The print paper selection dialog box is displayed. Note Make sure to set the print quantity in this dialog box. Even if you set the number of copies in "Paper/Output" tab of the "Sony DPP-EX50 Properties - Sony DPP-EX50 | Operating Instructions - Page 97
the paper size, the print dialog box is displayed. 7 In the "Printer" drop-down list box, select "Sony DPP-EX50" and then click "Properties". In the "Printer" drop-down list box, select the printer that you actually use. Items Functions Print All All the photos selected in the "Select Photo" window - Sony DPP-EX50 | Operating Instructions - Page 98
an image shot with a Exif Print (Exif 2.2)compliant digital camera will be adjusted and printed with its optimum picture printer is displayed. 8 In the "Paper/Output" tab, specify the paper size. Items Functions Paper size From the drop-down list box, select the paper size you actually use for - Sony DPP-EX50 | Operating Instructions - Page 99
Pictures: when a photograph or pictures are printed. Note The ICM setting is valid only when you are using an ICMcompliant application. When printing from an application software that does not support the ICM system, an image may be printed with incorrect colors. Continued 99 GB Printing from a PC - Sony DPP-EX50 | Operating Instructions - Page 100
an image shot with a Exif Print (Exif 2.2)-compliant digital camera. The printer driver uses the color conversion and Exif shooting data to adjust the •Red-eye reduction is enabled only when you have installed the software from "Setup.exe" in the supplied CD-ROM. For the details see the Readme.txt. - Sony DPP-EX50 | Operating Instructions - Page 101
" is checked in step 8 The preview window is displayed. Check the adjustment results and then click "Print." Printing from a PC (PC mode) The confirmation dialog box for printing is displayed. 12Make sure that the specified print paper and print cartridge are loaded and click "OK". Printing starts - Sony DPP-EX50 | Operating Instructions - Page 102
printing job on process, which may cause a paper jam. 102 GB Printing from other application software You can use a commercially-available application software to print an image from the DPP-EX50. Select "DPP-EX50" in the print dialog box and select the print paper size in the page setup dialog box - Sony DPP-EX50 | Operating Instructions - Page 103
may have priority over the setting specified in the printer driver dialog box. Exif Print Settings in the "Graphics" tab The Exif Print setting in the "Color reproduction/Picture quality" section supports the PictureGear Studio only. If you use other application to print an image with this option - Sony DPP-EX50 | Operating Instructions - Page 104
Troubleshooting If trouble occurs If you run into any problems using the printer, use the following guidelines to solve the problem. If the problem persists, consult your Sony MONITOR OUT indicator, so that the printer status will be displayed on the and try to solve the problem. (.page 120) • Is - Sony DPP-EX50 | Operating Instructions - Page 105
SELECT when no memory card is inserted? c The images contained in the printer are displayed (demonstration mode). You can print these images or use them to create a print. Some images in the image list are not mark is displayed again, you cannot print it with the printer. Troubleshooting 105 GB - Sony DPP-EX50 | Operating Instructions - Page 106
If there are more than 9 999 images stored in a memory card, use the PC or PictBridge mode to display and handle the remaining images. c card. • Did you change the file name of the image with your PC? c The printer cannot display the images saved in a folder of the 8th or higher hierarchy. c When - Sony DPP-EX50 | Operating Instructions - Page 107
aspect ratio of an image shot with a digital camera is 3:4. When an image is edited or paper properly set in the paper tray? Cause/Solutions c If print paper is not properly loaded, the printer may develop trouble. Check the following: • Is the correct set of print paper and print cartridge - Sony DPP-EX50 | Operating Instructions - Page 108
was not designed for the printer? Cause/Solutions c Use print paper designed for the printer. If you use incompatible print paper, the printer may develop trouble. (.page 12) • Is the print paper jammed? c When the printer cannot feed the print paper, the print paper error indicator ( ) will turn - Sony DPP-EX50 | Operating Instructions - Page 109
-compressed JPEG file may be also recorded. As the printer does not support the RAW file format, it may use the JPEG file to print an image. A RAW file can be printed from a PC. For details, see the operating instructions of the digital camera you are using. What is a RAW file? A RAW file is an - Sony DPP-EX50 | Operating Instructions - Page 110
for image processing software including the Adobe Photoshop. The AdobeRGB, an optional color space extended with the DCF 2.0, determines the color ranges widely used in printing industry. For whether or not a digital camera supports the AdobeRGB, see the operating instructions of the digital camera - Sony DPP-EX50 | Operating Instructions - Page 111
"On." (.page 62) cThe "Date Print" function of this unit supports an image that is compatible with the DCF standards. The date is 61) c Place the print paper in the direction of the arrow. (.page 16) c Depending on the type of digital camera used, the aspect ratio of the ) Troubleshooting 111 GB - Sony DPP-EX50 | Operating Instructions - Page 112
if it has been rotated or processed using your digital camera. This is not because of trouble with the printer, but because the image was rewritten with your digital camera. c The print head or paper path may be soiled. Use the supplied cleaning cartridge to clean the head and path. (.page - Sony DPP-EX50 | Operating Instructions - Page 113
size print paper. (.page 61) • Are you operating the Creative Print menu? Operations are rejected with beeps. c In the Creative Print menu, templates are used and you cannot select border/ borderless prints. c Beeps sound to notify you that the operation is invalid. Troubleshooting Saving or - Sony DPP-EX50 | Operating Instructions - Page 114
solve the problem, contact Sony service facilities or your Sony dealer. • Is the paper/cartridge error ( / ) indicator lit or is an error message displayed in the MONITOR OUT mode? c Paper is jammed. See "If paper jams" (.page 124) and remove jammed paper from the printer. If jammed paper cannot - Sony DPP-EX50 | Operating Instructions - Page 115
and remove jammed paper from the printer. If jammed paper cannot be removed, contact the Sony service facilities. c If no indicator is lit, the thermal head may be overheated. Leave the printer until the head cools down and the printer resumes printing. Connecting with a digital camera Symptom The - Sony DPP-EX50 | Operating Instructions - Page 116
PC. I lost the supplied CD-ROM and want to obtain a new one. Cause/Solutions c The printer does not provide the function for viewing the memory card images from the printer. c Please download the printer driver from the Customer support home page (.page 132). Or contact your Sony dealer. 116 GB - Sony DPP-EX50 | Operating Instructions - Page 117
. If an error message is displayed on your PC, check the contents and remove the source of the problem. Then install the printer driver again. For details on the error contents, see the operating instructions of your PC. • Is there an anti-virus program or other program running on the system? c If - Sony DPP-EX50 | Operating Instructions - Page 118
If the printer shows trouble, do the following: - Turn off the ON/STANDBY button and then turn it on again. - Disconnect the power cable, wait for 5 to 10 seconds, and then connect the cable again. - Restart your computer. If these do not solve the problem, consult with your Sony dealer or service - Sony DPP-EX50 | Operating Instructions - Page 119
application software you are using supports ICM. Preview image does not reflect the print settings in the "Graphics" tab of the "DPP-EX50 Properties" dialog box. c The print settings adjusts the printer itself and cannot influence the preview image. Print quantity specified in the "Paper/Output - Sony DPP-EX50 | Operating Instructions - Page 120
solve the problem. Printer Error messages A printer error has occurred. Meaning/Solutions c An error has occurred with the printer. Unplug the AC power cord of the printer, connect it again and then try operating again. If this occurs again, consult with your Sony dealer or Sony service facilities - Sony DPP-EX50 | Operating Instructions - Page 121
error in the compact flash card Write error in the compact flash card Image data read error An error occurred during saving. Failed in saving. Troubleshooting 121 GB - Sony DPP-EX50 | Operating Instructions - Page 122
size. (.page 13) Wrong print cartridge. Set the print cartridge for ### size. Press [PRINT] again. c The print size you specified in the Creative Print menu does not match the print cartridge actually loaded in the printer. Set a print cartridge and print paper of the displayed size. (.pages 13 - Sony DPP-EX50 | Operating Instructions - Page 123
the print paper for the identical size. (.page 15) Paper jam Remove the print paper and try printing again. c Paper jams. See "If paper jams" (page 124) and remove jammed paper from the printer. If the jammed paper cannot be removed, contact the Sony service facilities. Troubleshooting 123 GB - Sony DPP-EX50 | Operating Instructions - Page 124
take out the paper tray to remove the jammed paper. Pull out the jammed paper slowly. Take out the paper tray to remove the jammed paper. Cleaning the inside of the printer If white lines or dots are printed on the pictures, use the cleaning cartridge supplied with the printer and the protective - Sony DPP-EX50 | Operating Instructions - Page 125
the cleaning cartridge and protective sheet from the printer. When cleaning ends Set the print cartridge and print paper into the printer. Notes • not place the protective sheet on the print paper and carry out cleaning, which may cause paper jam or other troubles. • If a cleaning does not improve - Sony DPP-EX50 | Operating Instructions - Page 126
condensation occurs, unplug the AC power cord of the printer and do not use the printer for at least one hour. On transport When you transport the printer, remove the print cartridge, paper tray, the memory card from the printer and put the printer and its peripherals in the original box with the - Sony DPP-EX50 | Operating Instructions - Page 127
not use any type of solvent, such as alcohol or benzine, which may damage the finish. On restrictions on duplication If duplicating documents with the printer, pay "MagicGate" copyright protection technology and supports high-speed data transfer. It can be used with all the "Memory Stick"-compatible - Sony DPP-EX50 | Operating Instructions - Page 128
Stick PRO Duo"*2 OK*1 OK*1 "Memory Stick-ROM" OK NO *1 The printer cannot read/write the data subject to "MagicGate" copyright protection. *2 Use the adaptor designed for the "Memory Stick Duo" you use. *3 It does not support parallel interface high-speed data transfer. We cannot guarantee the - Sony DPP-EX50 | Operating Instructions - Page 129
the "MagicGate" technology and encode the data they exchange. The printer does not support the "MagicGate" standards and cannot read or write the data subject to the "MagicGate" copyright protection. Notes on use • When you slide the write protect switch to the write protect position, you cannot - Sony DPP-EX50 | Operating Instructions - Page 130
direct sunlight, or a place near a heater. - direct sunlight - high humidity - corrosive substances • When formatting a "Memory Stick", use the format function of the printer or your digital camera. If you format a "Memory Stick" with your computer, images may not be displayed properly. About the - Sony DPP-EX50 | Operating Instructions - Page 131
Card, or Smart Media card, use a commercially available CompactFlash card adaptor that is compatible with the card. Insert the card into the adaptor and then insert it into the printer. For how to install the card and adaptor, refer to the operating instructions of the CompactFlash card adaptor - Sony DPP-EX50 | Operating Instructions - Page 132
cartridge/Print Paper See "Preparing the printing pack (not supplied)" printer functions may be limited for a TIFF file. Customer support home page The latest support information is available at the following homepage addresses: For the customers in the U.S.A.: http://www.sel.sony.com/SEL/ service - Sony DPP-EX50 | Operating Instructions - Page 133
Printing range Postcard size 152.4 mm/6 inch (2 418 dots) 95.5 mm/ 3 7/8 inch (1 516 dots) 101.6 mm/ 4 inch (1 612 dots) 3.5 x 5 inch size 146.3 mm/5 7/8 inch (2 322 dots) 127 mm/5 inch (2 015 dots) 83.9 mm/ 3 3/8 inch (1 332 dots) 89 mm/3 1/2 inch (1 412 dots) Small size 122 mm/4 7/8 inch - Sony DPP-EX50 | Operating Instructions - Page 134
the previous page are those when an image with a 2:3 aspect ratio is printed. Margin sizes Aspect ratio of the image to be printed Paper size Postcard size right/left: top/bottom: 3.5 x 5 inch size right/left: Small size top/bottom: right/left: top: bottom: 2:3 4.6 mm/ 3/16 inch 3.1 mm - Sony DPP-EX50 | Operating Instructions - Page 135
-use printer. The printer supports DPOF printing and can automatically print the preset number of copies of the DPOF preset images. Exif 2.2 (Exif Print) Exif (Exchangeable image file format for digital cameras) Print is a global standard for digital photo printing. A digital camera supporting Exif - Sony DPP-EX50 | Operating Instructions - Page 136
Lists of templates and patterns in Creative Print (MONITOR OUT mode only) Free layout templates Calendar patterns Frames Stamps 136 GB - Sony DPP-EX50 | Operating Instructions - Page 137
Calendar templates x Postcard size x 3.5 x 5 inch size x Small size Card templates x Postcard size/3.5 x 5 inch size x Small size Split-image templates x Postcard size Messages x 3.5 x 5 inch size Additional information 137 GB - Sony DPP-EX50 | Operating Instructions - Page 138
x Small size Frames 138 GB - Sony DPP-EX50 | Operating Instructions - Page 139
indicated in the parentheses. Printer 1 MONITOR OUT button (pages Paper tray compartment cover (page 15) qj PictBridge connector (page 82) Connect the PictBridge-compliant digital camera. qk Cartridge compartment cover (page 13) ql Print cartridge (pages 12, 13) (Not supplied) w; Print cartridge - Sony DPP-EX50 | Operating Instructions - Page 140
Paper tray 1 Ventilation holes 2 VIDEO OUT (output) connector (page 18) Connects to the video input of your TV monitor. 3 USB connector (pages 82, 89) Connects to the USB connector of your computer. 4 AC power cord 1 Cover (page 15) 2 Spacer (page 15) 140 GB - Sony DPP-EX50 | Operating Instructions - Page 141
Free layout print 43 I INDEX 27, 76 INPUT SELECT 21, 74 Inserting Paper tray 17 Print cartridge 13 Print paper 15 Installing Picture Gear Studio 92 Printer driver 87 System requirements 85 L LCD mode 72 M "Memory Stick" Note on use 129 Write protect 129 Inserting/Removing 19, 73 Types 127 MENU 31 - Sony DPP-EX50 | Operating Instructions - Page 142
card size 12 Print cartridge 12, 13 Print paper 12, 15 Print quantity 25 Print settings (SET UP) 60 Printer preferences (Options) 63 Supplied accessories 11 System requirements 85 T Templates 136 Thumbnails 135 Transport 126 Troubleshooting 104 U Uninstalling Picture Gear Studio 95 Printer driver - Sony DPP-EX50 | Operating Instructions - Page 143
Additional information 143 GB - Sony DPP-EX50 | Operating Instructions - Page 144
Sony Corporation Printed in Korea
-
 1
1 -
 2
2 -
 3
3 -
 4
4 -
 5
5 -
 6
6 -
 7
7 -
8
-
9
-
10
-
11
-
12
-
13
-
14
-
15
-
16
-
17
-
18
-
19
-
20
-
21
-
22
-
23
-
24
-
25
-
26
-
27
-
28
-
29
-
30
-
31
-
32
-
33
-
34
-
35
-
36
-
37
-
38
-
39
-
40
-
41
-
42
-
43
-
44
-
45
-
46
-
47
-
48
-
49
-
50
-
51
-
52
-
53
-
54
-
55
-
56
-
57
-
58
-
59
-
60
-
61
-
62
-
63
-
64
-
65
-
66
-
67
-
68
-
69
-
70
-
71
-
72
-
73
-
74
-
75
-
76
-
77
-
78
-
79
-
80
-
81
-
82
-
83
-
84
-
85
-
86
-
87
-
88
-
89
-
90
-
91
-
92
-
93
-
94
-
95
-
96
-
97
-
98
-
99
-
100
-
101
-
102
-
103
-
104
-
105
-
106
-
107
-
108
-
109
-
110
-
111
-
112
-
113
-
114
-
115
-
116
-
117
-
118
-
119
-
120
-
121
-
122
-
123
-
124
-
125
-
126
-
127
-
128
-
129
-
130
-
131
-
132
-
133
-
134
-
135
-
136
-
137
-
138
-
139
-
140
-
141
-
142
-
143
-
144
 |
 |

Before you begin
Preparations
Printing using a
TV monitor
(MONITOR OUT mode)
Printing using the printer's
LCD display
(LCD mode)
Printing from a PictBridge
camera (PictBridge mode)
Printing from a PC
(PC mode)
Troubleshooting
Additional information
3-207-729-
13
(1)
2004 Sony Corporation
Operating Instructions
Before operating this printer, please read
this manual thoroughly and retain it for
future reference.
Digital Photo Printer
DPP EX50
Digital Photo
Printer
DPP-EX50