Sony HVR1500A Product Manual (HVE-1500A Operating Manuals) - Page 86
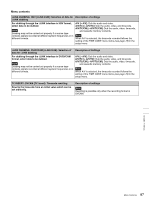
Auto mode execution (AUTO FUNCTION) menu, SYSTEM SEL [System Sel]: Settings related to system
 |
View all Sony HVR1500A manuals
Add to My Manuals
Save this manual to your list of manuals |
Page 86 highlights
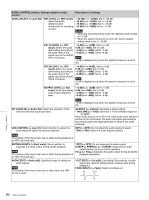
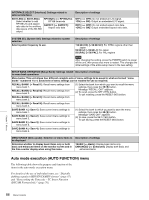
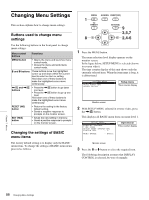
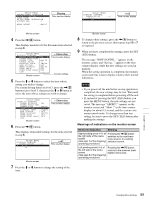
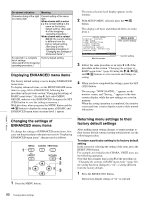
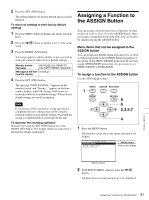
INTERFACE SELECT [Interface]: Settings related to external interfaces SDI H-ANC [> SDI H-ANC]: Select whether to add RP188 LTC and aspect ratio data to the ancillary data space of the SD-SDI output. RP188LTC [>> RP188LTC]: RP188 timecode ASPECT [>> ASPECT]: Aspect ratio data Description of settings OFF [>>> OFF]: Do not embed an LTC signal. *ON [>>> ON]: Output an embedded LTC signal. OFF [>>> OFF]: Do not embed aspect ratio data. *ON [>>> ON]: Output embedded aspect ratio data. SYSTEM SEL [System Sel]: Settings related to system selection Select system frequency to use. Description of settings *59.94i (UC) [> 59.94i UC]: For NTSC regions other than Japan 59.94i (J) [> 59.94i J]: For Japan 50i (PAL) [> 50i PAL]: For PAL regions Note After changing the setting, press the POWER switch to power off the unit, then press once more to restart. This changes the initial settings of the entire setup menu to the new setting. SETUP BANK OPERATION [Setup Bank]: Settings related Description of settings to menu bank operations Menu banks: This unit allows four different complete sets of menu settings to be saved in what are termed "menu banks" numbered 1 to 4. Saved sets of menu settings can be recalled for use as required. RECALL BANK1 [> Recall 1]: Recall menu settings from menu bank 1. RECALL BANK2 [> Recall 2]: Recall menu settings from menu bank 2. RECALL BANK3 [> Recall 3]: Recall menu settings from menu bank 3. (1) Select the bank from which you want to recall the menu settings, then press the ,/B button. Message "RECALL OK?" appears. (2) To recall, press the SET (YES) button. To quit recalling, press the RESET (NO) button. RECALL BANK4 [> Recall 4]: Recall menu settings from menu bank 4. SAVE BANK 1 [> Save 1]: Save current menu settings to menu bank 1. SAVE BANK 2 [> Save 2]: Save current menu settings to menu bank 2. SAVE BANK 3 [> Save 3]: Save current menu settings to menu bank 3. (1) Select the bank to which you want to save the menu settings, then press the ,/B button. Message "SAVE OK?" appears. (2) To save, press the SET (YES) button. To quit saving, press the RESET (NO) button. SAVE BANK 4 [> Save 4]: Save current menu settings to menu bank 4. MENU GRADE [Menu grade]: Selection of menu items to be displayed Determine whether to display basic items only or both basic and enhanced items on the monitor screen and in the time counter display when using the menu. Description of settings *BASIC [>> Basic]: Display basic items only. ENHANCED [>> Enhanced]: Display both basic and enhanced items. Auto mode execution (AUTO FUNCTION) menu The following table shows the purpose and function of the items in the auto mode execution menu. For details of the use of individual items, see "Digitally dubbing signals in HDV/DVCAM/DV format" (page 67) and "Rerecording the Timecode - TC Insert Function (DVCAM Format Only)" (page 70). Chapter 7 Menus 86 Menu Contents
-
 1
1 -
2
-
3
-
4
-
5
-
6
-
7
-
8
-
9
-
10
-
11
-
12
-
13
-
14
-
15
-
16
-
17
-
18
-
19
-
20
-
21
-
22
-
23
-
24
-
25
-
26
-
27
-
28
-
29
-
30
-
31
-
32
-
33
-
34
-
35
-
36
-
37
-
38
-
39
-
40
-
41
-
42
-
43
-
44
-
45
-
46
-
47
-
48
-
49
-
50
-
51
-
52
-
53
-
54
-
55
-
56
-
57
-
58
-
59
-
60
-
61
-
62
-
63
-
64
-
65
-
66
-
67
-
68
-
69
-
70
-
71
-
72
-
73
-
74
-
75
-
76
-
77
-
78
-
79
-
80
-
 81
81 -
 82
82 -
 83
83 -
 84
84 -
 85
85 -
 86
86 -
 87
87 -
 88
88 -
 89
89 -
 90
90 -
 91
91 -
92
-
93
-
94
-
95
-
96
-
97
-
98
-
99
-
100
-
101
-
102
-
103
-
104
-
105
-
106
-
107
-
108
-
109
-
110
-
111
 |
 |