Yamaha Tyros4 Reference Manual
Yamaha Tyros4 Manual
 |
UPC - 086792947280
View all Yamaha Tyros4 manuals
Add to My Manuals
Save this manual to your list of manuals |
Yamaha Tyros4 manual content summary:
- Yamaha Tyros4 | Reference Manual - Page 1
Reference Manual This Reference Manual explains advanced features of the Tyros4 that are not explained in the Owner's Manual. Please read the Owner's Manual first, before reading this Reference Manual. EN - Yamaha Tyros4 | Reference Manual - Page 2
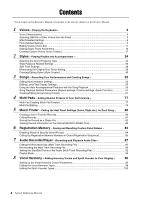
Multi Pad Editing ...79 5 Music Finder - Calling Up Ideal Panel Settings (Voice, Style, etc.) for Each Song - 80 Creating a Set of Favorite Records...80 Editing Records...81 Saving the Record as a Single File...82 Viewing Record Information on the Internet (MUSIC FINDER Plus 83 6 Registration - Yamaha Tyros4 | Reference Manual - Page 3
the Tyros4 Directly to the Internet - 115 Editing the Browser Settings...115 Registering Bookmarks of Your Favorite Pages 116 11 Connections - Using Tyros4 with Other Devices - 118 Microphone Settings ...118 Footswitch/Foot Controller Settings ...121 MIDI Settings ...124 12 Utility - Making - Yamaha Tyros4 | Reference Manual - Page 4
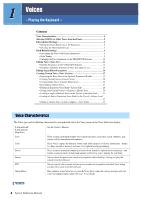
effect sounds and percussion sounds are assigned to individual keys, letting you play the sounds from the keyboard. This authentic organ Voice lets you use the Voice Set to adjust the various footages and craft your own original organ sounds. See page 16 for details. NEXT PAGE 4 Tyros4 Reference - Yamaha Tyros4 | Reference Manual - Page 5
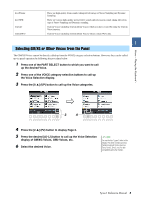
Selection display of GM/XG Voices, GM2 Voices, etc. 6 Select the desired Voice. NOTE You can find the "Legacy" folder in this display. This folder contains previous Yamaha keyboards' Voices (such as Tyros, Tyros2, Tyros3, etc.) for data compatibility with other models. Tyros4 Reference Manual 5 - Yamaha Tyros4 | Reference Manual - Page 6
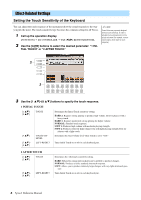
you play the keys). The touch sensitivity type becomes the common setting for all Voices. 1 Call up the operation display. [FUNCTION] [D] CONTROLLER TAB [][] KEYBOARD/PANEL 2 Use the [A]/[B] buttons to pres- sure. Turns Initial Touch on or off for each keyboard part. 6 Tyros4 Reference Manual - Yamaha Tyros4 | Reference Manual - Page 7
for Style playback and Harmony effect Split Point RIGHT 1-3 Voices LEFT Voice and chord section for Harmony effect Split Point Split Point (for Style playback) (for the Voice) Chord section for Style playback and Harmony effect LEFT Voice RIGHT 1-3 Voices NEXT PAGE Tyros4 Reference Manual 7 - Yamaha Tyros4 | Reference Manual - Page 8
the lowest velocity value at which the harmony note will sound. This allows you to selectively apply the harmony by your playing strength, letting you create harmony accents in the melody. The harmony effect is applied when you play the key strongly (above the set value). 8 Tyros4 Reference Manual - Yamaha Tyros4 | Reference Manual - Page 9
the Keyboard - Pitch-Related Settings Fine-tuning the Pitch of the Entire Instrument You can fine-tune the pitch of the entire instrument-useful when you play the Tyros4 along with other instruments or CD music. Please note that the Tune function does not affect the Drum Kit or SFX Kit Voices and - Yamaha Tyros4 | Reference Manual - Page 10
affect only the pitch of Song playback. When this is selected, the TRANSPOSE [-]/[+] buttons affect the overall pitch of the instrument, except audio playback. You can confirm the setting here by viewing the popup window called up via the TRANSPOSE [-]/[+] buttons. 10 Tyros4 Reference Manual - Yamaha Tyros4 | Reference Manual - Page 11
of the edited Voice with the original (unedited) Voice. 5 Press the [I] (SAVE) button to save your edited Voice as a User Voice. NOTICE The settings will be lost if you select another Voice or turn the power to the instrument off without executing the Save operation. Tyros4 Reference Manual 11 - Yamaha Tyros4 | Reference Manual - Page 12
edited Voice is set to "MONO" above. NOTE The Portamento Time determines the pitch transition time. Portamento is a function that creates a smooth transition in pitch from the first note played on the keyboard to the next. CONTROLLER Page 1 MODULATION The MODULATION wheel can be used to modulate - Yamaha Tyros4 | Reference Manual - Page 13
Voices - Playing the Keyboard - 2 AFTER TOUCH Aftertouch can be used to modulate the parameters below. Here, you can set the degree to which Aftertouch modulates each of the following parameters. [2 ] FILTER Determines the degree to which Aftertouch modulates the Filter Cutoff Frequency. See - Yamaha Tyros4 | Reference Manual - Page 14
Vibrato is a quavering, vibrating sound effect that is produced by regu- larly modulating the pitch of the Voice. SPEED DEPTH DELAY Time [6 ] [7 ] [8 ] DEPTH SPEED DELAY Determines the intensity of the Vibrato effect. Higher settings result in a more pronounced Vibrato. Determines - Yamaha Tyros4 | Reference Manual - Page 15
] [E] REGIST SEQUENCE/FREEZE/VOICE SET TAB [][] VOICE SET 1 2 Use the [A]/[B] buttons to select a keyboard part. 2 3 3 Use the [4 ]-[7 ] buttons to enable/disable automatic calling up of the settings (ON or OFF) independently for each parameter group. Tyros4 Reference Manual 15 - Yamaha Tyros4 | Reference Manual - Page 16
levers, adding the attack sound, applying effect and equalizer, etc. FOOTAGE Page Refer to the Owner's Manual, chapter 1. VOLUME/ATTACK Page NOTICE After editing, go to the Voice Selection display by pressing the [I] (PRESETS) button and save the setting. The settings will be lost if you select - Yamaha Tyros4 | Reference Manual - Page 17
Module 1 Install the expansion module to the Tyros4. For information on installation, refer to the Appendix section in the Owner's Manual. 2 Prepare the Wave data you'll be using for the new Voice. Only WAV or AIFF format data can be used for the Voice Creator. We recommend that you store the files - Yamaha Tyros4 | Reference Manual - Page 18
to actually start importing the selected Wave files. As soon as the Import operation is finished, the "Completed" dialog appears. 5 Press the [G] (OK) button to return to the Expansion Module display. The Wave files imported from the USB or HD drive are shown. NEXT PAGE 18 Tyros4 Reference Manual - Yamaha Tyros4 | Reference Manual - Page 19
Voices, Normal Voices (page 20) and Drum Voices (page 24) by using your own Waves. Expansion Module display 1 Voices - Playing the Keyboard - [F] [H] [I] [1 ]/ [2 ] [3 ]- [5 ] [6 ] [7 ]/ [8 ] CATEGORY IMPORT DELETE PAGE Up/Down Calls up a popup window for categorizing the Wave files - Yamaha Tyros4 | Reference Manual - Page 20
in the same way as all other Tyros4 Voices. Flash Memory Expansion Module Wave files (WAV or AIFF) Expansion Voice Bank (Library) q Assign to Element(s) (steps 1-8 below) Tyros4 Element 8 Element 1 Wave 1 Wave 2 w Edit each element and entire Voice (steps 9-11) e Store the created Normal - Yamaha Tyros4 | Reference Manual - Page 21
. 5-3 Use the [F] button to select the category which contains the desired Wave file. For information on category, refer to page 19. 5-4 Select the desired Wave file by using the [1 ]-[5 ] buttons, then press the [ENTER] button to confirm your selection. NEXT PAGE Tyros4 Reference Manual 21 - Yamaha Tyros4 | Reference Manual - Page 22
to ON, this has no effect. You can specify this setting directly from the keyboard by simultaneously holding down the [2 ] (DIRECT KEY) button and pressing the desired key on the keyboard. This determines the lowest key at which the Wave will sound. Use this with End Key (see step 9 on page 23) to - Yamaha Tyros4 | Reference Manual - Page 23
. Make sure to execute the Store operation. (If necessary) You can re-edit the element and the entire Voice. For details, refer to the section "Re-Editing a Custom Voice" (page 27). NOTE Do not use any special characters (umlaut, accent, etc.) in the Voice name. Tyros4 Reference Manual 23 - Yamaha Tyros4 | Reference Manual - Page 24
Voices from Kit Edit of the Mixing Console function (Owner's Manual, Chapter 9), proceed to step 3. Flash Memory Expansion Module Wave files (WAV or AIFF) Expansion Voice Bank (Library) q Assign to specific key(s) (steps 1-5 below) Tyros4 Drum Voice The instrument (drum/percussion) of Preset - Yamaha Tyros4 | Reference Manual - Page 25
TAB [][] buttons to select the desired tab page: PRESET or EXP. • PRESET: contains the instrument of Preset Drum Voice • EXP.: contains the Wave files in the expansion module 5-3 If you selected Preset tab on step 5-2, use the [F] and [G] buttons to select the category which contains the desired - Yamaha Tyros4 | Reference Manual - Page 26
ON, Note Off events will be received. When this is set to OFF, Note Off events will not be received. Assigns the key (TARGET) to a specific group. This lets you separate certain sounds, such as open and closed hi-hat sounds, so that one will cancel the other. NEXT PAGE 26 Tyros4 Reference Manual - Yamaha Tyros4 | Reference Manual - Page 27
can re-edit the entire Voice. For details, refer to the section "ReEditing a Custom Voice" below. NOTE Do not use any special characters (umlaut, accent, etc.) in the Voice name. Re-Editing a Custom Voice 1 Turn the PART SELECT [RIGHT 1] button to on, then press the [EXPANSION] button. 2 Use the - Yamaha Tyros4 | Reference Manual - Page 28
selected Voice. NOTE When you reorganize Voices in this display, you are simply organizing the paths of the Voices, not copying or moving the Voices themselves. Shows the property display (see below). 3 4 When you've finished editing, press the [EXIT] button. NEXT PAGE 28 Tyros4 Reference Manual - Yamaha Tyros4 | Reference Manual - Page 29
uses the expansion module memory space. • FREQUENCY (kHz): The sampling frequency of the focused Wave • CHANNEL: The number of channels of the focused Wave, MONO or STEREO • TIME: The playback time of the focused Wave To close the Property display, press the [F] (OK) button. Tyros4 Reference Manual - Yamaha Tyros4 | Reference Manual - Page 30
here, there is not enough memory space in the drive for storing Voice 6 Press the [6 ] (SAVE) button. Creator data. Make sure to use one of the other destinations. 7 Enter the desired name for the Library file and press the [8 ] (OK) button. A message appears prompting you to select the - Yamaha Tyros4 | Reference Manual - Page 31
To cancel, press the [8 ] (CANCEL) button. After the loading is finished, you can select the Voice from the [EXPANSION] button. NOTE File loading may take as little as a couple of seconds or as long as a few minutes, depending on how much data is contained in the Voice. Tyros4 Reference Manual 31 - Yamaha Tyros4 | Reference Manual - Page 32
replacing some selected Voices one by one by using "YES" and replace all the rest. The displayed Voice in the prompt will not be replaced. Cancels loading the Library file. After the loading is finished, you can select the newly loaded Voices from the [EXPANSION] button. 32 Tyros4 Reference Manual - Yamaha Tyros4 | Reference Manual - Page 33
, refer to the Owner's Manual of the Voice Editor on the included CDROM. 5 When you've finished editing, select the "Store" from the Edit menu to store the edited Voice on the Tyros4. 6 Exit the Voice Editor. 7 Select the edited Voice from the [EXPANSION] button and play it. Tyros4 Reference Manual - Yamaha Tyros4 | Reference Manual - Page 34
41 • Step Recording 44 • Style Assembly 44 • Editing the Rhythmic Feel 46 • Editing Data for Each Channel 48 • Making Style File Format Settings 49 Selecting the Chord Fingering Type Style playback can be controlled by the chords you play in the chord section of the keyboard. There are seven - Yamaha Tyros4 | Reference Manual - Page 35
Style. The Fingered type recognizes the various chord types which are listed on the Data List available at the Yamaha website and can be looked up using the Chord Tutor function on page 34. Accepts the same fingerings as Fingered, but the lowest note played in the Chord section of the keyboard - Yamaha Tyros4 | Reference Manual - Page 36
is set to "STYLE." NOTE When you record a song, the chord detected by playing the Stop Accompaniment can be recorded regardless of the setting here. Please note that both the Voice that is sounded and the chord data will be recorded when set to "STYLE," and only the chord data will be recorded when - Yamaha Tyros4 | Reference Manual - Page 37
ON/OFF This determines whether the Style Channel On/Off status changes or not when you 2 change Styles. HOLD: The Style Channel On/Off status of the previous Style is maintained. RESET: All Style Channels are set to On. Styles - Playing Rhythm and Accompaniment - Tyros4 Reference Manual 37 - Yamaha Tyros4 | Reference Manual - Page 38
] STYLE LEFT RIGHT3 38 Tyros4 Reference Manual Chord section + Voice LEFT Voice RIGHT 1-3 Sets each Split Point. Press one of the desired buttons and rotate the [DATA ENTRY] dial. You can also specify the Split Point directly from the keyboard by pressing the desired key on the keyboard while - Yamaha Tyros4 | Reference Manual - Page 39
the Style Selection display and save the panel settings as a Style file. NOTICE The panel settings memorized to each OTS button will be lost if you change the Style or turn the power off without executing the Save operation. Styles - Playing Rhythm and Accompaniment - Tyros4 Reference Manual 39 - Yamaha Tyros4 | Reference Manual - Page 40
the settings related for Style File Format. See page 49. • EDIT Lets you enter notes one by one to create your Style (Step Recording). See page 44. NOTE The Style files created on the Tyros4 can only be played back on instruments which are compatible with SFF GE. 40 Tyros4 Reference Manual - Yamaha Tyros4 | Reference Manual - Page 41
. [DIGITAL RECORDING] [B] STYLE CREATOR The BASIC Page is shown. 3 If you want to create a new Style from scratch, press the [C] (NEW STYLE) button to delete all channel's data. 4 Use the [B] button to select the TEMPO/BEAT menu, then edit the data by using the [3 ]-[6 ] buttons. 5 Use the - Yamaha Tyros4 | Reference Manual - Page 42
, [1 ]-[8 ]. You can cancel the deletion by pressing the same numbered button again before releasing your finger from the [J] button. NOTE When recording channels BASS-PHR2 based on the existing Style, you have to delete the original data before recording. NEXT PAGE 42 Tyros4 Reference Manual - Yamaha Tyros4 | Reference Manual - Page 43
Using the data recorded here, the auto accompaniment (Style playback) is appropriately converted depending on the chord changes you make during your performance. The chord which forms the basis for this note conversion is called the Source Chord, and is set can be used. Tyros4 Reference Manual 43 - Yamaha Tyros4 | Reference Manual - Page 44
, Chord, Lyrics, and System Exclusive data cannot be entered. For instructions on Step Recording, refer to pages 61-64. For information on the EDIT display (Event List display), refer to page 73. Style Assembly Style Assembly allows you to create a single Style by mixing the various patterns - Yamaha Tyros4 | Reference Manual - Page 45
assembling a Style, you can play back the Style and select the method of playback. Use the [6 ]/[7 ] (PLAY TYPE) buttons in the Style Assembly display to select the playback method. • SOLO: Mutes all but the selected channel in the ASSEMBLY Page. Any channels set to ON in the RECORD display on - Yamaha Tyros4 | Reference Manual - Page 46
the GROOVE Page, use the [A]/[B] buttons to select the edit menu, then edit the data by using the [1 ]-[8 ] buttons. 1 GROOVE This lets you add swing to the music or change the "feel" of the beat by making subtle shifts in the timing (clock) of the Style. The Groove settings are applied to all - Yamaha Tyros4 | Reference Manual - Page 47
can be undone. 3 Press the [I] (SAVE) button to execute the Save operation. NOTICE The edited Style will be lost if you change to another Style or turn the power to the instrument off without executing the Save operation. Styles - Playing Rhythm and Accompaniment - Tyros4 Reference Manual 47 - Yamaha Tyros4 | Reference Manual - Page 48
only has one level; only the previous operation can be undone. 5 Press the [I] (SAVE) button to execute the Save operation. NOTICE The edited Style will be lost if you change to another Style or turn the power to the instrument off without executing the Save operation. 48 Tyros4 Reference Manual - Yamaha Tyros4 | Reference Manual - Page 49
guitar parts. 1 In the PARAMETER Page, use the [A]/[B] buttons to select the edit menu. For details of the edit menu, see page 50. NOTE The Style files created on the Tyros4 can only be played back on instruments which are compatible with SFF GE. 1 4 2 NEXT PAGE 3 Tyros4 Reference Manual 49 - Yamaha Tyros4 | Reference Manual - Page 50
These settings determine the original key of the source pattern (i.e., the key used when recording the pattern). The default setting of CM7 (with a Source Root of "C" and a Chord Type of "M7"), is automatically selected whenever the preset data is deleted prior to recording a new Style, regardless - Yamaha Tyros4 | Reference Manual - Page 51
of the root note in the chord, when converted from the Source Pattern in response to chord changes. Refer to the list below. Sets the note transposition table for the source pattern. Refer to the list below. The channel for which this is set to ON will be played back by the bass root note, when the - Yamaha Tyros4 | Reference Manual - Page 52
key is F. Root changes Notes played CM C3-E3-G3 C#M C#3-E#3-G#3 FM F3-A3-C4 F#M F#2-A#2-C#3 [6 ] [7 ] NOTE LIMIT LOW NOTE LIMIT HIGH These set the note range (highest and lowest notes) for Voices recorded to the Style channels. By judicious setting the same. 52 Tyros4 Reference Manual - Yamaha Tyros4 | Reference Manual - Page 53
(Repeat settings, Channel settings, Guide Function 57 • Keyboard and Vocal Practice Using the Guide Function 58 • Playing Backing Parts with the Performance Assistant Technology ......... 60 Creating/Editing Songs (Song Creator 61 • Recording Melodies (Step Recording 61 • Recording Chords - Yamaha Tyros4 | Reference Manual - Page 54
CH RIGHT CH Determines which MIDI channel in the Song data is used for the left-hand/right-hand part. This setting returns to AUTO when a different Song is selected. AUTO: The MIDI channels in the Song data for the right- and left-hand parts are assigned automatically-setting the parts to the same - Yamaha Tyros4 | Reference Manual - Page 55
, press the [EXIT] button to return back to the Lyrics/Text display. NOTE When the background picture is specified in the Song data, the BACKGROUND setting cannot be changed. NOTE For information on available image files, refer to the MAIN PICTURE parameter on page 136. Tyros4 Reference Manual 55 - Yamaha Tyros4 | Reference Manual - Page 56
turning CHORD on (page 53) allows you to see the chord information. NOTE When playing back a Song and a Style at the same time, the tempo value set in the Song is automatically used. When the Song playback is stopped, the Style playback is also stopped at the same time. 56 Tyros4 Reference Manual - Yamaha Tyros4 | Reference Manual - Page 57
Left- or Right-hand part of the Guide function and the Song Score function. When set to "ON," this automatically sets the proper MIDI channels for the Rightand Left hand parts pre-programmed in the commercially available Song data. Normally, this should be set to "ON." Determines the language of the - Yamaha Tyros4 | Reference Manual - Page 58
this function, you can play the melody of a Song just by pressing a single key (any key is OK) in time with the rhythm. Song playback pauses and waits for you to play any key. Simply play a key on the keyboard in time with the music and Song playback continues. NEXT PAGE 58 Tyros4 Reference Manual - Yamaha Tyros4 | Reference Manual - Page 59
part of the Song data (page 72). For Songs to which the Guide settings have 3 been saved, the Guide function will be automatically turned on and the related settings will be recalled when the Song is selected. Songs - Recording Your Performances and Creating Songs - Tyros4 Reference Manual 59 - Yamaha Tyros4 | Reference Manual - Page 60
SONG SETTING 3 Press the [8 ] button to turn the [P.A.T.] (performance assis- tant technology) on. NOTE To use the performance assistant technology, the Song must contain chord data. If the Song contains this data Play three notes at the same time with your right hand. 60 Tyros4 Reference Manual - Yamaha Tyros4 | Reference Manual - Page 61
SONG [REC] and SONG [STOP] buttons simultane- ously. A blank Song ("New Song") is called up for recording. NOTE Selecting a blank Song initializes the panel settings. 2 Call up the operation display. [DIGITAL RECORDING] [A] SONG CREATOR TAB [][] 1-16 3 4 NEXT PAGE Tyros4 Reference Manual - Yamaha Tyros4 | Reference Manual - Page 62
by using the [DATA ENTRY] dial. Determines the note type to be entered: normal, dotted or triplet. Deletes the selected data. Sets the position of the note to be entered. Determines the note length to be entered: whole-note, half-note, quarter-note, eighthnote or sixteenth-note. 62 Tyros4 Reference - Yamaha Tyros4 | Reference Manual - Page 63
one of the steps involves holding down a key on the keyboard while executing the operation. Select the Voice for recording after calling up the Step Recording display. NOTE Since the music score displayed on the instrument is generated from the recorded MIDI data, it may not appear exactly the same - Yamaha Tyros4 | Reference Manual - Page 64
the [EXIT] button to exit from the Step Recording display. 7 Press the [I] (SAVE) button to execute the Save operation. NOTICE The recorded Song data will be lost if you select another Song or turn the power to the instrument off without executing the Save operation. 64 Tyros4 Reference Manual - Yamaha Tyros4 | Reference Manual - Page 65
settings. 2 Select the Style you want to use in the Song. 3 Call up the operation display. [DIGITAL RECORDING] [A] SONG CREATOR TAB [][] CHORD 3 4 Press the [G] (STEP REC) button to call up the STEP RECORD display. 5 Start Step Recording. About these buttons, refer to page 62. Tyros4 - Yamaha Tyros4 | Reference Manual - Page 66
the [AUTO FILL IN] button is set to off. 1 Enter the chords for the Main A section. 1-1 Press the STYLE CONTROL [MAIN A] button, 1-2 Press the [5 ] button to select the half-note length. 1-3 Play the chord C, F and G in the chord section of the keyboard. NOTE This example uses a Style in 4/4 time - Yamaha Tyros4 | Reference Manual - Page 67
data. 7 Press the [I] (SAVE) button to execute the Save operation. NOTICE The recorded Song data will be lost if you select another Song or turn the power to the instrument off without executing the Save operation. Songs - Recording Your Performances and Creating Songs - Tyros4 Reference Manual - Yamaha Tyros4 | Reference Manual - Page 68
Synchro Standby mode. FIRST KEY ON: The Song plays back normally, then starts overwrite recording as soon as you play the keyboard. PUNCH IN AT: The Song plays back normally up to the beginning of the indicated Punch In measure, then starts overwrite recording at that point. You can set the Punch In - Yamaha Tyros4 | Reference Manual - Page 69
5 6 7 8 *1 To avoid overwriting measures 1-2, start recording from measure 3. *2 To stop recording, press the [REC] button at the end of measure 5. 3 Previously recorded data Newly recorded data Deleted data Songs - Recording Your Performances and Creating Songs - Tyros4 Reference Manual 69 - Yamaha Tyros4 | Reference Manual - Page 70
has one level; only the previous operation can be undone. 3 Press the [I] (SAVE) button to execute the Save operation. NOTICE The recorded Song data will be lost if you select another Song or turn the power to the instrument off without executing the Save operation. 70 Tyros4 Reference Manual - Yamaha Tyros4 | Reference Manual - Page 71
length Quantizing strength =100 Quantizing strength =50 2 DELETE You can delete the data of the specified channel in the Song. Select the channel whose data to be deleted by using the [1 ]-[8 ] buttons, then press the [D] (EXECUTE) button to execute the operation. Tyros4 Reference Manual 71 - Yamaha Tyros4 | Reference Manual - Page 72
the Guide ON/OFF setting. LYRICS SETTING: Records the settings in the Lyrics display. VH/MIC: Records the Vocal Harmony and the microphone settings in the Mixing Console display. Add or remove a checkmark to the selected item. Checked items are recorded to the Song. 72 Tyros4 Reference Manual - Yamaha Tyros4 | Reference Manual - Page 73
CHORD tab display, press the [F] (EXPAND) button to convert the data into Song data. Event List display NOTE Indicates the location (position) of the corresponding event. Chord section data recorded with Realtime Recording cannot be indicated and edited on this display. Indicates the event value - Yamaha Tyros4 | Reference Manual - Page 74
. Determines the key signature, as well as the major/minor setting, for the music score shown on the display. Allows you to make various detailed changes to the XG parameters. Refer to the "MIDI Data Format" in the Data List for details. The Data List is available at the Yamaha website. Displays the - Yamaha Tyros4 | Reference Manual - Page 75
Songs - Recording Your Performances and Creating Songs - Displaying Specific Types of Events In the Event List displays, various types of events are shown. It may sometimes be difficult to pinpoint the ones you want to edit Press the [EXIT] button to execute the settings. Tyros4 Reference Manual 75 - Yamaha Tyros4 | Reference Manual - Page 76
Editing Song Position Markers This section covers two additional Marker-related features and details. For basic information on using the Markers for jump playback and loop playback, refer to the Owner's Manual. Jump Markers The Markers explained in the Owner's Manual are also called "Jump - Yamaha Tyros4 | Reference Manual - Page 77
any of the [A], [B], [F] and [G] buttons. If you want to create the Multi Pad data from scratch, press the [C] (NEW BANK) button to call up an empty bank. 5 Press the [H] (REC) button to enter the recording standby sta- tus for the Multi Pad selected in step 4. NEXT PAGE Tyros4 Reference Manual 77 - Yamaha Tyros4 | Reference Manual - Page 78
you play on the keyboard. You can also start recording by pressing the STYLE CONTROL [START/STOP] button. This lets you record as much silence as you want before the start of the Multi Pad phrase. If Chord Match is set to on for the Multi Pad to be recorded, you should record using the notes of the - Yamaha Tyros4 | Reference Manual - Page 79
the selected Multi Pads. For details on the naming and deleting procedures, refer to the Owner's Manual. Copying the Multi Pad 1 Press the [3 ] button in step 4 above. 2 Select the Multi Pads to be copied by using the [A], [B], [F] and [G] but- tons, then press the [7 ] (OK) button. The selected - Yamaha Tyros4 | Reference Manual - Page 80
Music Finder - Calling Up Ideal Panel Settings (Voice, Style, etc.) for Each Song - Contents Creating a Set of Favorite Records 80 Editing Records 81 Saving the Record as a Single File 82 • Calling Up Music Finder Records Saved to USER/HD/USB 82 Viewing Record Information on the Internet (MUSIC - Yamaha Tyros4 | Reference Manual - Page 81
are automatically saved in the internal memory. 1 Select the desired record to be edited in the MUSIC FINDER display. 2 Press the [8 ] (RECORD EDIT) button to call up the EDIT display. 3 Edit the record as desired. Music Finder - Calling Up Ideal Panel Settings (Voice, Style, etc.) for Each Song - Yamaha Tyros4 | Reference Manual - Page 82
presets and additionally created records as a single file. Keep in mind that individual records (panel settings and song data) cannot be handled as separate files. 1 Call up the Save display. [MUSIC FINDER] [7 ] FILES 2 Press the TAB [][] buttons to select the location for saving (USER/HD/USB - Yamaha Tyros4 | Reference Manual - Page 83
MUSIC FINDER +) button to open the Web page. The information of the selected record is shown. 4 Press the [EXIT] button to exit the browser screen and return to the MUSIC FINDER display. 5 Music Finder - Calling Up Ideal Panel Settings (Voice, Style, etc.) for Each Song - Tyros4 Reference Manual - Yamaha Tyros4 | Reference Manual - Page 84
Registration Memory setups. For example, you may want to switch Voices or effect settings while keeping the same accompaniment Style. This is where the Freeze function comes in handy. It lets power off without exiting from this display, the set- tings will be lost. 84 Tyros4 Reference Manual - Yamaha Tyros4 | Reference Manual - Page 85
between settings-without having to take your hands from the keyboard. program a sequence. 2 Call up the operation display. [FUNCTION] [E] REGIST SEQUENCE/FREEZE/VOICE SET TAB [][] REGISTRATION SEQUENCE 3 If you intend to use a pedal to switch Registration Memory set Tyros4 Reference Manual 85 - Yamaha Tyros4 | Reference Manual - Page 86
to call up the REGISTRATION BANK Selection display. NOTICE Keep in mind that all Registration Sequence data is lost when changing Registration Memory Banks, unless you've saved it with the Registration Memory Bank file. 2 Press the [6 ] button to save the Bank file. 86 Tyros4 Reference Manual - Yamaha Tyros4 | Reference Manual - Page 87
editing. Copying is the easiest way to do this. However, since copying within a folder in the HDD is not possible, you need to cre- (3) ate a new folder. For details on (1) file management, refer to the Owner's Manual. (2) Audio Recorder/Player - Recording and Playback Audio Files - Tyros4 - Yamaha Tyros4 | Reference Manual - Page 88
the volume of the recorded audio to the optimum level. Use this to make the recorded audio as loud as possible, without distortion. Technically, this operation scans the recorded file for the highest level, then raises the volume of the entire file so that the highest peak is set to the maximum, non - Yamaha Tyros4 | Reference Manual - Page 89
desired Voice. If you wish to record your singing voice or an external instrument, connect a microphone or instrument and make the appropriate settings. Adjust the Track Play and Rec Monitor levels here as desired. 5 Press the [REC] button to enable recording. NEXT PAGE Tyros4 Reference Manual 89 - Yamaha Tyros4 | Reference Manual - Page 90
re-recorded. 2 Use the [F] (TRACK SELECT) button to select the track to be re- recorded. 2 3 3 Use the [B]/[C] buttons to select a recording method. • Replace a certain range of the data: PUNCH IN/OUT • Overdub a certain range of the data: PUNCH IN/OUT (MERGE) NEXT PAGE 90 Tyros4 Reference Manual - Yamaha Tyros4 | Reference Manual - Page 91
Play the keyboard or sing the desired part in practice. In this rehearsal function, recording is not started. 3-3 Press the AUDIO RECORDER/PLAYER [STOP] button. NOTE Repeat playback of the rehearsal function is automatically stopped after playing back 99 times. NEXT PAGE Tyros4 Reference Manual 91 - Yamaha Tyros4 | Reference Manual - Page 92
function lets you set the Start and End points for the audio file. This action is non-destructive and affects only the playback of the data; it does not actually delete any data from the start or end of the file. 1 Execute Step 1-2 in "Editing the Recorded Data (Multi Track Recording File)" on page - Yamaha Tyros4 | Reference Manual - Page 93
the Playlist to the USER drive, inter- nal hard disk drive or USB flash memory. Audio Recorder/Player - Recording and Playback Audio Files - Playing a Playlist Once you've created and/or edited a Playlist and you've enabled the Playlist mode, you can play back the files in the list-at any time - Yamaha Tyros4 | Reference Manual - Page 94
Recorder/Player function. 4 Use the [5 ]/[6 ] buttons to select a file for playback, then actually enter it by pressing the [7 ] (SELECT) button. You can also use the [DATA ENTRY] dial to move the cursor and press the [ENTER] button to actually select the song. To have the files play back - Yamaha Tyros4 | Reference Manual - Page 95
the file at the cursor position. Adds or removes the checkmark to/from the selected data. Only the checkmarked files will be played. Holding this button adds (or removes) the checkmark to (or from) all files. Audio Recorder/Player - Recording and Playback Audio Files - Tyros4 Reference Manual 95 - Yamaha Tyros4 | Reference Manual - Page 96
) are adjusted correctly before setting the Vocal Harmony Control parameters here. 2 Press the [8 ] (SETUP) button to call up the Setup display, then set the value by using the [2 ]-[5 ] and [7 ] buttons. For information on each parameter, see page 97. NEXT PAGE 96 Tyros4 Reference Manual - Yamaha Tyros4 | Reference Manual - Page 97
For details on Split Point Settings, refer to page 38. NOTE When the settings of both keyboard performance and Song data are applied, those settings are merged to control the harmony. In Chordal mode, the following parameters determine which data in a recorded Song is used for chord detection. OFF - Yamaha Tyros4 | Reference Manual - Page 98
. • DETAIL Detailed editing for Vocal Harmony type. NOTICE The settings here will be lost if you change to another Vocal Harmony type or you turn the power off without executing the save operation. 6 Press the [I] (SAVE) button to save your edited Vocal Harmony type. 98 Tyros4 Reference Manual - Yamaha Tyros4 | Reference Manual - Page 99
to edit the Vocal Effect. Use the [1 ]-[5 ] buttons to select the desired effect type and parameter, then set the value of the selected parameter by using the [6 ]/[7 ] buttons. For information on each parameter, refer to the Data List on the website. NEXT PAGE Tyros4 Reference Manual 99 - Yamaha Tyros4 | Reference Manual - Page 100
. Determines the specific type of effect applied to the lead and harmony vocal sounds. A wide range of reverb, delay, modulation, distortion and other special effects are available. For a list of the effect types, refer to the Data List on the website. Determines the amount of Vocal Effect that is - Yamaha Tyros4 | Reference Manual - Page 101
level balance among the vocal parts. Settings: 0-127 PITCH CORRECT MODE (set by [7 ]-[8 ] buttons) Determines how the Pitch Correct affects your voice. For information on each parameter, refer to the Data List on the website. Settings: OFF, SOFT1, SOFT2, HARD Tyros4 Reference Manual 101 - Yamaha Tyros4 | Reference Manual - Page 102
Editing the Detail Tab Parameters Use the [2 ]-[5 ] buttons to select the desired parameter, then set the value of the selected parameter by using the [6 ]/[7 ] buttons. For information on each parameter, refer to the Data List on the website. 102 Tyros4 Reference Manual - Yamaha Tyros4 | Reference Manual - Page 103
buttons to call up the desired tab, then edit the Synth Vocoder by using [A]-[E], [G] and [J] buttons and [1 ]-[8 ] buttons or sliders. There are two tabs in the Synth Vocoder Edit display; refer to pages 104-106 for editing each tab. NOTICE The settings here will be lost if you change to - Yamaha Tyros4 | Reference Manual - Page 104
button to edit Vocal Effect. Use the [1 ]-[5 ] buttons to select the desired effect type and parameter, then set the value of the selected parameter by using the [6 ]/[7 ] buttons. For information on each parameter, refer to the Data List on the website. NEXT PAGE 104 Tyros4 Reference Manual - Yamaha Tyros4 | Reference Manual - Page 105
of reverb, delay, modulation, distortion and other special effects are available. You can edit the vocal effect by pressing the [G] (VOCAL EFFECT EDIT) button (step 2 on page 104). For a list of the effect types, refer to the Data List on the website. Determines the amount of effect applied to the - Yamaha Tyros4 | Reference Manual - Page 106
increase values. BAND PASS FILTER 1-10 parameters Determines each output gain of the BPF 1 - 10 for the Inst Input (keyboard performance sound). The BPF 1 corresponds to the lowest Formant while the BPF 10 corresponds to the highest Formant. Settings: -18dB - +18dB 106 Tyros4 Reference Manual - Yamaha Tyros4 | Reference Manual - Page 107
Master EQ 113 Line Out Settings 114 Editing VOL/VOICE Parameters NOTE For information on available Voices for each Style channel, refer to page 42. NOTE When playing GM song data, channel 10 (in the SONG CH 9 to 16 page) can only be used for a Drum Kit Voice. NOTE When changing the rhythm - Yamaha Tyros4 | Reference Manual - Page 108
instrument (MASTER), Song playback (SONG), or the keyboard pitch (KEYBOARD), respectively. Please note that the "KEYBOARD" also transposes the keyboard pitch of Style playback and the Multi Pads (since these are also affected by keyboard play in the left-hand section). 108 Tyros4 Reference Manual - Yamaha Tyros4 | Reference Manual - Page 109
DSP5, LEFT, SONG of the keyboard parts or Song parts. DSP6 CHANNEL 1-16 DSP7 Microphone sound, SONG CHANNEL 1-16 This effect is applied to the MIC input (in addition to the Vocal Harmony effect)/Song parts. DSP8, DSP9 STYLE PART These effects are applied only to Style parts. 3 Use the - Yamaha Tyros4 | Reference Manual - Page 110
and type, use the [1 ]-[3 ] buttons. The re-selected effect configuration is displayed at the upper left side box in the display. NOTE Keep in mind that in some cases noise may result if you adjust the effect parameters while playing the instrument. NEXT PAGE 110 Tyros4 Reference Manual - Yamaha Tyros4 | Reference Manual - Page 111
for saving the effect. The maximum number for effects that can be saved differs depending on the effect block. 6 Press the [I] (SAVE) button to save the effect. When recalling the saved effect, use the same procedure as in steps 4-5 of "Selecting an Effect type." 9 Tyros4 Reference Manual 111 - Yamaha Tyros4 | Reference Manual - Page 112
. You can even create your own custom EQ settings by adjusting the frequency bands, and save the settings to one of two User Master EQ types. Gain Bandwidth (also called "Shape" or "Q") 0 Freq (Frequency) 5 bands LOW LOWMID MID HIGHMID HIGH EQ1 EQ2 EQ3 EQ4 EQ5 112 Tyros4 Reference Manual - Yamaha Tyros4 | Reference Manual - Page 113
slider. The available FREQ range is different for each band. 5 Press the [H] or [I] (STORE 1 or 2) button to save the edited EQ 9 type. Up to two types of EQ can be created and saved. The saved EQ can be recalled from the EQ tab display by using the [A]/[B] buttons. Tyros4 Reference Manual 113 - Yamaha Tyros4 | Reference Manual - Page 114
SUB1 & 2 NOTE Only the DSP2-9 and Vocal Harmony effects can be applied to the sound output from the SUB jacks. Other effects (Reverb, Chorus and DSP1) will not be applied. (If the "Connection" parameter of the DSP1 is set to "Insertion", the DSP1 will also be applied.) 114 Tyros4 Reference Manual - Yamaha Tyros4 | Reference Manual - Page 115
- 2 [E] DELETE Deletes the cookies. COOKIES [G] REGISTER Register the currently selected page as the Home page. 10 [H] EXECUTE Restores the home page setting. 2 Press the [7 ] (OK) button to close the display. To cancel, press the [8 ] (CANCEL) button. Tyros4 Reference Manual 115 - Yamaha Tyros4 | Reference Manual - Page 116
set up a custom link so the page can be instantly called up in the future. 1 With the desired page currently selected, press the [4 ] (BOOKMARK) button. The Bookmark display appears, showing a list be opened by pressing the [2 ] (VIEW) button in the Bookmark display. 116 Tyros4 Reference Manual - Yamaha Tyros4 | Reference Manual - Page 117
) button. Changes the name of the selected bookmark. Pressing this button calls up the display for entering characters. Deletes the selected bookmark from the Bookmark list. Closes the Bookmark display and returns to the browser display. 10 Tyros4 Reference Manual 117 - Yamaha Tyros4 | Reference Manual - Page 118
- Using Tyros4 with Other Devices - Contents Microphone Settings 118 • Overall Settings 118 • Saving the Microphone Settings 119 • VOCAL Page 119 • TALK Page 120 Footswitch/Foot Controller Settings 121 • Assigning Specific Functions to Each Foot Pedal 121 MIDI Settings 124 • MIDI System - Yamaha Tyros4 | Reference Manual - Page 119
Settings Saved to USER To call up the Microphone Settings you've saved to USER, follow the instructions below. 1 Call up the MIC SETTING MEMORY display. [MIC SETTING] [H] (USER MEMORY) 2 Press the [A]-[J] buttons to select the desired setting file. VOCAL Page Connections - Using Tyros4 - Yamaha Tyros4 | Reference Manual - Page 120
the TALK page are microphone settings that are active when the Talk function is on. All indications and parameters (with the exception of TALK MIXING below) are the same as in the VOCAL page. However, the settings are independent from those in the VOCAL page. NEXT PAGE 120 Tyros4 Reference Manual - Yamaha Tyros4 | Reference Manual - Page 121
effectively adjust the balance between your voice and the overall instrument sound. Footswitch/Foot Controller Settings Assigning Specific pedals can be connected, refer to the Owner's Manual, chapter 11. 2 3 5 Connections - Using Tyros4 with Other Devices - 4 3 Use the [C]/[D] buttons to - Yamaha Tyros4 | Reference Manual - Page 122
of the Super Articulation Voices, even if this has been assigned to the Foot Pedals. PITCH BEND* MODULATION* MODULATION (ALT) DSP VARIATION HARMONY/ECHO VOCAL HARMONY VOCAL EFFECT TALK Allows you to bend the pitch of notes up or down by using the pedal. The following parameters can be set for this - Yamaha Tyros4 | Reference Manual - Page 123
(one page at a time). Same as the AUDIO RECORDER/PLAYER [PLAY/PAUSE] button. Same as the SONG [PLAY/PAUSE] button. Same as the STYLE CONTROL [START/STOP] button. Same as the [TAP up the next/previous One Touch Setting. 11 Connections - Using Tyros4 with Other Devices - Tyros4 Reference Manual 123 - Yamaha Tyros4 | Reference Manual - Page 124
chord type for Style playback via MIDI reception data (page 129) • MFC10 Settings for a connected MFC10 MIDI Foot Controller (page 130) 5 When you've finished editing, press the [EXIT] button to return to the MIDI template Selection display. 6 Select USER tab display by using the TAB [][] buttons - Yamaha Tyros4 | Reference Manual - Page 125
. Playback or recording (Song, Style, Multi Pad, etc.) synchronizes with an external MIDI clock instead of the Tyros4's internal clock. This template should be used when you wish to set the tempo on the MIDI device connected to the Tyros4. Playback or recording of the Tyros4 synchronizes with an - Yamaha Tyros4 | Reference Manual - Page 126
you play the keyboard or use the controllers. For example, this allows you to use an external MIDI sequencer to play the Tyros4's internal Voices, and use the Tyros4 keyboard to record notes to the external sequencer and/or play an external tone generator. 2 Clock setting, etc. CLOCK Determines - Yamaha Tyros4 | Reference Manual - Page 127
is the same as those already explained elsewhere in the Owner's Manual. Connections - Using Tyros4 with Other Devices - UPPER A keyboard part played on the right side of the keyboard from the Split Point for the Voices (RIGHT 1, 2, and 3). LOWER A keyboard part played on the left side of the - Yamaha Tyros4 | Reference Manual - Page 128
elsewhere in the Owner's Manual. KEYBOARD The received note messages control the Tyros4's keyboard performance. EXTRA PART 1-4 There are four parts specially reserved for receiving and playing MIDI data. Normally, these parts are not used by the instrument itself. The Tyros4 can be used as a 32 - Yamaha Tyros4 | Reference Manual - Page 129
Connections - Using Tyros4 with Other Devices - Setting the Bass Note for Style Playback via MIDI Receive The explanations here apply to the BASS Page in step 4 on page 124. These settings let you determine the bass note for Style playback, based on the note messages received via MIDI. The note on/ - Yamaha Tyros4 | Reference Manual - Page 130
sends control change messages over a specific control change number to the Tyros4, and the Tyros4 determines how it responds to (which parameter is changed by) that control change number. 4-1 Use the [A]/[E] buttons to select "FOOTSWITCH" or "FOOT CONTROL- LER." NEXT PAGE 130 Tyros4 Reference Manual - Yamaha Tyros4 | Reference Manual - Page 131
using an MFC10, you can have note numbers and control change messages from any other appropriate MIDI device (such as a computer, sequencer or master keyboard) control the Tyros4. Make sure to set the appropriate channel in this display for control by the external device. Tyros4 Reference Manual - Yamaha Tyros4 | Reference Manual - Page 132
Original Settings as a Single File...138 CONFIG1 Select the desired parameter: 1 Fade In/Out 2 Metronome 3 Parameter Lock 4 Tap 1 Fade In/Out These parameters determine the behavior when the Style or Song playback . Determines the time signature of the metronome sound. 132 Tyros4 Reference Manual - Yamaha Tyros4 | Reference Manual - Page 133
Lock This function is used to "lock" specific parameters (effect, split point, etc.) to make them selectable only via the panel control-in other words, instead of being changed via Registration Memory, One Touch Setting, Music Finder, or Song and sequence data. Use the [1 ]-[7 ] buttons to - Yamaha Tyros4 | Reference Manual - Page 134
press buttons such as TEMPO, TRANSPOSE or UPPER OCTAVE, etc.) 3 SA2 Auto Articulation Determines whether articulation is added to SA2 Voices automatically. NOTE This affects not only SA2 Voices of your keyboard performance, but also the SA2 Voices in Songs or Styles. 134 Tyros4 Reference Manual - Yamaha Tyros4 | Reference Manual - Page 135
Audio Recorder/Player may not function properly. Turns the Song Auto Open function on or off. When this is set to "ON" and the media selected in the Device List above is inserted, the Tyros4 automatically calls up the first Song in the media. Utility - Making Global Settings - 12 Tyros4 Reference - Yamaha Tyros4 | Reference Manual - Page 136
selected language. Displays the version number of this instrument. 2 License Key When you want to purchase and install Premium Voices, Songs and Styles, etc. (called Premium Pack data), a license key may be needed. For details, refer to Chapter 1 in the Owner's Manual. 136 Tyros4 Reference Manual - Yamaha Tyros4 | Reference Manual - Page 137
press the [4 ] (MARK OFF) button. Utility - Making Global Settings - SYSTEM SETUP MIDI SETUP USER EFFECT MUSIC FINDER FILES & FOLDERS REGIST EXPANSION VOICE Restores the System Setup parameters to the original factory settings. Refer to the Data List for details about which parameters belong to - Yamaha Tyros4 | Reference Manual - Page 138
the Mixing Console display, as well as the user vocal harmony types and user microphone setting memories are managed as a single file. [I] MUSIC FINDER All the preset and created records of the Music Finder are handled as a single file. FILES 4 Use the TAB [][] buttons to select one of the - Yamaha Tyros4 | Reference Manual - Page 139
6, 10, 121 CONTROLLER (Voice Set 12 Cool 4 Custom Drum Voice 24 Custom Reset 138 Custom Voice 20 CUSTOM VOICE ASSEMBLY. 21, 25 CUSTOM VOICE EDIT via PC ...... 33 Custom 5 CustomWA 5 D DECAY 13 DEFRAG (Expansion Module)....... 29 DELETE (Song Creator 71 DELETE (Style Creator 42 DELETE WAVE - Yamaha Tyros4 | Reference Manual - Page 140
Recorder/Player)..... 91 MODE (Organ Flutes 16 MODE (Vocal Harmony 100 MODULATION (Pedal 122 MODULATION (Voice Set 12 MONO/POLY 12 MOVABLE DO 54 Multi Assign Type 7 MULTI FINGER 35 Multi Pad 77 Multi Pad Creator 77 MULTI PAD EDIT 79 Music Finder 80 MUSIC FINDER 83 MUSIC FINDER FILES - Yamaha Tyros4 | Reference Manual - Page 141
SENSE (Voice Set).......... 12 Touch Sensitivity 6 TRACK DELETE 88 TRACK SELECT 88-90 TRANSMIT 124, 127 TRANSMIT CLOCK 126 TRANSPOSE 108 TRANSPOSE (Vocal Harmony)... 101 TRANSPOSE ASSIGN 10 TUNE 108 TUNING 108 Tuning 9 U USER EFFECT FILES 138 USER MEMORY 119 Utility 132 V VARIATION
-
 1
1 -
 2
2 -
 3
3 -
 4
4 -
 5
5 -
 6
6 -
 7
7 -
8
-
9
-
10
-
11
-
12
-
13
-
14
-
15
-
16
-
17
-
18
-
19
-
20
-
21
-
22
-
23
-
24
-
25
-
26
-
27
-
28
-
29
-
30
-
31
-
32
-
33
-
34
-
35
-
36
-
37
-
38
-
39
-
40
-
41
-
42
-
43
-
44
-
45
-
46
-
47
-
48
-
49
-
50
-
51
-
52
-
53
-
54
-
55
-
56
-
57
-
58
-
59
-
60
-
61
-
62
-
63
-
64
-
65
-
66
-
67
-
68
-
69
-
70
-
71
-
72
-
73
-
74
-
75
-
76
-
77
-
78
-
79
-
80
-
81
-
82
-
83
-
84
-
85
-
86
-
87
-
88
-
89
-
90
-
91
-
92
-
93
-
94
-
95
-
96
-
97
-
98
-
99
-
100
-
101
-
102
-
103
-
104
-
105
-
106
-
107
-
108
-
109
-
110
-
111
-
112
-
113
-
114
-
115
-
116
-
117
-
118
-
119
-
120
-
121
-
122
-
123
-
124
-
125
-
126
-
127
-
128
-
129
-
130
-
131
-
132
-
133
-
134
-
135
-
136
-
137
-
138
-
139
-
140
-
141
 |
 |

EN
Reference Manual
This Reference Manual explains advanced features of the Tyros4 that are not explained in the
Owner’s Manual. Please read the Owner’s Manual first, before reading this Reference Manual.