Yamaha Tyros4 Reference Manual - Page 23
Store the created Normal Voice., Key Mapping display.
 |
UPC - 086792947280
View all Yamaha Tyros4 manuals
Add to My Manuals
Save this manual to your list of manuals |
Page 23 highlights
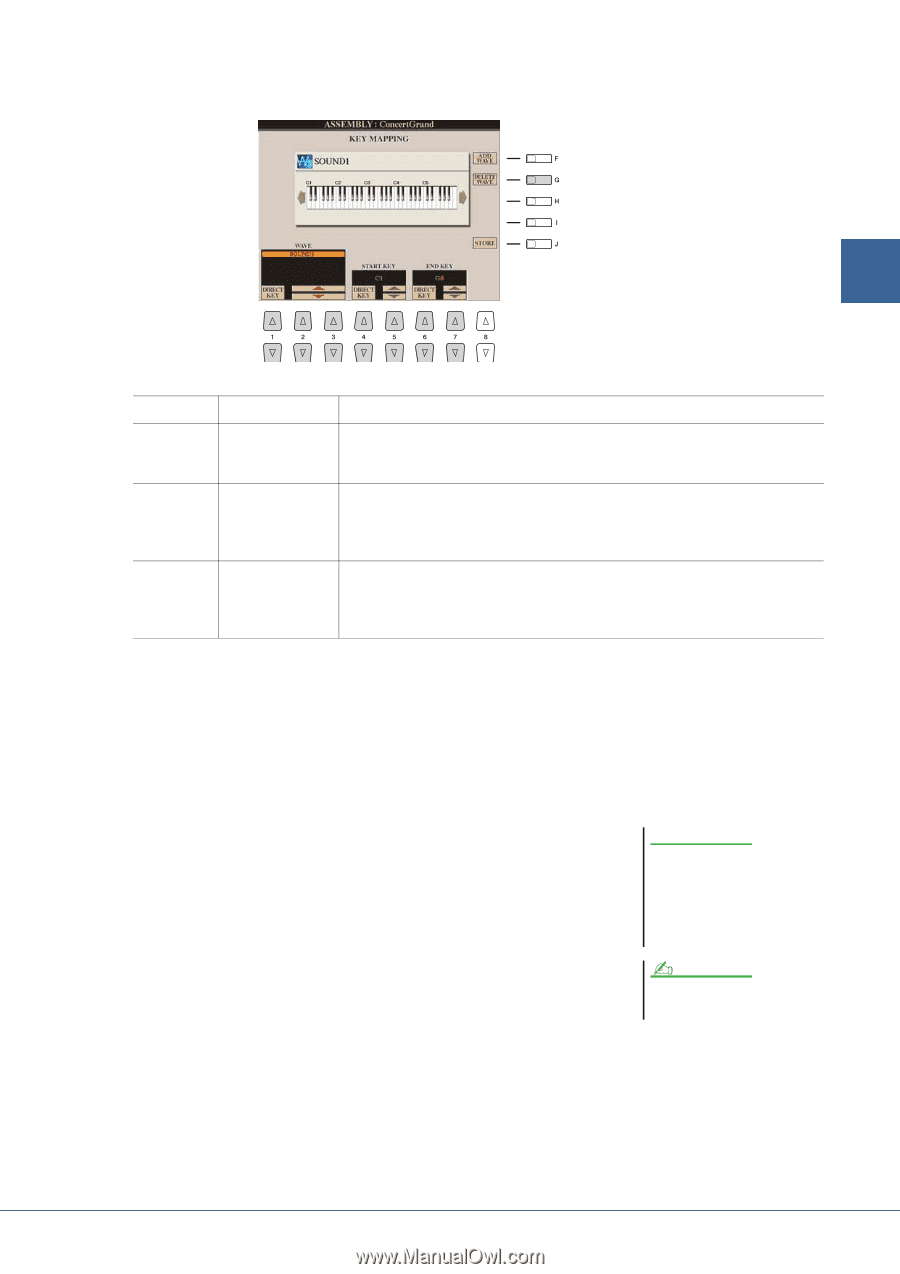
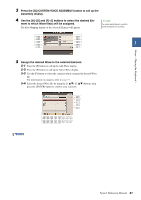
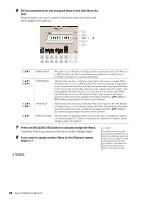
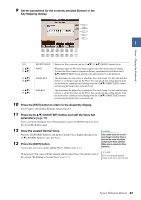
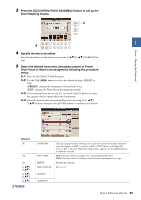
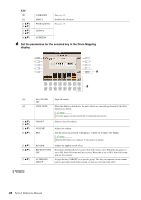
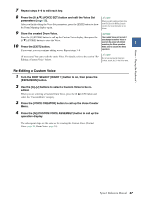
Voices - Playing the Keyboard - 9 Set the parameters for the currently selected Element in the Key Mapping display. 1 [G] [1 ]- [3 ] [4 ]/ [5 ] [6 ]/ [7 ] DELETE WAVE WAVE START KEY END KEY Deletes the Wave selected with the [1 ]-[3 ] (WAVE) buttons below. When more than one Wave has been assigned, select the desired one for editing. To select the Wave which is assigned to the key, simultaneously hold down the [1 ] (DIRECT KEY) button and press the appropriate key on the keyboard. This determines the lowest key at which the Wave will sound. Use this with End Key (below) to set the key range for the Wave. You can specify this setting directly from the keyboard by simultaneously holding down the [4 ] (DIRECT KEY) button and pressing the desired key on the keyboard. This determines the highest key at which the Wave will sound. Use this with Start Key (above) to set the key range for the Wave. You can specify this setting directly from the keyboard by simultaneously holding down the [6 ] (DIRECT KEY) button and pressing the desired key on the keyboard. 10 Press the [EXIT] button to return to the Assembly display. If you want to edit another Element, repeat steps 4-9. 11 Press the [8 ] (VOICE SET) button and edit the Voice Set parameters (page 12). After you finish editing the Voice Set parameters, press the [EXIT] button to show the Assembly display again. 12 Store the created Normal Voice. Press the [J] (STORE) button to call up the Custom Voice display, then press the [6 ] (STORE) button to store the Voice. 13 Press the [EXIT] button. If you want, you can continue adding Waves. Repeat steps 4-12. NOTICE The created Voice will be lost if you change to another Voice or you turn the power off without executing the Store operation. Make sure to execute the Store operation. (If necessary) You can re-edit the element and the entire Voice. For details, refer to the section "Re-Editing a Custom Voice" (page 27). NOTE Do not use any special characters (umlaut, accent, etc.) in the Voice name. Tyros4 Reference Manual 23
-
 1
1 -
2
-
3
-
4
-
5
-
6
-
7
-
8
-
9
-
10
-
11
-
12
-
13
-
14
-
15
-
16
-
17
-
 18
18 -
 19
19 -
 20
20 -
 21
21 -
 22
22 -
 23
23 -
 24
24 -
 25
25 -
 26
26 -
 27
27 -
 28
28 -
29
-
30
-
31
-
32
-
33
-
34
-
35
-
36
-
37
-
38
-
39
-
40
-
41
-
42
-
43
-
44
-
45
-
46
-
47
-
48
-
49
-
50
-
51
-
52
-
53
-
54
-
55
-
56
-
57
-
58
-
59
-
60
-
61
-
62
-
63
-
64
-
65
-
66
-
67
-
68
-
69
-
70
-
71
-
72
-
73
-
74
-
75
-
76
-
77
-
78
-
79
-
80
-
81
-
82
-
83
-
84
-
85
-
86
-
87
-
88
-
89
-
90
-
91
-
92
-
93
-
94
-
95
-
96
-
97
-
98
-
99
-
100
-
101
-
102
-
103
-
104
-
105
-
106
-
107
-
108
-
109
-
110
-
111
-
112
-
113
-
114
-
115
-
116
-
117
-
118
-
119
-
120
-
121
-
122
-
123
-
124
-
125
-
126
-
127
-
128
-
129
-
130
-
131
-
132
-
133
-
134
-
135
-
136
-
137
-
138
-
139
-
140
-
141
 |
 |