Yamaha Tyros4 Reference Manual - Page 22
steps 5-7., If you want to assign another Wave to this Element, repeat
 |
UPC - 086792947280
View all Yamaha Tyros4 manuals
Add to My Manuals
Save this manual to your list of manuals |
Page 22 highlights
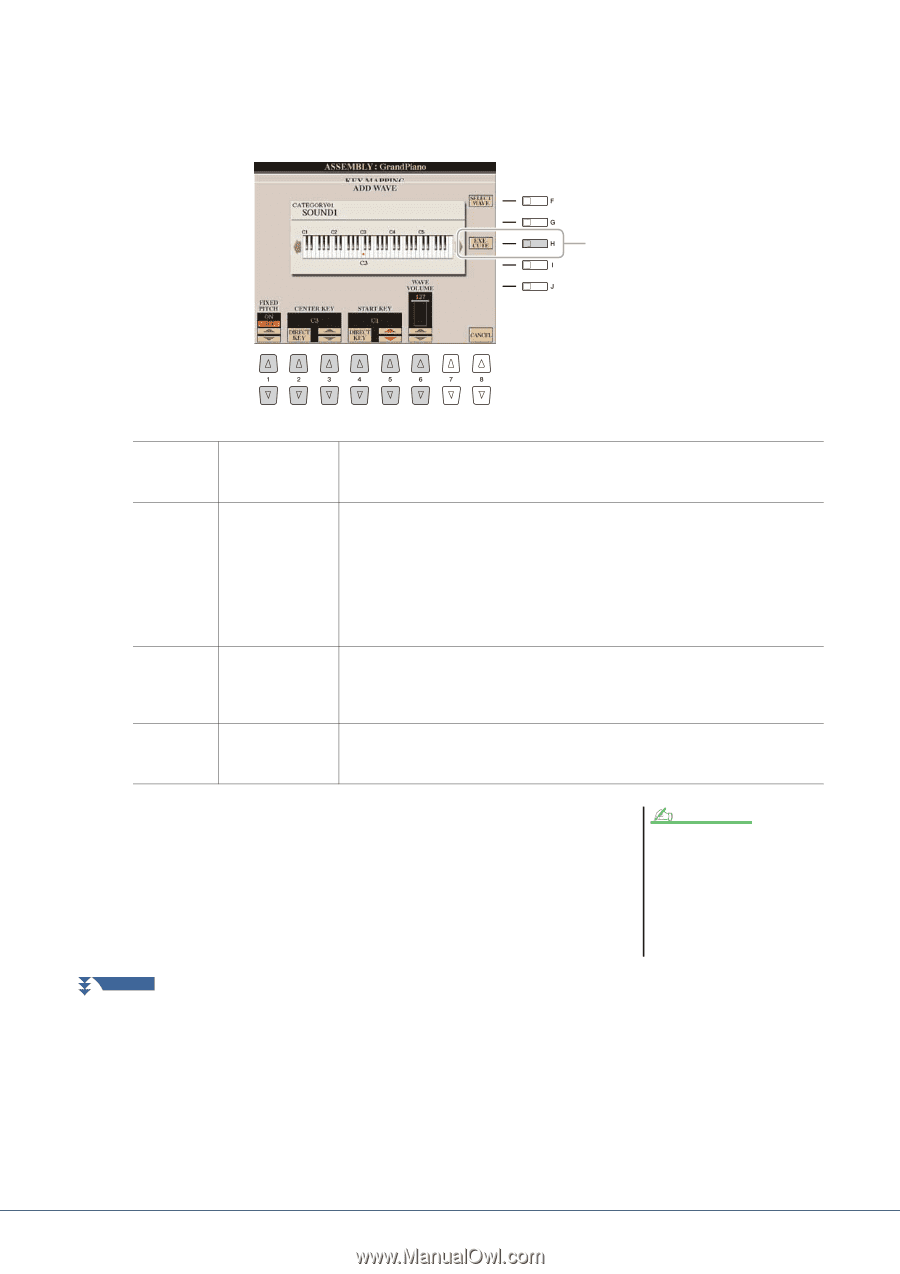
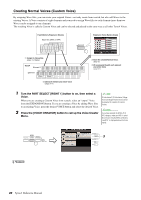
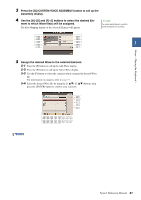
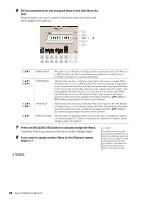
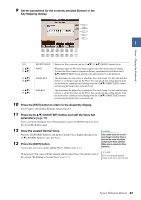
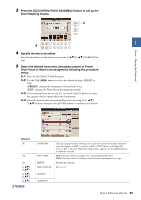
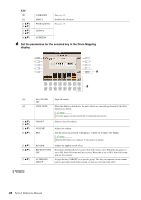
6 Set the parameters for the assigned Wave in the Add Wave dis- play. From this display, you can set a number of parameters related to how the sound will be mapped to the keyboard. 7 [1 ] [2 ]/ [3 ] [4 ]/ [5 ] [6 ] FIXED PITCH CENTER KEY START KEY WAVE VOLUME When this is set to ON, all keys will play the Wave sound at the same pitch. When set to OFF, the pitch of the Wave sound changes according to the key played, based around the original pitch (set at Center Key below). This determines the key to which the original pitch of the sound is assigned. When Fixed Pitch (above) is set to OFF, keys below the Center Key play the sound progressively lower in pitch, while keys above play the sound progressively higher. Normally, you'll want to make sure that this is the same as the original sound; for example, if the original pitch of the audio was at C3, set Center Key to C3 for best results. When Fixed Pitch (above) is set to ON, this has no effect. You can specify this setting directly from the keyboard by simultaneously holding down the [2 ] (DIRECT KEY) button and pressing the desired key on the keyboard. This determines the lowest key at which the Wave will sound. Use this with End Key (see step 9 on page 23) to set the key range for the Wave. You can specify this setting directly from the keyboard by simultaneously holding down the [4 ] (DIRECT KEY) button and pressing the desired key on the keyboard. This determines the playback volume for the specific Wave. Normally, this should be set to the maximum (127); however, you can use it to adjust the level balance among multiple sounds in the Element. 7 Press the [H] (EXECUTE) button to actually assign the Wave. Completion of the Assign operation will return to the Key Mapping display. 8 If you want to assign another Wave to this Element, repeat steps 5-7. NOTE If you want to store the Voice at this point, press the [J] (STORE) button. The Custom Voice display will appear. Refer to step 12 on page 23 about the Custom Voice display. Each time you make some change (e.g., add a Wave to the Element or add an Element to the Voice), you should store the Voice. NEXT PAGE 22 Tyros4 Reference Manual
-
 1
1 -
2
-
3
-
4
-
5
-
6
-
7
-
8
-
9
-
10
-
11
-
12
-
13
-
14
-
15
-
16
-
 17
17 -
 18
18 -
 19
19 -
 20
20 -
 21
21 -
 22
22 -
 23
23 -
 24
24 -
 25
25 -
 26
26 -
 27
27 -
28
-
29
-
30
-
31
-
32
-
33
-
34
-
35
-
36
-
37
-
38
-
39
-
40
-
41
-
42
-
43
-
44
-
45
-
46
-
47
-
48
-
49
-
50
-
51
-
52
-
53
-
54
-
55
-
56
-
57
-
58
-
59
-
60
-
61
-
62
-
63
-
64
-
65
-
66
-
67
-
68
-
69
-
70
-
71
-
72
-
73
-
74
-
75
-
76
-
77
-
78
-
79
-
80
-
81
-
82
-
83
-
84
-
85
-
86
-
87
-
88
-
89
-
90
-
91
-
92
-
93
-
94
-
95
-
96
-
97
-
98
-
99
-
100
-
101
-
102
-
103
-
104
-
105
-
106
-
107
-
108
-
109
-
110
-
111
-
112
-
113
-
114
-
115
-
116
-
117
-
118
-
119
-
120
-
121
-
122
-
123
-
124
-
125
-
126
-
127
-
128
-
129
-
130
-
131
-
132
-
133
-
134
-
135
-
136
-
137
-
138
-
139
-
140
-
141
 |
 |