Brother International MFC-7050C Users Manual - English - Page 31
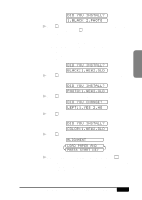
Black 2.photo, Black:1.new2.old, Photo:1.new2.old, Did You Change?, Left:1.yes 2.no, Color:1.new2.
 |
View all Brother International MFC-7050C manuals
Add to My Manuals
Save this manual to your list of manuals |
Page 31 highlights
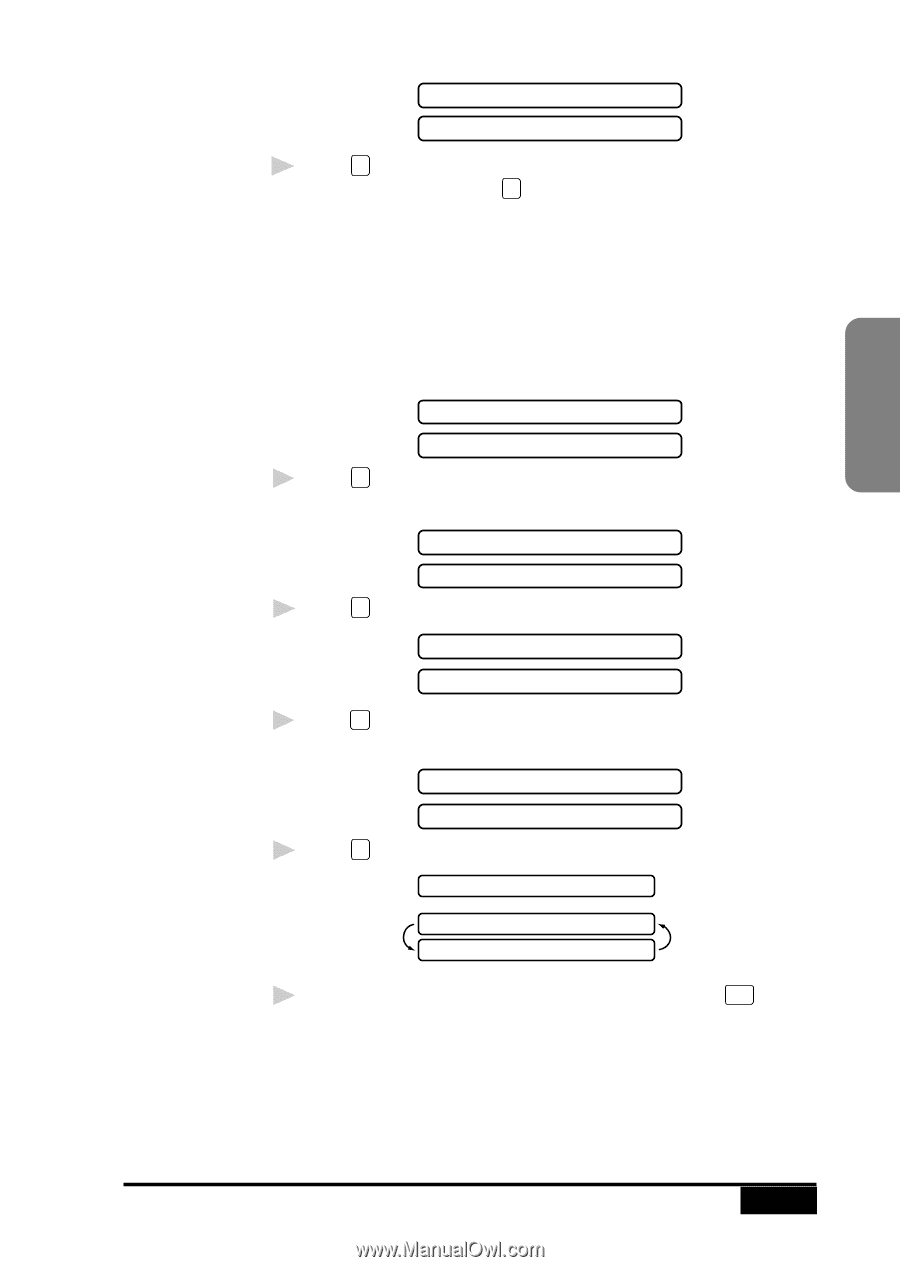
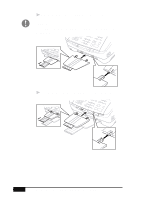
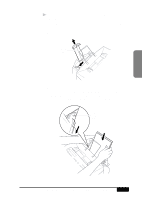
Assembly and Connections DID YOU INSTALL? 1.BLACK 2.PHOTO 9 Press 1 if you installed the starter Black ink cartridge and go to Step 10-OR-press 2 if you installed the Photo ink cartridge (accessory) and go to Step 11. In initial setup, the MFC prompts you to verify that you installed each ink cartridge. Be sure to use the starter ink cartridges that were designed for initial setup. The MFC uses your responses to set the ink dot counter for each ink cartridge, so the MFC can warn you when a specific ink cartridge is low or empty. DID YOU INSTALL? BLACK:1.NEW2.OLD 10 Press 1 if you installed the new starter Black ink cartridge. Go to Step 12. DID YOU INSTALL? PHOTO:1.NEW2.OLD 11 Press 1 if you installed a new Photo ink cartridge (accessory). DID YOU CHANGE? LEFT:1.YES 2.NO 12 Press 1 that you changed the new starter Color cartridge on the left-side. DID YOU INSTALL? COLOR:1.NEW2.OLD 13 Press 1 that you installed the new starter Color ink cartridge. ALIGNMENT LOAD PAPER AND PRESS START KEY 14 Make sure paper is in the paper cassette, then press Start . The Alignment Test Sheet prints with instructions for checking and changing the alignment of the ink cartridges. If needed, adjust the alignment. MFC SETUP AND CONNECTIONS 2 -11
-
 1
1 -
2
-
3
-
4
-
5
-
6
-
7
-
8
-
9
-
10
-
11
-
12
-
13
-
14
-
15
-
16
-
17
-
18
-
19
-
20
-
21
-
22
-
23
-
24
-
25
-
 26
26 -
 27
27 -
 28
28 -
 29
29 -
 30
30 -
 31
31 -
 32
32 -
 33
33 -
 34
34 -
 35
35 -
 36
36 -
37
-
38
-
39
-
40
-
41
-
42
-
43
-
44
-
45
-
46
-
47
-
48
-
49
-
50
-
51
-
52
-
53
-
54
-
55
-
56
-
57
-
58
-
59
-
60
-
61
-
62
-
63
-
64
-
65
-
66
-
67
-
68
-
69
-
70
-
71
-
72
-
73
-
74
-
75
-
76
-
77
-
78
-
79
-
80
-
81
-
82
-
83
-
84
-
85
-
86
-
87
-
88
-
89
-
90
-
91
-
92
-
93
-
94
-
95
-
96
-
97
-
98
-
99
-
100
-
101
-
102
-
103
-
104
-
105
-
106
-
107
-
108
-
109
-
110
-
111
-
112
-
113
-
114
-
115
-
116
-
117
-
118
-
119
-
120
-
121
-
122
-
123
-
124
-
125
-
126
-
127
-
128
-
129
-
130
-
131
-
132
-
133
-
134
-
135
-
136
-
137
-
138
-
139
-
140
-
141
-
142
-
143
-
144
-
145
-
146
-
147
-
148
-
149
-
150
-
151
-
152
-
153
-
154
-
155
-
156
-
157
-
158
-
159
-
160
-
161
-
162
-
163
-
164
-
165
-
166
-
167
-
168
-
169
-
170
-
171
-
172
-
173
-
174
-
175
-
176
-
177
-
178
-
179
-
180
-
181
-
182
-
183
-
184
-
185
-
186
-
187
-
188
-
189
-
190
-
191
-
192
-
193
-
194
-
195
-
196
-
197
-
198
-
199
-
200
-
201
-
202
-
203
-
204
-
205
-
206
-
207
-
208
-
209
-
210
-
211
-
212
-
213
-
214
-
215
-
216
-
217
-
218
-
219
-
220
-
221
-
222
-
223
-
224
-
225
-
226
-
227
-
228
-
229
-
230
-
231
-
232
-
233
-
234
-
235
-
236
-
237
-
238
-
239
-
240
-
241
-
242
-
243
-
244
-
245
-
246
-
247
-
248
-
249
-
250
-
251
-
252
-
253
-
254
-
255
-
256
-
257
-
258
-
259
-
260
-
261
-
262
-
263
-
264
 |
 |