Brother International MFC-7050C Users Manual - English - Page 36
Pls Open Cover
 |
View all Brother International MFC-7050C manuals
Add to My Manuals
Save this manual to your list of manuals |
Page 36 highlights
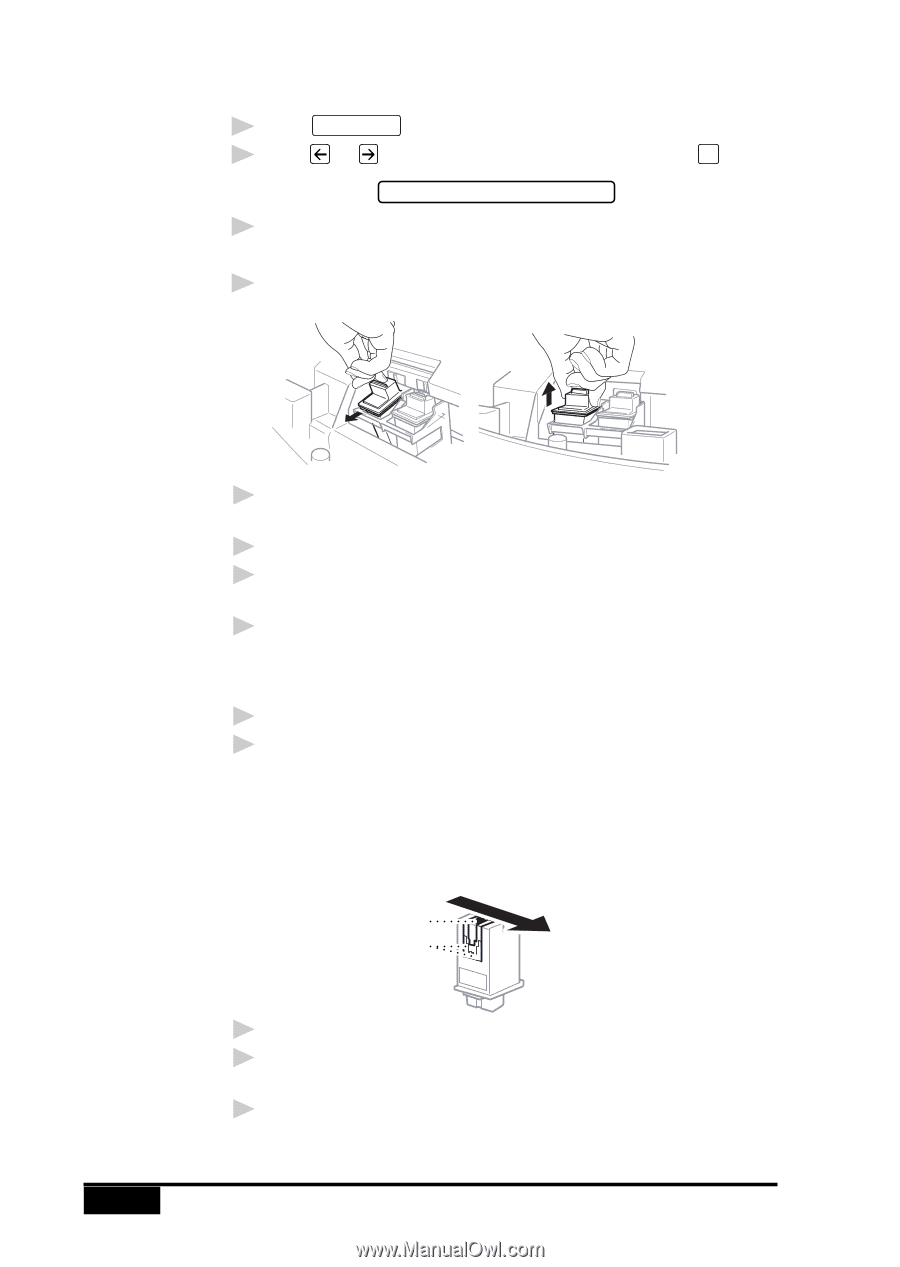
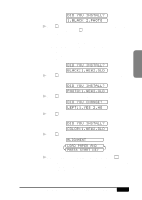
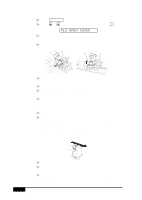
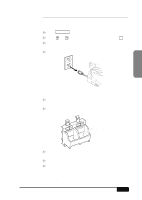
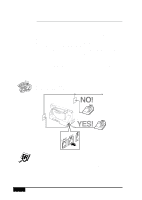
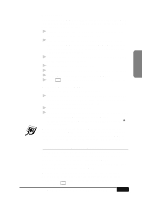
Removing and Reinstalling Ink Cartridges: 6 Press Ink Management . 7 Press or to select 3.REPLACE INK and press Set . PLS OPEN COVER 8 Open the cover. The ink cartrige carrier will move to its loading position. 9 Remove the ink cartridges (press cartridges forward until they snap and lift out). 2 -16 10 Reinstall the ink cartridges (insert cartridges and press backward until they snap). 11 Close the cover. 12 For correct responses to the display prompts, see "Replacing the Ink Cartridges (Routine Maintenance)," page 24-16. 13 Repeat the head cleaning and check the test patterns again (Steps 2-5). If the lines are still broken, clean the ink nozzles manually. Cleaning Nozzles Manually: 14 Repeat Steps 6-9. 15 Dampen a clean cloth with water and gently wipe the entire copper-colored area, including the nozzles and contacts. When cleaning the color print cartridge, wipe the nozzles in one direction so the colors do not mix. To dissolve dried ink, hold the damp cloth against the nozzles for about three seconds. Gently blot and wipe dry. Nozzles Contacts 16 Allow the copper-colored area to dry. 17 Reinstall the ink cartridges (insert cartridges and press backward until they snap). 18 Repeat Steps 2-5 to perform another head cleaning. If the nozzle test line is still unsatisfactory, perform the steps in "Cleaning the Cartridge Carrier," page 2-17. MFC SETUP AND CONNECTIONS
-
 1
1 -
2
-
3
-
4
-
5
-
6
-
7
-
8
-
9
-
10
-
11
-
12
-
13
-
14
-
15
-
16
-
17
-
18
-
19
-
20
-
21
-
22
-
23
-
24
-
25
-
26
-
27
-
28
-
29
-
30
-
 31
31 -
 32
32 -
 33
33 -
 34
34 -
 35
35 -
 36
36 -
 37
37 -
 38
38 -
 39
39 -
 40
40 -
 41
41 -
42
-
43
-
44
-
45
-
46
-
47
-
48
-
49
-
50
-
51
-
52
-
53
-
54
-
55
-
56
-
57
-
58
-
59
-
60
-
61
-
62
-
63
-
64
-
65
-
66
-
67
-
68
-
69
-
70
-
71
-
72
-
73
-
74
-
75
-
76
-
77
-
78
-
79
-
80
-
81
-
82
-
83
-
84
-
85
-
86
-
87
-
88
-
89
-
90
-
91
-
92
-
93
-
94
-
95
-
96
-
97
-
98
-
99
-
100
-
101
-
102
-
103
-
104
-
105
-
106
-
107
-
108
-
109
-
110
-
111
-
112
-
113
-
114
-
115
-
116
-
117
-
118
-
119
-
120
-
121
-
122
-
123
-
124
-
125
-
126
-
127
-
128
-
129
-
130
-
131
-
132
-
133
-
134
-
135
-
136
-
137
-
138
-
139
-
140
-
141
-
142
-
143
-
144
-
145
-
146
-
147
-
148
-
149
-
150
-
151
-
152
-
153
-
154
-
155
-
156
-
157
-
158
-
159
-
160
-
161
-
162
-
163
-
164
-
165
-
166
-
167
-
168
-
169
-
170
-
171
-
172
-
173
-
174
-
175
-
176
-
177
-
178
-
179
-
180
-
181
-
182
-
183
-
184
-
185
-
186
-
187
-
188
-
189
-
190
-
191
-
192
-
193
-
194
-
195
-
196
-
197
-
198
-
199
-
200
-
201
-
202
-
203
-
204
-
205
-
206
-
207
-
208
-
209
-
210
-
211
-
212
-
213
-
214
-
215
-
216
-
217
-
218
-
219
-
220
-
221
-
222
-
223
-
224
-
225
-
226
-
227
-
228
-
229
-
230
-
231
-
232
-
233
-
234
-
235
-
236
-
237
-
238
-
239
-
240
-
241
-
242
-
243
-
244
-
245
-
246
-
247
-
248
-
249
-
250
-
251
-
252
-
253
-
254
-
255
-
256
-
257
-
258
-
259
-
260
-
261
-
262
-
263
-
264
 |
 |