Brother International MFC 9420CN Software Users Manual - English - Page 137
Network Scanning (For Mac OS® X 10.2.4 or greater), Before using Network Scanning, Configuring
 |
UPC - 012502614074
View all Brother International MFC 9420CN manuals
Add to My Manuals
Save this manual to your list of manuals |
Page 137 highlights
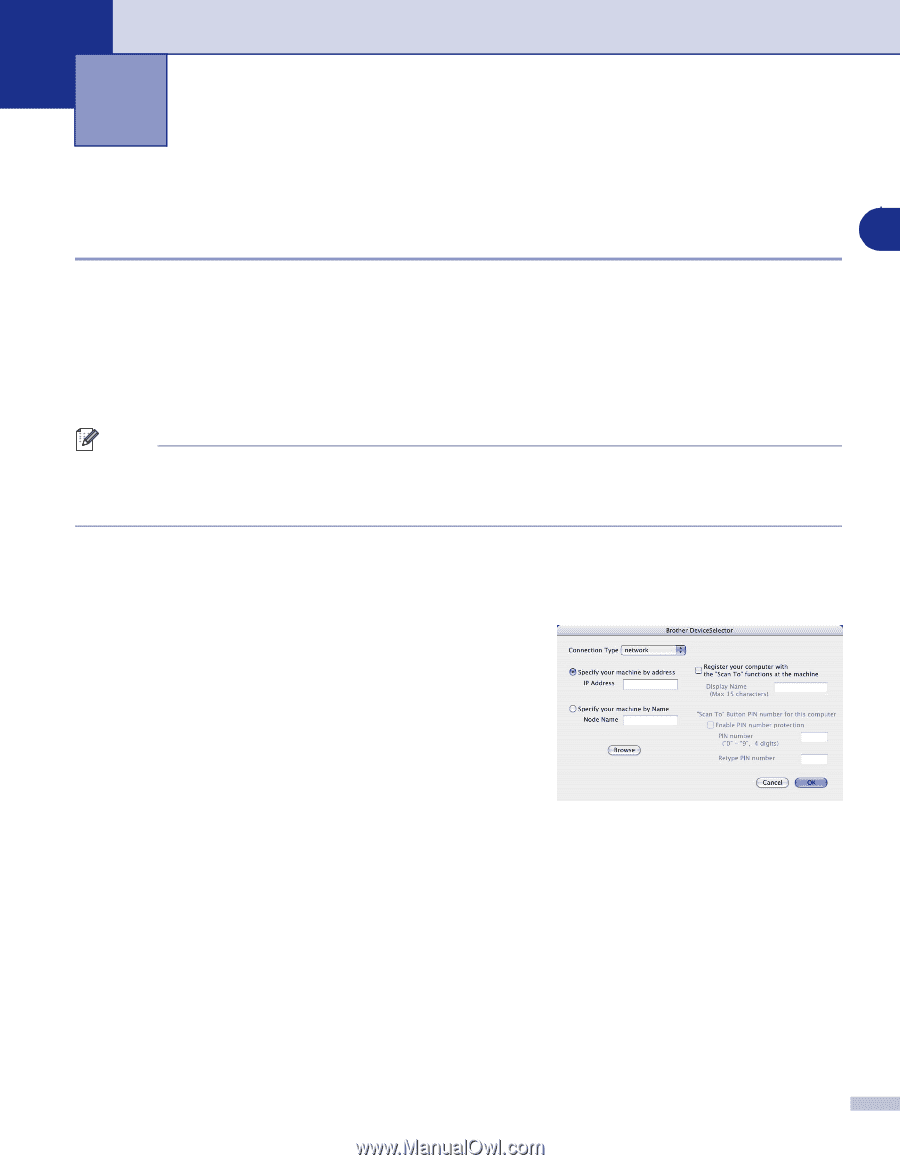
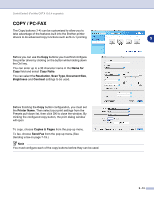
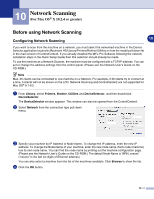
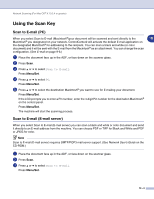
10 Network Scanning (For Mac OS® X 10.2.4 or greater) Before using Network Scanning 10 Configuring Network Scanning If you want to scan from the machine on a network, you must select the networked machine in the Device Selector application located in Macintosh HD/Library/Printers/Brother/Utilities or from the model pull-down list in the main screen of ControlCenter2. If you already installed the MFL-Pro Software following the network installation steps in the Quick Setup Guide then this selection should already be made. To use the machine as a Network Scanner, the machine must be configured with a TCP/IP address. You can set or change the address settings from the control panel. (Please see the Network User's Guide on the CD-ROM.) Note Max. 25 clients can be connected to one machine on a Network. For example, if 30 clients try to connect at a time, 5 clients will not be shown on the LCD. Network Scanning and ControlCenter2 are not supported for Mac OS® 9.1-9.2. 1 From Library, select Printers, Brother, Utilities and DeviceSelector, and then doubleclick DeviceSelector. The DeviceSelector window appears. This window can also be opened from the ControlCenter2. 2 Select Network from the connection type pull-down menu. 3 Specify your machine by IP Address or Node Name. To change the IP address, enter the new IP address. To change the Node Name of your machine, enter the new node name. Each node (machine) has its own node name. You can find the node name by printing out the machine configuration page. (Please see the Network User's Guide on the CD-ROM.) The default Node Name is "BRN_xxxxxx" ("xxxxxx" is the last six digits of Ethernet address.) You can also select a machine from the list of the machines available. Click Browse to show the list. 4 Click the OK button. 10 - 1
-
 1
1 -
2
-
3
-
4
-
5
-
6
-
7
-
8
-
9
-
10
-
11
-
12
-
13
-
14
-
15
-
16
-
17
-
18
-
19
-
20
-
21
-
22
-
23
-
24
-
25
-
26
-
27
-
28
-
29
-
30
-
31
-
32
-
33
-
34
-
35
-
36
-
37
-
38
-
39
-
40
-
41
-
42
-
43
-
44
-
45
-
46
-
47
-
48
-
49
-
50
-
51
-
52
-
53
-
54
-
55
-
56
-
57
-
58
-
59
-
60
-
61
-
62
-
63
-
64
-
65
-
66
-
67
-
68
-
69
-
70
-
71
-
72
-
73
-
74
-
75
-
76
-
77
-
78
-
79
-
80
-
81
-
82
-
83
-
84
-
85
-
86
-
87
-
88
-
89
-
90
-
91
-
92
-
93
-
94
-
95
-
96
-
97
-
98
-
99
-
100
-
101
-
102
-
103
-
104
-
105
-
106
-
107
-
108
-
109
-
110
-
111
-
112
-
113
-
114
-
115
-
116
-
117
-
118
-
119
-
120
-
121
-
122
-
123
-
124
-
125
-
126
-
127
-
128
-
129
-
130
-
131
-
 132
132 -
 133
133 -
 134
134 -
 135
135 -
 136
136 -
 137
137 -
 138
138 -
 139
139 -
 140
140 -
 141
141 -
 142
142 -
143
-
144
-
145
 |
 |