Canon PowerShot G9 X Mark II User Manual - Page 121
Cropping
 |
View all Canon PowerShot G9 X Mark II manuals
Add to My Manuals
Save this manual to your list of manuals |
Page 121 highlights
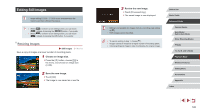
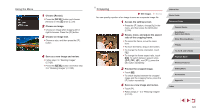
Using the Menu 1 Choose [Resize]. zzPress the [ ] button and choose [Resize] on the [ 3] tab (=29). 2 Choose an image. zzChoose an image after dragging left or right to browse. Press the [ ] button. 3 Choose an image size. zzChoose a size, and then press the [ ] button. 4 Save as a new image and review. zzFollow step 2 in "Resizing Images" (= 120). zzPress the [ ] button and follow step 3 in "Resizing Images" (= 120). Cropping Still Images Movies You can specify a portion of an image to save as a separate image file. 1 Access the setting screen. zzPress the [ ] button, choose [ ] in the menu, and then press the [ ] button (= 28). 2 Resize, move, and adjust the aspect ratio of the cropping frame. zzTo resize the frame, move the zoom lever. zzTo move the frame, drag on the screen. zzTo change the frame orientation, touch [ ]. zzTo change the frame aspect ratio, touch [ ]. To switch between aspect ratios and [ ]), press the [ ] button repeatedly. 3 Preview the cropped image. zzTouch [ ]. zzTo switch display between the cropped image and the cropping frame, press the [ ] button repeatedly. 4 Save as a new image and review. zzTouch [ ]. zzFollow steps 2 - 3 in "Resizing Images" (= 120). Before Use Basic Guide Advanced Guide Camera Basics Auto Mode / Hybrid Auto Mode Other Shooting Modes P Mode Tv, Av, M, and C Mode Playback Mode Wireless Features Setting Menu Accessories Appendix Index 121
-
 1
1 -
2
-
3
-
4
-
5
-
6
-
7
-
8
-
9
-
10
-
11
-
12
-
13
-
14
-
15
-
16
-
17
-
18
-
19
-
20
-
21
-
22
-
23
-
24
-
25
-
26
-
27
-
28
-
29
-
30
-
31
-
32
-
33
-
34
-
35
-
36
-
37
-
38
-
39
-
40
-
41
-
42
-
43
-
44
-
45
-
46
-
47
-
48
-
49
-
50
-
51
-
52
-
53
-
54
-
55
-
56
-
57
-
58
-
59
-
60
-
61
-
62
-
63
-
64
-
65
-
66
-
67
-
68
-
69
-
70
-
71
-
72
-
73
-
74
-
75
-
76
-
77
-
78
-
79
-
80
-
81
-
82
-
83
-
84
-
85
-
86
-
87
-
88
-
89
-
90
-
91
-
92
-
93
-
94
-
95
-
96
-
97
-
98
-
99
-
100
-
101
-
102
-
103
-
104
-
105
-
106
-
107
-
108
-
109
-
110
-
111
-
112
-
113
-
114
-
115
-
 116
116 -
 117
117 -
 118
118 -
 119
119 -
 120
120 -
 121
121 -
 122
122 -
 123
123 -
 124
124 -
 125
125 -
 126
126 -
127
-
128
-
129
-
130
-
131
-
132
-
133
-
134
-
135
-
136
-
137
-
138
-
139
-
140
-
141
-
142
-
143
-
144
-
145
-
146
-
147
-
148
-
149
-
150
-
151
-
152
-
153
-
154
-
155
-
156
-
157
-
158
-
159
-
160
-
161
-
162
-
163
-
164
-
165
-
166
-
167
-
168
-
169
-
170
-
171
-
172
-
173
-
174
-
175
-
176
-
177
-
178
-
179
-
180
-
181
-
182
-
183
-
184
-
185
-
186
-
187
-
188
-
189
-
190
-
191
-
192
-
193
-
194
-
195
-
196
-
197
-
198
-
199
-
200
-
201
-
202
-
203
-
204
-
205
-
206
-
207
-
208
-
209
-
210
-
211
-
212
-
213
-
214
-
215
-
216
-
217
-
218
-
219
 |
 |
