Canon PowerShot G9 X Mark II User Manual - Page 56
Shooting with a Fish-Eye Lens Effect Fish-Eye, Effect
 |
View all Canon PowerShot G9 X Mark II manuals
Add to My Manuals
Save this manual to your list of manuals |
Page 56 highlights
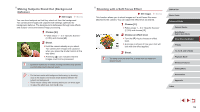
●● If excessive camera shake interferes with shooting, mount the camera on a tripod or take other measures to keep it still. Additionally, you should set [IS Mode] to [Off] when using a tripod or other means to secure the camera (=51). ●● Any subject movement will cause images to look blurry. ●● There will be a delay before you can shoot again, as the camera processes and combines the images may be displayed when you press the shutter button halfway in bright conditions, indicating automatic adjustment for optimal image brightness. Adding Artistic Effects zzFollow steps 1 - 2 in "Specific Scenes" (=53) and choose [ ]. zzTurn the [ ] ring to choose an effect. zzA preview is shown of how your shot will look with the effect applied. Natural Art Standard Art Vivid Art Bold Art Embossed Images are natural and organic. Images resemble paintings, with subdued contrast. Images resemble vivid illustrations. Images resemble oil paintings, with bold edges. Images resemble old photos, with bold edges and dark ambiance. Shooting with a Fish-Eye Lens Effect (Fish-Eye Effect) Still Images Shoot with the distorting effect of a fish-eye lens. Movies 1 Choose [ ]. zzFollow steps 1 - 2 in "Specific Scenes" (=53) and choose [ ]. 2 Choose an effect level. zzTurn the [ ] ring to choose an effect level. zzA preview is shown of how your shot will look with the effect applied. 3 Shoot. ●● Try taking some test shots first, to make sure you obtain the desired results. Before Use Basic Guide Advanced Guide Camera Basics Auto Mode / Hybrid Auto Mode Other Shooting Modes P Mode Tv, Av, M, and C Mode Playback Mode Wireless Features Setting Menu Accessories Appendix Index 56
-
 1
1 -
2
-
3
-
4
-
5
-
6
-
7
-
8
-
9
-
10
-
11
-
12
-
13
-
14
-
15
-
16
-
17
-
18
-
19
-
20
-
21
-
22
-
23
-
24
-
25
-
26
-
27
-
28
-
29
-
30
-
31
-
32
-
33
-
34
-
35
-
36
-
37
-
38
-
39
-
40
-
41
-
42
-
43
-
44
-
45
-
46
-
47
-
48
-
49
-
50
-
 51
51 -
 52
52 -
 53
53 -
 54
54 -
 55
55 -
 56
56 -
 57
57 -
 58
58 -
 59
59 -
 60
60 -
 61
61 -
62
-
63
-
64
-
65
-
66
-
67
-
68
-
69
-
70
-
71
-
72
-
73
-
74
-
75
-
76
-
77
-
78
-
79
-
80
-
81
-
82
-
83
-
84
-
85
-
86
-
87
-
88
-
89
-
90
-
91
-
92
-
93
-
94
-
95
-
96
-
97
-
98
-
99
-
100
-
101
-
102
-
103
-
104
-
105
-
106
-
107
-
108
-
109
-
110
-
111
-
112
-
113
-
114
-
115
-
116
-
117
-
118
-
119
-
120
-
121
-
122
-
123
-
124
-
125
-
126
-
127
-
128
-
129
-
130
-
131
-
132
-
133
-
134
-
135
-
136
-
137
-
138
-
139
-
140
-
141
-
142
-
143
-
144
-
145
-
146
-
147
-
148
-
149
-
150
-
151
-
152
-
153
-
154
-
155
-
156
-
157
-
158
-
159
-
160
-
161
-
162
-
163
-
164
-
165
-
166
-
167
-
168
-
169
-
170
-
171
-
172
-
173
-
174
-
175
-
176
-
177
-
178
-
179
-
180
-
181
-
182
-
183
-
184
-
185
-
186
-
187
-
188
-
189
-
190
-
191
-
192
-
193
-
194
-
195
-
196
-
197
-
198
-
199
-
200
-
201
-
202
-
203
-
204
-
205
-
206
-
207
-
208
-
209
-
210
-
211
-
212
-
213
-
214
-
215
-
216
-
217
-
218
-
219
 |
 |
