Canon VIXIA HF G50 Instruction Manual - Page 31
Recovering Clips, Dual Recording] or
 |
View all Canon VIXIA HF G50 manuals
Add to My Manuals
Save this manual to your list of manuals |
Page 31 highlights
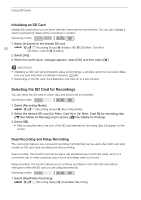
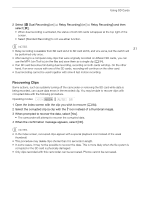
Using SD Cards 2 Select [4 Dual Recording] or [ Relay Recording] (or [ Relay Recording]) and then select [X]. • When dual recording is activated, the status of both SD cards will appear at the top right of the screen. • Select [Standard Recording] to not use either function. NOTES 31 • Relay recording is available from SD card slot A to SD card slot B, and vice versa, but the switch will be performed only once. • After saving to a computer relay clips that were originally recorded on different SD cards, you can use the MP4 Join Tool to join the files and save them as a single clip (A 94). • If an SD card becomes full during dual recording, recording on both cards will stop. On the other hand, if an error occurs with one of the SD cards, recording will continue on the other card. • Dual recording cannot be used together with slow & fast motion recording. Recovering Clips Some actions, such as suddenly turning off the camcorder or removing the SD card while data is being recorded, can cause data errors in the recorded clip. You may be able to recover clips with corrupted data with the following procedure. Operating modes: 1 Open the index screen with the clip you wish to recover (A 84). 2 Select the corrupted clip (a clip with the icon instead of a thumbnail image). 3 When prompted to recover the data, select [Yes]. • The camcorder will attempt to recover the corrupted data. 4 When the confirmation message appears, select [OK]. NOTES • In the index screen, recovered clips appear with a special playback icon instead of the usual thumbnail. • This procedure may delete clips shorter than 0.5 seconds in length. • In some cases, it may not be possible to recover the data. This is more likely when the file system is corrupted or the SD card is physically damaged. • Only clips recorded with this camcorder can be recovered. Photos cannot be recovered.
-
 1
1 -
2
-
3
-
4
-
5
-
6
-
7
-
8
-
9
-
10
-
11
-
12
-
13
-
14
-
15
-
16
-
17
-
18
-
19
-
20
-
21
-
22
-
23
-
24
-
25
-
 26
26 -
 27
27 -
 28
28 -
 29
29 -
 30
30 -
 31
31 -
 32
32 -
 33
33 -
 34
34 -
 35
35 -
 36
36 -
37
-
38
-
39
-
40
-
41
-
42
-
43
-
44
-
45
-
46
-
47
-
48
-
49
-
50
-
51
-
52
-
53
-
54
-
55
-
56
-
57
-
58
-
59
-
60
-
61
-
62
-
63
-
64
-
65
-
66
-
67
-
68
-
69
-
70
-
71
-
72
-
73
-
74
-
75
-
76
-
77
-
78
-
79
-
80
-
81
-
82
-
83
-
84
-
85
-
86
-
87
-
88
-
89
-
90
-
91
-
92
-
93
-
94
-
95
-
96
-
97
-
98
-
99
-
100
-
101
-
102
-
103
-
104
-
105
-
106
-
107
-
108
-
109
-
110
-
111
-
112
-
113
-
114
-
115
-
116
-
117
-
118
-
119
-
120
-
121
-
122
-
123
-
124
-
125
-
126
-
127
-
128
-
129
-
130
-
131
-
132
 |
 |