Canon VIXIA HF G50 Instruction Manual - Page 44
ND Filter, Using the Zebra Pattern, Select [ND Filter].
 |
View all Canon VIXIA HF G50 manuals
Add to My Manuals
Save this manual to your list of manuals |
Page 44 highlights
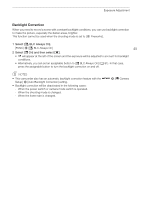
Exposure Adjustment ND Filter Using the ND filter allows you to open up the aperture to obtain a shallower depth of field even when recording in bright surroundings. You can also use the ND filter to avoid the soft focus caused by diffraction when using small apertures. The ND filter can be set when the aperture value is F4.0. This function can only be used when the shooting mode is set to ', ,, " or n. 1 Select [ND Filter]. 44 > [v # Camera Setup] > [ND Filter] 2 Select the desired option and then select [X]. ND filter operation ND filter option [k Automatic] [j Off] Shooting mode ", n ', , ", n ', , Description When the aperture value is F4.0, you can select the ND filter setting manually. The camcorder will use the ND filter automatically for automatic exposure. The ND filter will not be used. The camcorder will not use the ND filter for automatic exposure. NOTES • The ND filter is not available with the [T Fireworks] Special Scene mode. • The ND filter will be set to [k Automatic] when the camera mode is set to a Special Scene mode (except for [T Fireworks]). or the shooting mode is Using the Zebra Pattern You can use the zebra pattern to identify areas that might be overexposed, so you can correct the exposure appropriately. The camcorder offers two levels of zebra pattern: With 100% only areas that will lose detail in the highlight areas will be identified, while 70% will identify also areas that are dangerously close to losing detail. 1 Select the aperture, shutter speed, gain or exposure compensation. Aperture: [FUNC] > [ Aperture] Shutter speed: [FUNC] > [ Shutter Speed] Gain: [FUNC] > [ Gain] Exposure compensation: [FUNC] > [y Exposure Comp.] 2 Select the desired zebra level. [ ] > [z 70%] or [{ 100%] > [X] • To turn off the zebra pattern, select [ Off] instead. • To return to the previous screen and adjust other settings, select [L] instead of [X]. • The zebra pattern will appear on the overexposed areas of the picture. NOTES • Using the zebra pattern will not affect your recordings.
-
 1
1 -
2
-
3
-
4
-
5
-
6
-
7
-
8
-
9
-
10
-
11
-
12
-
13
-
14
-
15
-
16
-
17
-
18
-
19
-
20
-
21
-
22
-
23
-
24
-
25
-
26
-
27
-
28
-
29
-
30
-
31
-
32
-
33
-
34
-
35
-
36
-
37
-
38
-
 39
39 -
 40
40 -
 41
41 -
 42
42 -
 43
43 -
 44
44 -
 45
45 -
 46
46 -
 47
47 -
 48
48 -
 49
49 -
50
-
51
-
52
-
53
-
54
-
55
-
56
-
57
-
58
-
59
-
60
-
61
-
62
-
63
-
64
-
65
-
66
-
67
-
68
-
69
-
70
-
71
-
72
-
73
-
74
-
75
-
76
-
77
-
78
-
79
-
80
-
81
-
82
-
83
-
84
-
85
-
86
-
87
-
88
-
89
-
90
-
91
-
92
-
93
-
94
-
95
-
96
-
97
-
98
-
99
-
100
-
101
-
102
-
103
-
104
-
105
-
106
-
107
-
108
-
109
-
110
-
111
-
112
-
113
-
114
-
115
-
116
-
117
-
118
-
119
-
120
-
121
-
122
-
123
-
124
-
125
-
126
-
127
-
128
-
129
-
130
-
131
-
132
 |
 |
