Canon VIXIA HF G50 Instruction Manual - Page 42
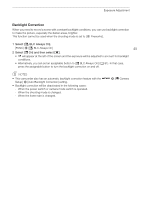
Touch Exposure, To use the Highlight AE function, change the touch exposure settings.
 |
View all Canon VIXIA HF G50 manuals
Add to My Manuals
Save this manual to your list of manuals |
Page 42 highlights
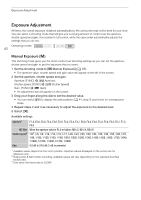
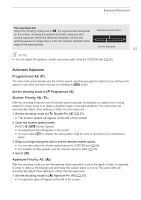
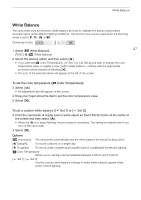
Exposure Adjustment 2 Open the aperture screen. [FUNC] > [ Aperture] • An adjustment dial will appear on the screen. • You can select [ ] to display the zebra pattern (A 44, step 2) and check for overexposed areas. 3 Drag your finger along the dial to set the desired aperture value. 42 • You can also adjust the aperture value using the CUSTOM dial (A 80). • For available aperture values, see the manual exposure table (A 40) 4 Select [X]. NOTES • When the shooting mode is set to , or ", depending on the brightness of the subject, the camcorder may not be able to set the appropriate exposure. In such case the shutter speed (,) or aperture value (") will flash on the screen. Change the aperture/shutter speed as necessary. Touch Exposure You can touch the screen to optimize the exposure for a specific subject or area. The camcorder will automatically adjust the exposure for the selected point and lock the exposure settings. You can even touch a bright area of the image to try to avoid overexposure (Highlight AE). This function can only be used when the shooting mode is set to ', ,, " or one of the Special Scene modes, except for [T Fireworks]. 1 Open the exposure screen. [FUNC] > [y Exposure Comp.] • An adjustment dial will appear on the screen. • You can select [ ] to display the zebra pattern (A 44, step 2) and check for overexposed areas. 2 To use the Highlight AE function, change the touch exposure settings. [i] > [ Highlights] > [L] 3 Touch the desired area on the LCD screen to optimize and lock the exposure. • The I mark will flash and the exposure will be adjusted automatically so the area you touched will be correctly exposed. • The exposure compensation value ±0 and will appear on the screen. In addition, [ ] will indicate that the exposure is locked. • Select [ ] to return the camcorder to automatic exposure. 4 If necessary, drag your finger along the dial to compensate the exposure. • You can select a compensation level from -3 to +3 in 1/4 increments. 5 Select [X]. • The exposure compensation value and will appear at the left of the screen.
-
 1
1 -
2
-
3
-
4
-
5
-
6
-
7
-
8
-
9
-
10
-
11
-
12
-
13
-
14
-
15
-
16
-
17
-
18
-
19
-
20
-
21
-
22
-
23
-
24
-
25
-
26
-
27
-
28
-
29
-
30
-
31
-
32
-
33
-
34
-
35
-
36
-
 37
37 -
 38
38 -
 39
39 -
 40
40 -
 41
41 -
 42
42 -
 43
43 -
 44
44 -
 45
45 -
 46
46 -
 47
47 -
48
-
49
-
50
-
51
-
52
-
53
-
54
-
55
-
56
-
57
-
58
-
59
-
60
-
61
-
62
-
63
-
64
-
65
-
66
-
67
-
68
-
69
-
70
-
71
-
72
-
73
-
74
-
75
-
76
-
77
-
78
-
79
-
80
-
81
-
82
-
83
-
84
-
85
-
86
-
87
-
88
-
89
-
90
-
91
-
92
-
93
-
94
-
95
-
96
-
97
-
98
-
99
-
100
-
101
-
102
-
103
-
104
-
105
-
106
-
107
-
108
-
109
-
110
-
111
-
112
-
113
-
114
-
115
-
116
-
117
-
118
-
119
-
120
-
121
-
122
-
123
-
124
-
125
-
126
-
127
-
128
-
129
-
130
-
131
-
132
 |
 |