Canon VIXIA HF G50 Instruction Manual - Page 72
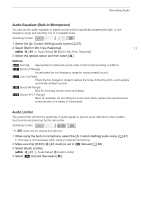
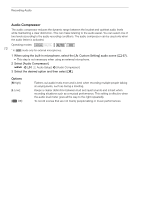
Audio Compressor, When using the built-in microphone, select the, Custom Setting] audio scene
 |
View all Canon VIXIA HF G50 manuals
Add to My Manuals
Save this manual to your list of manuals |
Page 72 highlights
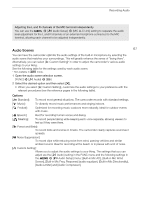
Recording Audio Audio Compressor The audio compressor reduces the dynamic range between the loudest and quietest audio levels while maintaining a clear distinction. This can make listening to the audio easier. You can select one of two levels according to the audio recording conditions. The audio compressor can be used only when the audio limiter is activated. Operating modes: * 72 * In mode only for external microphones. 1 When using the built-in microphone, select the [„ Custom Setting] audio scene (A 67). • This step is not necessary when using an external microphone. 2 Select [Audio Compressor]. > [C ! Audio Setup] > [Audio Compressor] 3 Select the desired option and then select [X]. Options [H High]: [L Low]: [j Off]: Flattens out audio levels more and is best when recording multiple people talking at varying levels, such as during a meeting. Keeps a clearer distinction between loud and quiet sounds and is best when recording situations such as a musical performance. This setting is effective when the audio level meter goes all the way to the right repeatedly. To record scenes that are not mainly people talking or music performances.
-
 1
1 -
2
-
3
-
4
-
5
-
6
-
7
-
8
-
9
-
10
-
11
-
12
-
13
-
14
-
15
-
16
-
17
-
18
-
19
-
20
-
21
-
22
-
23
-
24
-
25
-
26
-
27
-
28
-
29
-
30
-
31
-
32
-
33
-
34
-
35
-
36
-
37
-
38
-
39
-
40
-
41
-
42
-
43
-
44
-
45
-
46
-
47
-
48
-
49
-
50
-
51
-
52
-
53
-
54
-
55
-
56
-
57
-
58
-
59
-
60
-
61
-
62
-
63
-
64
-
65
-
66
-
 67
67 -
 68
68 -
 69
69 -
 70
70 -
 71
71 -
 72
72 -
 73
73 -
 74
74 -
 75
75 -
 76
76 -
 77
77 -
78
-
79
-
80
-
81
-
82
-
83
-
84
-
85
-
86
-
87
-
88
-
89
-
90
-
91
-
92
-
93
-
94
-
95
-
96
-
97
-
98
-
99
-
100
-
101
-
102
-
103
-
104
-
105
-
106
-
107
-
108
-
109
-
110
-
111
-
112
-
113
-
114
-
115
-
116
-
117
-
118
-
119
-
120
-
121
-
122
-
123
-
124
-
125
-
126
-
127
-
128
-
129
-
130
-
131
-
132
 |
 |
