Canon VIXIA HF G50 Instruction Manual - Page 89
Trimming Clips, Deleting a Photo during Playback
 |
View all Canon VIXIA HF G50 manuals
Add to My Manuals
Save this manual to your list of manuals |
Page 89 highlights
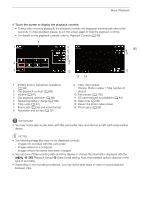
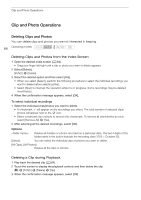
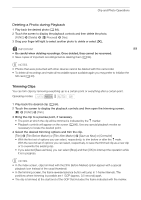
Clip and Photo Operations Deleting a Photo during Playback 1 Play back the desired photo (A 84). 2 Touch the screen to display the playback controls and then delete the photo. [FUNC] > [Delete] > [¸ Proceed] > [Yes] 3 Drag your finger left/right to select another photo to delete or select [X]. IMPORTANT 89 • Be careful when deleting recordings. Once deleted, they cannot be recovered. • Save copies of important recordings before deleting them (A 94). NOTES • Photos that were protected with other devices cannot be deleted with this camcorder. • To delete all recordings and make all recordable space available again you may prefer to initialize the SD card (A 30). Trimming Clips You can trim clips by removing everything up to a certain point or everything after a certain point. Operating modes: 1 Play back the desired clip (A 84). 2 Touch the screen to display the playback controls and then open the trimming screen. [Ý] > [FUNC] > [Trim] 3 Bring the clip to a precise point, if necessary. • The point at which the clip will be trimmed is indicated by the marker. • Playback controls will appear on the screen (A 86). Use any special playback modes as necessary to locate the desired point. 4 Select the desired trimming options and trim the clip. [Trim] > [Trim Before Marker] or [Trim After Marker] > [Save as New] or [Overwrite] • With the first set of options you can select, respectively, to trim before or after the ´ mark. With the second set of options you can select, respectively, to save the trimmed clip as a new clip or to overwrite the existing clip. • If you selected [Save as New], you can select [Stop] and then [OK] to interrupt the operation while it is in progress. NOTES • In the index screen, clips trimmed with the [Trim Before Marker] option appear with a special playback icon instead of the usual thumbnail. • In the trimming screen, the frame reverse/advance button will jump in 1-frame intervals. The positions where trimming is possible are 1 GOP (approx. 0.5 second) apart. • The clip is trimmed at the start/end of the GOP that includes the frame indicated with the marker.
-
 1
1 -
2
-
3
-
4
-
5
-
6
-
7
-
8
-
9
-
10
-
11
-
12
-
13
-
14
-
15
-
16
-
17
-
18
-
19
-
20
-
21
-
22
-
23
-
24
-
25
-
26
-
27
-
28
-
29
-
30
-
31
-
32
-
33
-
34
-
35
-
36
-
37
-
38
-
39
-
40
-
41
-
42
-
43
-
44
-
45
-
46
-
47
-
48
-
49
-
50
-
51
-
52
-
53
-
54
-
55
-
56
-
57
-
58
-
59
-
60
-
61
-
62
-
63
-
64
-
65
-
66
-
67
-
68
-
69
-
70
-
71
-
72
-
73
-
74
-
75
-
76
-
77
-
78
-
79
-
80
-
81
-
82
-
83
-
 84
84 -
 85
85 -
 86
86 -
 87
87 -
 88
88 -
 89
89 -
 90
90 -
 91
91 -
 92
92 -
 93
93 -
 94
94 -
95
-
96
-
97
-
98
-
99
-
100
-
101
-
102
-
103
-
104
-
105
-
106
-
107
-
108
-
109
-
110
-
111
-
112
-
113
-
114
-
115
-
116
-
117
-
118
-
119
-
120
-
121
-
122
-
123
-
124
-
125
-
126
-
127
-
128
-
129
-
130
-
131
-
132
 |
 |
