Casio EX-Z1080BE Owners Manual - Page 220
Windows XP users: Click Start and then My, On the My Documents Edit menu, select
 |
UPC - 079767623005
View all Casio EX-Z1080BE manuals
Add to My Manuals
Save this manual to your list of manuals |
Page 220 highlights
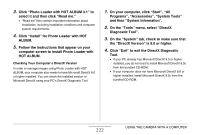
2. Double-click "Removable Disk". • Your computer recognizes the memory card loaded in the camera (or built-in memory if there is no card) as a removable disk. 3. Right-click the "DCIM" folder. 4. On the shortcut menu that appears, click "Copy". 5. Windows XP users: Click "Start" and then "My Documents". Windows Vista users: Click "Start" and then "Documents". Windows 2000/Me/98SE/98 users: Doubleclick "My Documents" to open it. • If you already have a "DCIM" folder in "My Documents", the next step will overwrite it. If you want to keep the existing "DCIM" folder, you need to change its name or move it to a different location before performing the next step. 6. On the "My Documents" "Edit" menu, select "Paste". This will paste the "DCIM" folder (and all the image files it contains) into your "My Documents" folder. You now have a copy of the files that are in camera memory on your computer. IMPORTANT! • Never use your computer to modify, delete, move, or rename any image files that are in the camera's built-in memory or memory card. Doing so can cause problems with the camera's image management data, which will make it impossible to play back images on the camera and can drastically alter remaining memory capacity. Whenever you want to modify, delete, move, or rename an image, do so only on images that are stored on your computer. • Never unplug the USB cable or operate the camera while viewing or storing images. Doing so can cause data to become corrupted. 220 USING THE CAMERA WITH A COMPUTER
-
 1
1 -
2
-
3
-
4
-
5
-
6
-
7
-
8
-
9
-
10
-
11
-
12
-
13
-
14
-
15
-
16
-
17
-
18
-
19
-
20
-
21
-
22
-
23
-
24
-
25
-
26
-
27
-
28
-
29
-
30
-
31
-
32
-
33
-
34
-
35
-
36
-
37
-
38
-
39
-
40
-
41
-
42
-
43
-
44
-
45
-
46
-
47
-
48
-
49
-
50
-
51
-
52
-
53
-
54
-
55
-
56
-
57
-
58
-
59
-
60
-
61
-
62
-
63
-
64
-
65
-
66
-
67
-
68
-
69
-
70
-
71
-
72
-
73
-
74
-
75
-
76
-
77
-
78
-
79
-
80
-
81
-
82
-
83
-
84
-
85
-
86
-
87
-
88
-
89
-
90
-
91
-
92
-
93
-
94
-
95
-
96
-
97
-
98
-
99
-
100
-
101
-
102
-
103
-
104
-
105
-
106
-
107
-
108
-
109
-
110
-
111
-
112
-
113
-
114
-
115
-
116
-
117
-
118
-
119
-
120
-
121
-
122
-
123
-
124
-
125
-
126
-
127
-
128
-
129
-
130
-
131
-
132
-
133
-
134
-
135
-
136
-
137
-
138
-
139
-
140
-
141
-
142
-
143
-
144
-
145
-
146
-
147
-
148
-
149
-
150
-
151
-
152
-
153
-
154
-
155
-
156
-
157
-
158
-
159
-
160
-
161
-
162
-
163
-
164
-
165
-
166
-
167
-
168
-
169
-
170
-
171
-
172
-
173
-
174
-
175
-
176
-
177
-
178
-
179
-
180
-
181
-
182
-
183
-
184
-
185
-
186
-
187
-
188
-
189
-
190
-
191
-
192
-
193
-
194
-
195
-
196
-
197
-
198
-
199
-
200
-
201
-
202
-
203
-
204
-
205
-
206
-
207
-
208
-
209
-
210
-
211
-
212
-
213
-
214
-
 215
215 -
 216
216 -
 217
217 -
 218
218 -
 219
219 -
 220
220 -
 221
221 -
 222
222 -
 223
223 -
 224
224 -
 225
225 -
226
-
227
-
228
-
229
-
230
-
231
-
232
-
233
-
234
-
235
-
236
-
237
-
238
-
239
-
240
-
241
-
242
-
243
-
244
-
245
-
246
-
247
-
248
-
249
-
250
-
251
-
252
-
253
-
254
-
255
-
256
-
257
-
258
-
259
-
260
-
261
-
262
-
263
-
264
-
265
-
266
-
267
 |
 |