Dell PowerConnect J-SRX240 Hardware Guide - Page 69
Installing the J-SRX240 Services Gateway in a Rack, sure the chassis is level.
 |
View all Dell PowerConnect J-SRX240 manuals
Add to My Manuals
Save this manual to your list of manuals |
Page 69 highlights
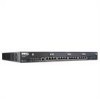
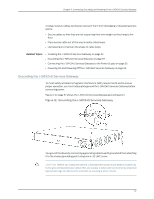
Chapter 10: Installing the J-SRX240 Services Gateway 1. Position a mounting bracket on each side of the chassis as shown in Figure 10 on page 53. Figure 10: Installing the J-SRX240 Services Gateway in a Rack 2. Use a number-2 Phillips screwdriver to install the screws that secure the mounting brackets to the chassis. 3. Have one person grasp the sides of the device, lift it, and position it in the rack. 4. Align the bottom hole in each mounting bracket with a hole in each rack rail, making sure the chassis is level. 5. Have a second person install a mounting screw into each of the two aligned holes. Use a number-2 Phillips screwdriver to tighten the screws. 53
-
 1
1 -
2
-
3
-
4
-
5
-
6
-
7
-
8
-
9
-
10
-
11
-
12
-
13
-
14
-
15
-
16
-
17
-
18
-
19
-
20
-
21
-
22
-
23
-
24
-
25
-
26
-
27
-
28
-
29
-
30
-
31
-
32
-
33
-
34
-
35
-
36
-
37
-
38
-
39
-
40
-
41
-
42
-
43
-
44
-
45
-
46
-
47
-
48
-
49
-
50
-
51
-
52
-
53
-
54
-
55
-
56
-
57
-
58
-
59
-
60
-
61
-
62
-
63
-
 64
64 -
 65
65 -
 66
66 -
 67
67 -
 68
68 -
 69
69 -
 70
70 -
 71
71 -
 72
72 -
 73
73 -
 74
74 -
75
-
76
-
77
-
78
-
79
-
80
-
81
-
82
-
83
-
84
-
85
-
86
-
87
-
88
-
89
-
90
-
91
-
92
-
93
-
94
-
95
-
96
-
97
-
98
-
99
-
100
-
101
-
102
-
103
-
104
-
105
-
106
-
107
-
108
-
109
-
110
-
111
-
112
-
113
-
114
-
115
-
116
-
117
-
118
-
119
-
120
-
121
-
122
-
123
-
124
-
125
-
126
-
127
-
128
-
129
-
130
-
131
-
132
-
133
-
134
-
135
-
136
-
137
-
138
-
139
-
140
-
141
-
142
-
143
-
144
-
145
-
146
-
147
-
148
-
149
-
150
-
151
-
152
-
153
-
154
-
155
-
156
-
157
-
158
-
159
-
160
 |
 |
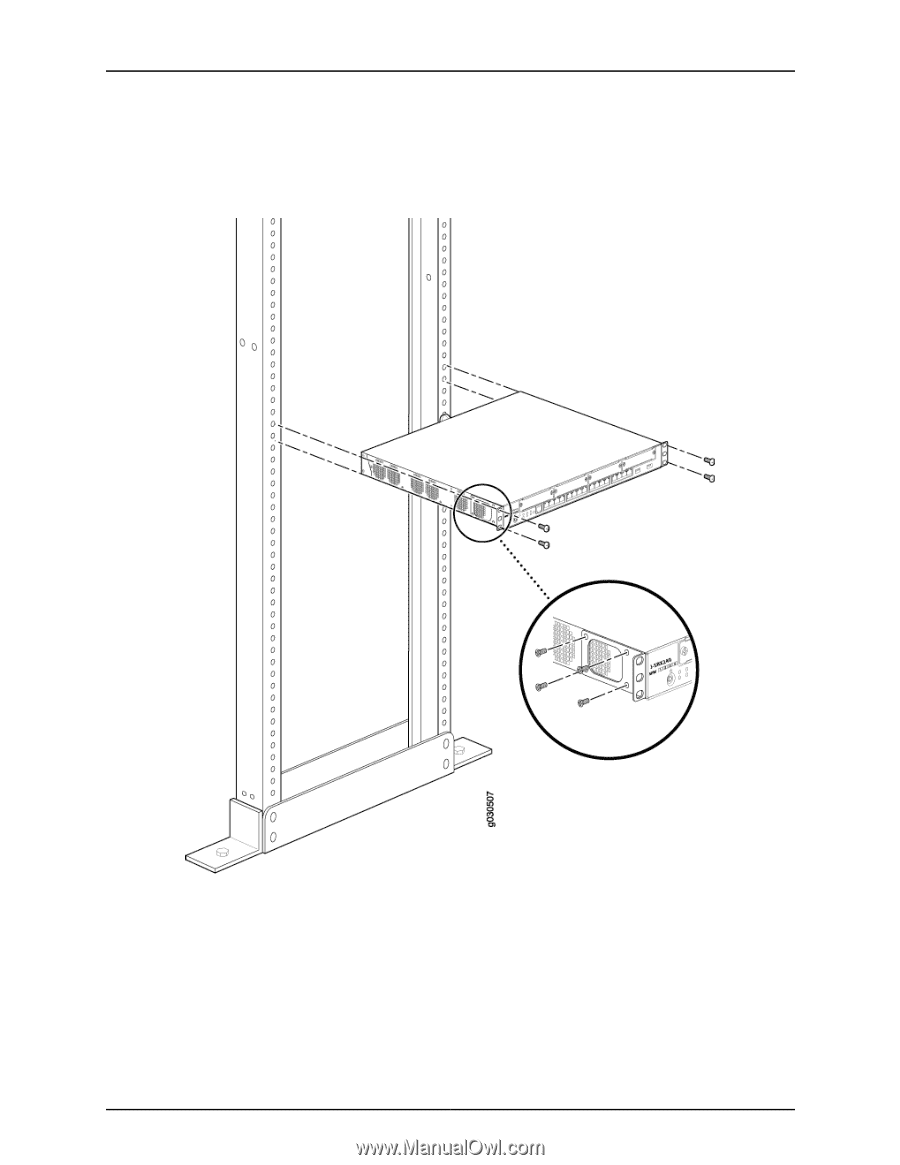
1.
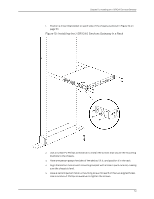
Position a mounting bracket on each side of the chassis as shown in Figure 10 on
page 53.
Figure 10: Installing the J-SRX240 Services Gateway in a Rack
2.
Use a number–2 Phillips screwdriver to install the screws that secure the mounting
brackets to the chassis.
3.
Have one person grasp the sides of the device, lift it, and position it in the rack.
4.
Align the bottom hole in each mounting bracket with a hole in each rack rail, making
sure the chassis is level.
5.
Have a second person install a mounting screw into each of the two aligned holes.
Use a number–2 Phillips screwdriver to tighten the screws.
53
Chapter 10: Installing the J-SRX240 Services Gateway