Epson PowerLite 8150i User Manual
Epson PowerLite 8150i Manual
 |
View all Epson PowerLite 8150i manuals
Add to My Manuals
Save this manual to your list of manuals |
Epson PowerLite 8150i manual content summary:
- Epson PowerLite 8150i | User Manual - Page 1
EPSON® PowerLiUtsee®r's81Gu5id0ei EPSON® PowerLite® 8150i Multimedia Projector - Epson PowerLite 8150i | User Manual - Page 2
EPSON® PowerLite® 8150i Multimedia Projector User's Guide - Epson PowerLite 8150i | User Manual - Page 3
User's Guide, do not attempt to service this product yourself. Refer all servicing to qualified service personnel. WARNING: The projector and with SEIKO EPSON CORPORATION's operating and maintenance instructions. SEIKO EPSON CORPORATION shall not be liable for any damages or problems arising from - Epson PowerLite 8150i | User Manual - Page 4
a Laptop or VCR 3Displaying and Adjusting the Image Getting the Most from Your Projector 2 Using Your Documentation 4 Reading This Manual Online 4 Getting Help 5 Creating Your Presentation 8 Supported Applications and File Formats 8 Creating Scenarios 8 Transferring Your Presentation to the - Epson PowerLite 8150i | User Manual - Page 5
Adjusting the Volume 44 Turning On the Projector Automatically 45 Shutting Down the Projector 47 Turning On the Remote Control 50 Problems with the Image or Sound 62 Solving Problems with the Remote Control 69 Solving Problems with EasyMP.net 70 Where To Get Help 72 Telephone Support Services - Epson PowerLite 8150i | User Manual - Page 6
important information and useful tips. Introduction The EPSON® PowerLite® 8150i is a highly versatile presentation tool. You can connect it to one or two computer sources and up to three video sources and easily switch between them. In addition, the projector's EasyMP.net features let you transfer - Epson PowerLite 8150i | User Manual - Page 7
PowerPoint®, Excel, and Word-as well as certain types of image files. For instructions, see Chapter 1 starting on page 7. s Connecting a computer or video device If you're not using EasyMP.net, you'll need to connect the projector directly to a computer or video device. See page 30 for guidelines on - Epson PowerLite 8150i | User Manual - Page 8
the screen, make notes, and highlight your presentation. See page 20. If you don't have access to a USB mouse or tablet, you can use the projector's EMP Tablet software to draw on screen using your laptop's mouse; see page 21. (You can also connect a drawing tablet to your laptop.) Your laptop - Epson PowerLite 8150i | User Manual - Page 9
Online The projector CD-ROM includes an electronic copy of this manual. You may find it convenient to copy it onto your computer's hard drive so it's always with you. Just insert the CD-ROM in your CD-ROM drive, select the Install/View Documentation button and click Install User's Guide or View - Epson PowerLite 8150i | User Manual - Page 10
If you experience a problem with the projector, check with your network or projector administrator first. You can also check for troubleshooting tips in Chapter 5 starting on page 59. If you still need help after checking these sources, you can use the EPSON PrivateLine® Support service. Call (800 - Epson PowerLite 8150i | User Manual - Page 11
6 Introduction - Epson PowerLite 8150i | User Manual - Page 12
can receive the data while your presentation is running); see "Delivering Your Presentation" on page 17 for instructions. Otherwise, you'll have to copy your files to the projector's memory card (either directly or over the network) before starting your presentation; see page 11. Follow the - Epson PowerLite 8150i | User Manual - Page 13
Notices section in the Administrator's Manual.) Creating Scenarios Another type of file you can send to the projector is a scenario. You can the EMP Scenario software included with the projector. This lets you combine in a slideshow format any of the supported file types listed above. In addition, - Epson PowerLite 8150i | User Manual - Page 14
slot, you can also copy the scenario directly onto the memory card; select Local Drive instead of the projector's name. See page 16 for instructions on removing and inserting the card in the projector. note For more information on creating scenarios, see the online help in the EMP Scenario program - Epson PowerLite 8150i | User Manual - Page 15
3. To exit your presentation early (before showing the last slide), click the exit icon. If you want a scenario to start playing automatically when the projector is first turned on, select it in Easy View and click Properties, then select Play Automatically. (You can also set the scenario to repeat - Epson PowerLite 8150i | User Manual - Page 16
Transferring Your Presentation to the Projector Follow the instructions in this section to transfer a supported application or image file directly to the projector; to copy a scenario to the projector, see the previous section. When you send your presentation to the projector, it gets stored on the - Epson PowerLite 8150i | User Manual - Page 17
the list. If it isn't listed, you may need to click the Search button; see the Administrator's Manual for details.) All files currently stored on the projector appear on the right, as shown: note You can click the File icon to create a new folder, or to rename an existing file or folder - Epson PowerLite 8150i | User Manual - Page 18
presentation, see page 17 for instructions on projecting it. For additional information on using the EMP File Utility, see the online help. Downloading Your Presentation While in the Meeting Room If you're in the meeting room and want to copy files to the projector that are in a remote location - Epson PowerLite 8150i | User Manual - Page 19
You see this screen, with the files on the projector listed on the left: projector files click Connection Target Setting 4. Click Connection Target Setting, as shown above. You see this screen: 5. Select the name of the PC (or shared folder) - Epson PowerLite 8150i | User Manual - Page 20
its name on the right side of the screen, then highlight the projector folder where you want to copy it on the left side of the screen. Then click the copy icon. When you're done transferring your presentation, see page 17 for instructions on delivering it. Presenting Without a Computer 15 - Epson PowerLite 8150i | User Manual - Page 21
your presentation directly onto the card. Before starting your presentation, you'll need to place the card in the projector as described below. 1. If necessary, remove the memory card that's already in the projector. Press the button to the left of the card slot to eject the card: press here If the - Epson PowerLite 8150i | User Manual - Page 22
's memory card, as described on page 11, before starting your presentation. Follow these steps to start your presentation: 1. Turn on the projector as described in "Displaying and Adjusting the Image" on page 37. 2. If necessary, select EasyMP.net as the source. (Press the EasyMP.net button on - Epson PowerLite 8150i | User Manual - Page 23
is selected in the Viewer window. 4. Click Viewer as shown in the previous screen. 5. Do one of the following: s If your presentation is on the projector's memory card, locate its file name in the file window. s If your presentation is on a remote PC, click the Connection icon at the top of - Epson PowerLite 8150i | User Manual - Page 24
Follow these guidelines when viewing your presentation: s If you're showing a Microsoft Word or Excel file, you can move through it using the scroll bars on the sides of the screen. Excel spreadsheet tabs scroll bars If you're displaying a multi-page Excel spreadsheet, you can jump to a different - Epson PowerLite 8150i | User Manual - Page 25
mouse or drawing tablet. note Other drawing tablet models won't work with this projector. Choosing a Drawing Tool If all you want to do is place simple an underline to highlight key points-you can use the remote control to guide the cursor. For details, see page 52. To make actual drawings, or - Epson PowerLite 8150i | User Manual - Page 26
the next section. Using the EMP Tablet Software If you have a PC or laptop on the same network as the projector, you can use the EMP Tablet software to control the projector and draw on the screen. You can use either your laptop's mouse or a drawing tablet connected to the laptop. Note - Epson PowerLite 8150i | User Manual - Page 27
move or resize the EMP Tablet window on your laptop to be able to guide the cursor near the edge of the projected image. You can use the box clear all highlights The other buttons on the toolbar give you access to various projector features. If you're unsure of what a button is for, you can hold - Epson PowerLite 8150i | User Manual - Page 28
a blank screen (using it like a digital white board). Follow the instructions in the sections below. Drawing on a Projected Image Follow these steps to be a PowerPoint slide, Excel spreadsheet, or any other type of image supported by the projector. 2. Right-click with the mouse. (If you're using the - Epson PowerLite 8150i | User Manual - Page 29
Select one of the other drawing tools as shown. You can adjust drawing tool attributes by clicking the checkbox icon; a second menu appears on screen. After making your selections, click the return icon to close both menus and resume drawing. 5. When done drawing on screen, right-click, then click - Epson PowerLite 8150i | User Manual - Page 30
next section.) Saving Your Drawings and Notes You can capture images displayed on the screen, including your drawings and notes, and save them on the projector's memory card. This lets you view them at a later time. You can also share your captured images by transferring them to other systems on - Epson PowerLite 8150i | User Manual - Page 31
Esc Menu Help Comp1 Comp2/YCbCr Capture Auto Video APPs Resize P in P Preset - Volume + Sharing Captured Images If you wish to copy your captured JPEG files to another system without first converting them to HTML, do one of the following: s If you're in the meeting room, you can copy the - Epson PowerLite 8150i | User Manual - Page 32
Enter a name for your meeting minutes and, optionally, a password. To type the name, use one of the following: s a USB keyboard directly connected to the projector (connect it as you would a USB mouse or tablet, as shown on page 20) s your computer's keyboard if you're using the EMP Tablet software - Epson PowerLite 8150i | User Manual - Page 33
office PC using the EMP File Utility software. After connecting to the projector (see page 11), click the Meeting Minutes icon at the top of PC. Once the captured images have been saved, you can view them on the projector at a later time by clicking the Meeting Minutes icon at the top of the - Epson PowerLite 8150i | User Manual - Page 34
noted, all cables required for the connections described in this chapter are included with the projector. You'll find instructions in this chapter for the following: s Positioning the projector s Connecting to a laptop (PC or Macintosh) s Connecting to a video device Presenting from a Laptop or VCR - Epson PowerLite 8150i | User Manual - Page 35
image size with other settings. After positioning the projector, you may wish to connect a Kensington MicroSaver® anti-theft device to the lock port on the projector's left side. You can purchase this from EPSON; see the Administrator's Manual for details. Kensington lock port 30 Presenting from - Epson PowerLite 8150i | User Manual - Page 36
on page 34. s If you want to use the projector's built-in sound system, you need to connect an audio cable as described on port, follow the instructions for connecting to a video device on page 36. For other types of computer connections, see the Administrator's Manual. Connecting the Computer - Epson PowerLite 8150i | User Manual - Page 37
't fit properly, you may need a special video-out cable (available from Apple) or a Macintosh desktop adapter (available from Epson; see the projector Administrator's Manual). Refer to the figure below to make the proper connections: Computer 1 port video-out cable (if needed) Macintosh desktop - Epson PowerLite 8150i | User Manual - Page 38
as shown and set the DIP switches according to the resolution you want to use, such as 16-inch mode. See your Macintosh documentation for instructions. 2. Replace the cover and connect the adapter to one end of the computer video cable. Then plug the cable (with the adapter) into the monitor - Epson PowerLite 8150i | User Manual - Page 39
illustration shows the connections you'll be making: mouse cable Mouse/Com port main cable 1. Connect the round end of the main cable to the projector's Mouse/Com port, as shown. 2. To use the remote control as a wireless mouse, choose the correct mouse cable for your laptop. (Note that some of - Epson PowerLite 8150i | User Manual - Page 40
laptop. 5. Tighten the screws on the connectors. 6. If necessary, configure your laptop to work with an external mouse. Connecting the Audio Cable To use the projector's built-in stereo speaker system, connect the 3.5-mm audio cable between the laptop's speaker or audio-out port and the - Epson PowerLite 8150i | User Manual - Page 41
note To connect using S-video or component (BNC) video, see the projector Administrator's Manual. Connecting to a Video Device Follow the steps below to connect the projector to a VCR, DVD player, or any other video device that has RCA-style (composite video) connectors. Before starting, make sure - Epson PowerLite 8150i | User Manual - Page 42
the Image Once you've transferred your presentation to the projector (as described in Chapter 1) or connected the projector to your computer or other equipment (as described in Chapter 2), you're ready to turn on the projector and adjust the image. This chapter covers the following: s Turning - Epson PowerLite 8150i | User Manual - Page 43
connected equipment, and to display an image. note You can also set the projector to turn on automatically at a preset time. See page 45. Turning On the Projector Follow these steps to turn on the projector: 1. Make sure the projector is plugged in and the lens cap is off. power cord The power - Epson PowerLite 8150i | User Manual - Page 44
button remote control on/off switch Power Help Comp/ Video A/V mute Resize Menu Esc Sync. Sync. Keystone Shift Volume The projector's power light flashes green as the projector warms up, and the projection lamp comes on in about 30 seconds. (To turn off the lamp, see page 47.) Selecting - Epson PowerLite 8150i | User Manual - Page 45
pressing one of the source buttons, wait a moment for the image to appear. 3. To display the image, do one of the following: s On the projector's control panel, press the Comp/ EasyMP.net button to switch between EasyMP, Computer 1, and Computer 2; or press the Video button to switch between the - Epson PowerLite 8150i | User Manual - Page 46
already installed in a meeting room, you probably won't need to make any adjustments. If you set up the projector yourself, check the following: s To focus or zoom your image, see below. s If the image is too high or too low, you can reposition it. - Epson PowerLite 8150i | User Manual - Page 47
) to position the image on-screen. This delivers the best-looking picture. You won't need to tilt the projector upward as long as you position it so that its lens is at least as high as the bottom of the screen, but no higher - Epson PowerLite 8150i | User Manual - Page 48
fine-tune the height of the image, rotate the thumb wheels attached to the projector's feet. If the image is no longer square after raising it, see the of the following: s If your image looks like or , you've placed the projector off to one side of the screen, at an angle. Move it directly in - Epson PowerLite 8150i | User Manual - Page 49
, pressing the Resize button switches the aspect ratio between 4:3 and 16:9. Adjusting the Volume If you've connected an audio source, you can adjust the projector's volume from the control panel. Hold the Shift button down while pressing the + or - side of the Volume button. You can also adjust the - Epson PowerLite 8150i | User Manual - Page 50
, or you can set it to come on everyday or on certain days of the week. When the projector comes on, it displays whichever source was selected when last used. (See page 39 for instructions on switching sources.) The only exception is if a scenario is set to begin playing automatically (see page - Epson PowerLite 8150i | User Manual - Page 51
You see this screen: select a reservation number 4. You can program up to seven different power-on times. Click one of the reservation numbers, as shown above. Then select the desired options for the day, start time, and end time. When done, click Set. (If you want to cancel a programmed time, click - Epson PowerLite 8150i | User Manual - Page 52
received any input signals for 30 minutes, it automatically turns off the projection lamp and enters "sleep mode." This conserves electricity, cools the projector, and extends the life of the lamp. power button power light 2. Press the Power button again. The power light flashes orange for about - Epson PowerLite 8150i | User Manual - Page 53
48 Displaying and Adjusting the Image - Epson PowerLite 8150i | User Manual - Page 54
4 Using the Remote Control Using the remote control, you can access your projector's features from anywhere in the room-up to 30 feet away. You can use it to start and run your presentation, control the picture and - Epson PowerLite 8150i | User Manual - Page 55
it, make sure batteries are installed (as described in the Administrator's Manual), then push up the on/off switch to turn it on. Turn off the remote control before transporting it or storing it with the projector in a carrying case; this prevents the batteries from discharging if something - Epson PowerLite 8150i | User Manual - Page 56
mouse to let you access various projector features and control your presentations; see the next page for instructions. You can use it as a also lets you navigate the menu system to fine-tune various projector features; see the Administrator's Manual for details. Turn to the next page for details on - Epson PowerLite 8150i | User Manual - Page 57
Follow the guidelines in the figure below to use the remote control as a mouse: Freeze A/V Mute E-Zoom Power R/C ON OFF 3 2 5 4 1 Enter Esc to move the mouse pointer on screen: pivot the Enter button like a joystick to left-click: press down on the Enter button to right-click: Press Esc - Epson PowerLite 8150i | User Manual - Page 58
, freeze the action, zoom in on the picture, or display a picture-in-picture video image. Switching Between Picture Sources If you've connected your projector to more than one computer and/or video source, you can use the remote control to switch between the different sources. s Press the Video - Epson PowerLite 8150i | User Manual - Page 59
note You can also have an image, such as a company logo, display on the screen whenever you press the A/V Mute button. See the Administrator's Manual for instructions. Turning Off the Picture and Sound You can use the A/V Mute button on the remote control to darken your screen and turn off the - Epson PowerLite 8150i | User Manual - Page 60
or other video source using an RCA cable as described on page 36. You can also use S-video, but be sure to follow the instructions in the Administrator's Manual to connect the cable and select S-video in the P in P menu option. (You can't display the picture-in-picture window using component video - Epson PowerLite 8150i | User Manual - Page 61
spotlight bar erase You can customize the highlighting tools (by changing their color and shape) through the Effect menu. See the Administrator's Manual for instructions. Using the Pointer You can choose from three types of pointers and place them anywhere on your screen. 1. To activate the pointer - Epson PowerLite 8150i | User Manual - Page 62
4. To erase the pointers pasted on the screen, press button 5. 5. To cancel the pointer feature, press Esc. Using Box Highlights You can draw outline boxes on the screen to highlight areas of your presentation or video. 1. To activate the box tool, press button 2 on the remote control. A colored - Epson PowerLite 8150i | User Manual - Page 63
Using Horizontal and Vertical Highlights With the bar tool, you can draw bold horizontal or vertical lines on the screen to underline or highlight your presentation points. You can choose from three types of bars. 1. To activate the bar tool, press button 4 on the remote control. A horizontal bar - Epson PowerLite 8150i | User Manual - Page 64
warning Except as specifically explained in this User's Guide, do not attempt to service this product yourself. This chapter helps you solve problems with the projector, and tells you how to contact technical support for problems you can't solve yourself. This chapter explains the following - Epson PowerLite 8150i | User Manual - Page 65
do when your audio isn't working s Language selection Lets you display the help information and projector menus in any of nine different languages Follow these steps to get help: 1. Press the suggestions solves your problem, see additional solutions to problems in the following sections. 60 Solving - Epson PowerLite 8150i | User Manual - Page 66
on the projector. If this does not solve the problem, check the status lights on top of the projector and try the problem. Remove the power cord and contact EPSON for help; see page 72. The lamp is almost burned out. This is a good time to replace it. See the Administrator's Manual for instructions - Epson PowerLite 8150i | User Manual - Page 67
or replace the air filter as described in the Administrator's Manual. If the projector continues to overheat, the problem may be caused by damage to the cooling fan or internal circuits. Contact EPSON for help; see page 72. There is a problem with the cooling fan or temperature sensor. Turn off the - Epson PowerLite 8150i | User Manual - Page 68
systems, the key lets you toggle between the LCD screen and the projector, or to display on both at the same time. Check your laptop's manual or online help for details. s Depending on your computer's video card computer's documentation or online help for details. No Signal Solving Problems 63 - Epson PowerLite 8150i | User Manual - Page 69
here drag one monitor icon on top of the other 3. Drag one monitor icon on top of the other. This lets you display on the projector screen as well as the LCD screen. 4. If the Arrange option isn't available, click the Monitor icon. click here select a Simulscan resolution 5. Select one of - Epson PowerLite 8150i | User Manual - Page 70
(1600 × 1200), and the frequency is supported by the projector (see the Administrator's Manual). If necessary, change your computer's resolution for instructions.) s Make sure your computer's resolution setting is correct. Ideally, it should be 1024 × 768 to match the projector's Solving Problems 65 - Epson PowerLite 8150i | User Manual - Page 71
a decline in the projected image quality when the image is displayed simultaneously on your laptop computer and the projector, turn off the laptop's LCD display; see your laptop's manual for instructions. The image is blurry. s There may be dirt or smears on the lens. Clean the lens as described - Epson PowerLite 8150i | User Manual - Page 72
on the control panel. This resets the projector's tracking and sync settings. s If further adjustment is needed, you can fine-tune the Tracking and Sync settings manually using the buttons on the control panel sharpness of the image. Menu Esc Sync. Tracking Tracking Sync. Solving Problems 67 - Epson PowerLite 8150i | User Manual - Page 73
're displaying a computer image, use the Gamma option in the projector's Video menu to adjust the balance of red, green, and sure the audio cable is securely connected to both the projector and your computer's headphone jack or audio out jack projector to sync up after pressing the button. 68 Solving - Epson PowerLite 8150i | User Manual - Page 74
Solving Problems with the Remote Control The projector doesn't respond to remote control commands. s Make sure the remote control is turned on. s Make sure you are within 30 feet of the projector, have a direct line-of-sight to the projector's front or back sensor, and are no more than 30° to the - Epson PowerLite 8150i | User Manual - Page 75
Solving Problems with EasyMP.net You cannot send your presentation to the projector. s Make sure the projector is plugged into a power outlet (the projector doesn't have to be turned on, though). It must also be properly connected to your network, as described in the Administrator's Manual. s Make - Epson PowerLite 8150i | User Manual - Page 76
PowerPoint file in EMP Scenario's file window to open the individual slides; then drag each slide from the thumbnail window into the scenario window. Solving Problems 71 - Epson PowerLite 8150i | User Manual - Page 77
EPSON PrivateLine Support card included in your Owner's Kit. This is the fastest way of speaking to a live representative, and it's free. This service is available 6 AM to 6 PM, Pacific Time, Monday through Friday, for the duration of your warranty period. You may also speak with a projector support - Epson PowerLite 8150i | User Manual - Page 78
, please have the following information ready: s Product name (EPSON PowerLite 8150i) s Product serial number (located on the bottom of the projector) s Video source (computer, DVD player, etc.) and how it's connected s Description of the problem You can purchase screens, carrying cases, and other - Epson PowerLite 8150i | User Manual - Page 79
74 Solving Problems - Epson PowerLite 8150i | User Manual - Page 80
on screen, 20 to 25 Easy File, 13 to 15 Easy View, 17 to 19 introduction, 2 problems, 70 sharing captured images, 25 to 28 starting presentation, 17 to 19 supported file formats, 8 transferring presentation to projector, 11 to 16 EMP File Utility, 11 to 13 EMP Scenario software, 8 to 10 EMP Tablet - Epson PowerLite 8150i | User Manual - Page 81
61 to 62 Troubleshooting EasyMP.net problems, 70 image problems, 62 to 68 remote control problems, 69 sound problems, 68 status lights, 61 to 62 using on-screen help, 60 Turning off picture (using A/V Mute), 54 Turning off projector, 47 Turning on projector automatically, 45 to 46 manually, 38 to 39 - Epson PowerLite 8150i | User Manual - Page 82
V Video button, 53 selecting source, 39 to 40, 53 Video device, connecting to, 36 Volume, adjusting, 44, 53 W Warning lights, 61 to 62 Wireless Ethernet card, 3 Word, Microsoft, 8, 19 Z Zooming image, 41, 54 Index 77 - Epson PowerLite 8150i | User Manual - Page 83
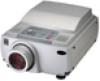
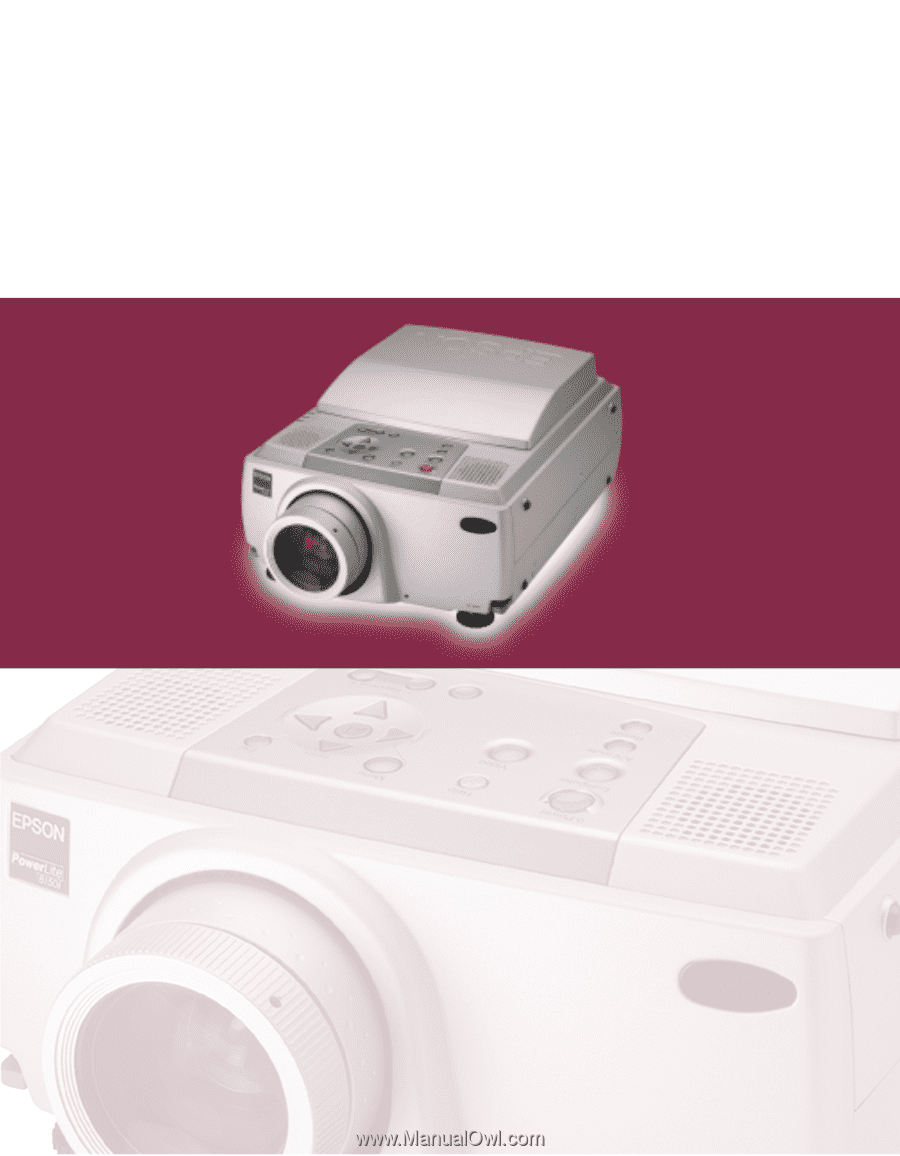
EPSON® PowerLite® 8150i Multimedia Projector CPD-11971
-
 1
1 -
 2
2 -
 3
3 -
 4
4 -
 5
5 -
 6
6 -
 7
7 -
8
-
9
-
10
-
11
-
12
-
13
-
14
-
15
-
16
-
17
-
18
-
19
-
20
-
21
-
22
-
23
-
24
-
25
-
26
-
27
-
28
-
29
-
30
-
31
-
32
-
33
-
34
-
35
-
36
-
37
-
38
-
39
-
40
-
41
-
42
-
43
-
44
-
45
-
46
-
47
-
48
-
49
-
50
-
51
-
52
-
53
-
54
-
55
-
56
-
57
-
58
-
59
-
60
-
61
-
62
-
63
-
64
-
65
-
66
-
67
-
68
-
69
-
70
-
71
-
72
-
73
-
74
-
75
-
76
-
77
-
78
-
79
-
80
-
81
-
82
-
83
 |
 |
EPSON
®
PowerLite
®
8150i
User’s Guide
EPSON
®
PowerLite
®
8150i
Multimedia Projector