Epson PowerLite 8150i User Manual - Page 33
Meeting Minutes, Make sure the meeting minutes file you want to transfer is
 |
View all Epson PowerLite 8150i manuals
Add to My Manuals
Save this manual to your list of manuals |
Page 33 highlights
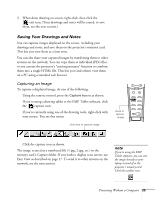
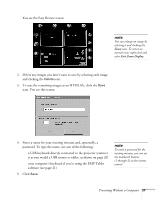
note You can also download the meeting minutes to your office PC using the EMP File Utility software. After connecting to the projector (see page 11), click the Meeting Minutes icon at the top of the screen; make sure your meeting minutes file is selected, then click Copy to transfer it to your PC. Once the captured images have been saved, you can view them on the projector at a later time by clicking the Meeting Minutes icon at the top of the Easy Review screen. While viewing meeting minutes, you can click Add to append additional captured images to your meeting minutes file, or click Delete to remove an individual image or delete the entire file. To transfer the saved meeting minutes to another system on the network, follow these steps: 1. Open Easy File, as described on page 13, and connect with the computer to which you want to transfer the files. 2. Click the Send Meeting Minutes icon. 3. Make sure the meeting minutes file you want to transfer is selected. Then select the folder on the computer to which you want to transfer it and click Copy. The meeting minutes are saved on the computer with the date and time they were created as part of the file name. To view the file, use a standard web browser such as Microsoft Internet Explorer. 28 Presenting Without a Computer
-
 1
1 -
2
-
3
-
4
-
5
-
6
-
7
-
8
-
9
-
10
-
11
-
12
-
13
-
14
-
15
-
16
-
17
-
18
-
19
-
20
-
21
-
22
-
23
-
24
-
25
-
26
-
27
-
 28
28 -
 29
29 -
 30
30 -
 31
31 -
 32
32 -
 33
33 -
 34
34 -
 35
35 -
 36
36 -
 37
37 -
 38
38 -
39
-
40
-
41
-
42
-
43
-
44
-
45
-
46
-
47
-
48
-
49
-
50
-
51
-
52
-
53
-
54
-
55
-
56
-
57
-
58
-
59
-
60
-
61
-
62
-
63
-
64
-
65
-
66
-
67
-
68
-
69
-
70
-
71
-
72
-
73
-
74
-
75
-
76
-
77
-
78
-
79
-
80
-
81
-
82
-
83
 |
 |