HP 4600 HP color LaserJet 4600 Series - User Guide - Page 231
Checking DIMM installation
 |
UPC - 808736060875
View all HP 4600 manuals
Add to My Manuals
Save this manual to your list of manuals |
Page 231 highlights
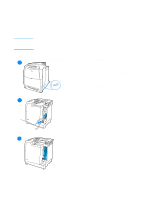
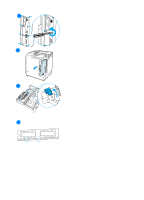
Checking DIMM installation Check that the DIMMs are installed correctly and working. To check DIMM installation 1. Turn the printer on. Check that the Ready light is on after the printer has gone through the startup sequence. If an error message appears, a DIMM may have been incorrectly installed. 2. Print a configuration page. See Printing a configuration page. 3. Check the Installed Personalities and Options section on the configuration page and compare it with the configuration page printed before the DIMM installation. 4. If the amount of recognized memory has not increased: • The DIMM may not be installed correctly. Repeat the installation procedure. • The DIMM may be defective. Try a new DIMM. ENWW 217
-
 1
1 -
2
-
3
-
4
-
5
-
6
-
7
-
8
-
9
-
10
-
11
-
12
-
13
-
14
-
15
-
16
-
17
-
18
-
19
-
20
-
21
-
22
-
23
-
24
-
25
-
26
-
27
-
28
-
29
-
30
-
31
-
32
-
33
-
34
-
35
-
36
-
37
-
38
-
39
-
40
-
41
-
42
-
43
-
44
-
45
-
46
-
47
-
48
-
49
-
50
-
51
-
52
-
53
-
54
-
55
-
56
-
57
-
58
-
59
-
60
-
61
-
62
-
63
-
64
-
65
-
66
-
67
-
68
-
69
-
70
-
71
-
72
-
73
-
74
-
75
-
76
-
77
-
78
-
79
-
80
-
81
-
82
-
83
-
84
-
85
-
86
-
87
-
88
-
89
-
90
-
91
-
92
-
93
-
94
-
95
-
96
-
97
-
98
-
99
-
100
-
101
-
102
-
103
-
104
-
105
-
106
-
107
-
108
-
109
-
110
-
111
-
112
-
113
-
114
-
115
-
116
-
117
-
118
-
119
-
120
-
121
-
122
-
123
-
124
-
125
-
126
-
127
-
128
-
129
-
130
-
131
-
132
-
133
-
134
-
135
-
136
-
137
-
138
-
139
-
140
-
141
-
142
-
143
-
144
-
145
-
146
-
147
-
148
-
149
-
150
-
151
-
152
-
153
-
154
-
155
-
156
-
157
-
158
-
159
-
160
-
161
-
162
-
163
-
164
-
165
-
166
-
167
-
168
-
169
-
170
-
171
-
172
-
173
-
174
-
175
-
176
-
177
-
178
-
179
-
180
-
181
-
182
-
183
-
184
-
185
-
186
-
187
-
188
-
189
-
190
-
191
-
192
-
193
-
194
-
195
-
196
-
197
-
198
-
199
-
200
-
201
-
202
-
203
-
204
-
205
-
206
-
207
-
208
-
209
-
210
-
211
-
212
-
213
-
214
-
215
-
216
-
217
-
218
-
219
-
220
-
221
-
222
-
223
-
224
-
225
-
 226
226 -
 227
227 -
 228
228 -
 229
229 -
 230
230 -
 231
231 -
 232
232 -
 233
233 -
 234
234 -
 235
235 -
 236
236 -
237
-
238
-
239
-
240
-
241
-
242
-
243
-
244
 |
 |

ENWW
217
Checking DIMM installation
Check that the DIMMs are installed correctly and working.
To check DIMM installation
1.
Turn the printer on. Check that the Ready light is on after the
printer has gone through the startup sequence. If an error
message appears, a DIMM may have been incorrectly installed.
2.
Print a configuration page. See
Printing a configuration page
.
3.
Check the Installed Personalities and Options section on the
configuration page and compare it with the configuration page
printed before the DIMM installation.
4.
If the amount of recognized memory has not increased:
•
The DIMM may not be installed correctly. Repeat the
installation procedure.
•
The DIMM may be defective. Try a new DIMM.