HP 4600 HP color LaserJet 4600 Series - User Guide - Page 85
To load envelopes into Tray 1, Printing envelopes, Open Tray 1. - driver windows 10
 |
UPC - 808736060875
View all HP 4600 manuals
Add to My Manuals
Save this manual to your list of manuals |
Page 85 highlights
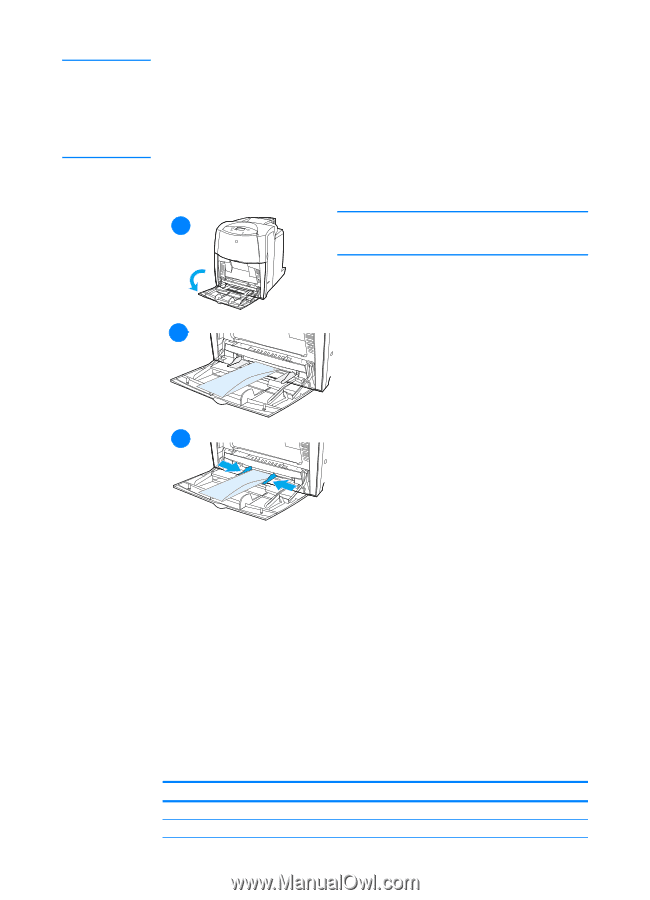
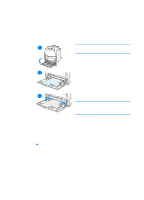
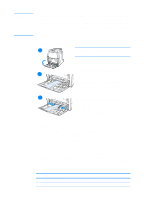
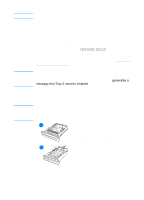
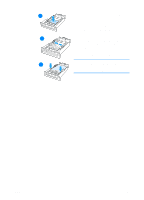
CAUTION Envelopes with clasps, snaps, windows, coated linings, exposed selfstick adhesives, or other synthetic materials can severly damage the printer. To avoid jams and possible printer damage, never try to print on both sides of an envelope. Before you load envelopes, make sure they are flat, undamaged, and not stuck together. Do not use envelopes with pressure-sensitive adhesive. To load envelopes into Tray 1 1 CAUTION To avoid jams, do not remove or insert envelopes during printing. 1 Open Tray 1. 2 Load up to 20 envelopes in the 12 center of Tray 1 with the side to be printed facing down and the postage end toward the printer. Slide the envelopes into the printer as far as they will go without forcing them. 13 3 Adjust the guides to touch the envelope stack without bending the envelopes. Make sure the envelopes fit under the tabs on the guides. Printing envelopes 1. In the printer control panel, set the media size for Tray 1 to match the size envelope you are printing. 2. Specify Tray 1 or select the media source by size in the printer driver. 3. If your software does not automatically format an envelope, specify Landscape for page orientation in your software application or printer driver. Use the following guidelines to set margins for return and destination addresses on Commercial #10 or DL envelopes. ENWW Address type Return Destination Left margin 15 mm (0.6 inches) 102 mm (4.0 inches) Top margin 15 mm (0.6 inches) 51 mm (2.0 inches) 71
-
 1
1 -
2
-
3
-
4
-
5
-
6
-
7
-
8
-
9
-
10
-
11
-
12
-
13
-
14
-
15
-
16
-
17
-
18
-
19
-
20
-
21
-
22
-
23
-
24
-
25
-
26
-
27
-
28
-
29
-
30
-
31
-
32
-
33
-
34
-
35
-
36
-
37
-
38
-
39
-
40
-
41
-
42
-
43
-
44
-
45
-
46
-
47
-
48
-
49
-
50
-
51
-
52
-
53
-
54
-
55
-
56
-
57
-
58
-
59
-
60
-
61
-
62
-
63
-
64
-
65
-
66
-
67
-
68
-
69
-
70
-
71
-
72
-
73
-
74
-
75
-
76
-
77
-
78
-
79
-
 80
80 -
 81
81 -
 82
82 -
 83
83 -
 84
84 -
 85
85 -
 86
86 -
 87
87 -
 88
88 -
 89
89 -
 90
90 -
91
-
92
-
93
-
94
-
95
-
96
-
97
-
98
-
99
-
100
-
101
-
102
-
103
-
104
-
105
-
106
-
107
-
108
-
109
-
110
-
111
-
112
-
113
-
114
-
115
-
116
-
117
-
118
-
119
-
120
-
121
-
122
-
123
-
124
-
125
-
126
-
127
-
128
-
129
-
130
-
131
-
132
-
133
-
134
-
135
-
136
-
137
-
138
-
139
-
140
-
141
-
142
-
143
-
144
-
145
-
146
-
147
-
148
-
149
-
150
-
151
-
152
-
153
-
154
-
155
-
156
-
157
-
158
-
159
-
160
-
161
-
162
-
163
-
164
-
165
-
166
-
167
-
168
-
169
-
170
-
171
-
172
-
173
-
174
-
175
-
176
-
177
-
178
-
179
-
180
-
181
-
182
-
183
-
184
-
185
-
186
-
187
-
188
-
189
-
190
-
191
-
192
-
193
-
194
-
195
-
196
-
197
-
198
-
199
-
200
-
201
-
202
-
203
-
204
-
205
-
206
-
207
-
208
-
209
-
210
-
211
-
212
-
213
-
214
-
215
-
216
-
217
-
218
-
219
-
220
-
221
-
222
-
223
-
224
-
225
-
226
-
227
-
228
-
229
-
230
-
231
-
232
-
233
-
234
-
235
-
236
-
237
-
238
-
239
-
240
-
241
-
242
-
243
-
244
 |
 |