HP 750c HP DesignJet 700 user guide - Page 108
For the HP DesignJet 750C - designjet cartridges
 |
View all HP 750c manuals
Add to My Manuals
Save this manual to your list of manuals |
Page 108 highlights
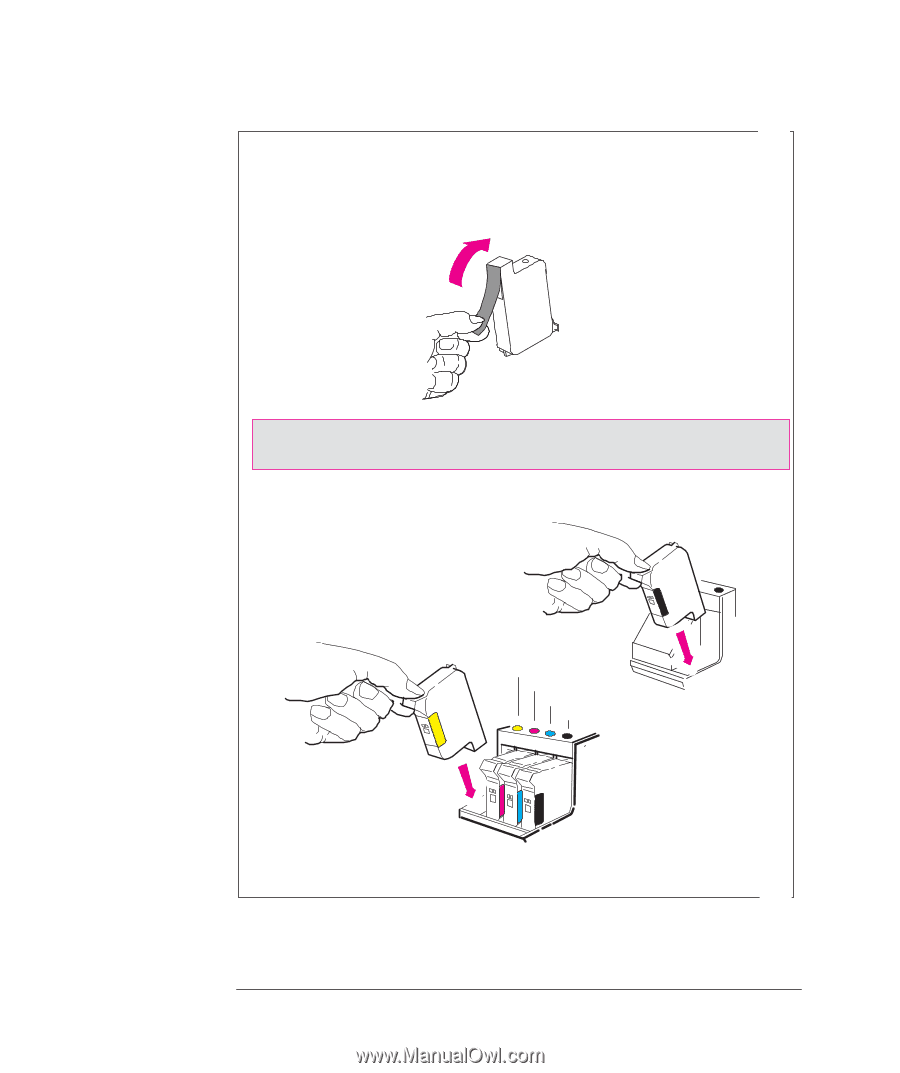
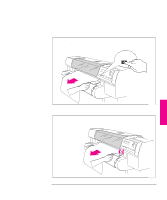
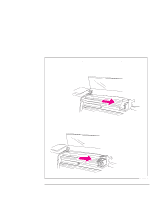
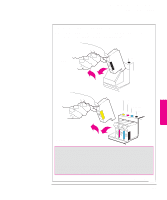
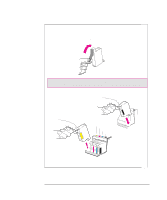
Working With Media and Cartridge(s) Replacing Cartridge(s) 1754 5 For each cartridge in the set that needs to be replaced: a Take the new cartridge out of its box. b Remove the colored protective tape and tab from the cartridge's nozzles. 750C Plus For the HP DesignJet 750C Plus, match the color of the cartridge's label with the color of the dot above the stall. c Insert the cartridge in the correct stall. Press down lightly and push the cartridge away from you until it snaps into place. 700 Yellow Cyan Magenta Black 750C Plus If the front-panel display says Reseat cartridge(s), then remove the cartridge indicated in the display and insert it again. Do so until the message disappears. 0019 6 When you have finished installing the cartridge(s), the plotter runs the automatic alignment procedure. When the front panel displays STATUS / Ready, the procedure is complete. You can throw away the small print produced during the alignment procedure. 3-30
-
 1
1 -
2
-
3
-
4
-
5
-
6
-
7
-
8
-
9
-
10
-
11
-
12
-
13
-
14
-
15
-
16
-
17
-
18
-
19
-
20
-
21
-
22
-
23
-
24
-
25
-
26
-
27
-
28
-
29
-
30
-
31
-
32
-
33
-
34
-
35
-
36
-
37
-
38
-
39
-
40
-
41
-
42
-
43
-
44
-
45
-
46
-
47
-
48
-
49
-
50
-
51
-
52
-
53
-
54
-
55
-
56
-
57
-
58
-
59
-
60
-
61
-
62
-
63
-
64
-
65
-
66
-
67
-
68
-
69
-
70
-
71
-
72
-
73
-
74
-
75
-
76
-
77
-
78
-
79
-
80
-
81
-
82
-
83
-
84
-
85
-
86
-
87
-
88
-
89
-
90
-
91
-
92
-
93
-
94
-
95
-
96
-
97
-
98
-
99
-
100
-
101
-
102
-
 103
103 -
 104
104 -
 105
105 -
 106
106 -
 107
107 -
 108
108 -
 109
109 -
 110
110 -
 111
111 -
 112
112 -
 113
113 -
114
-
115
-
116
-
117
-
118
-
119
-
120
-
121
-
122
-
123
-
124
-
125
-
126
-
127
-
128
-
129
-
130
-
131
-
132
-
133
-
134
-
135
-
136
-
137
-
138
-
139
-
140
-
141
-
142
-
143
-
144
-
145
-
146
-
147
-
148
-
149
-
150
-
151
-
152
-
153
-
154
-
155
-
156
-
157
-
158
-
159
-
160
-
161
-
162
-
163
-
164
-
165
-
166
-
167
-
168
-
169
-
170
-
171
-
172
-
173
-
174
-
175
-
176
-
177
-
178
-
179
-
180
-
181
-
182
-
183
-
184
-
185
-
186
-
187
-
188
-
189
-
190
-
191
-
192
-
193
-
194
-
195
-
196
-
197
-
198
-
199
-
200
-
201
-
202
-
203
-
204
-
205
-
206
-
207
-
208
-
209
-
210
-
211
-
212
-
213
-
214
-
215
-
216
-
217
-
218
-
219
-
220
-
221
-
222
 |
 |