HP 750c HP DesignJet 700 user guide - Page 43
the cartridge alignment procedure. - ink cartridges
 |
View all HP 750c manuals
Add to My Manuals
Save this manual to your list of manuals |
Page 43 highlights
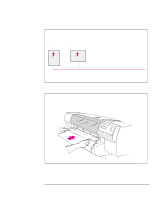
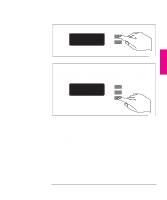
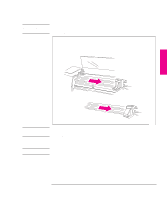
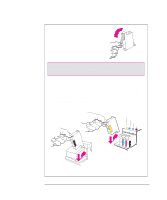
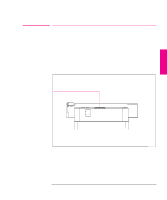
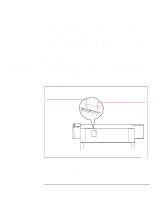
Setting Up Your Plotter Task 5: Load the Print Cartridge(s) C A U T I O N 3 When the cartridges are successfully installed, the plotter automatically runs the cartridge alignment procedure. When the front-panel displays STATUS / Ready, the procedure is complete. You can throw away the small print produced during the cartridge alignment procedure. To make your cartridges last as long as possible, you should not remove them once they are installed, except to replace them. Now that the cartridge(s) are loaded, never turn the plotter upside down, or ink will spill. SETUP 1 1-23
-
 1
1 -
2
-
3
-
4
-
5
-
6
-
7
-
8
-
9
-
10
-
11
-
12
-
13
-
14
-
15
-
16
-
17
-
18
-
19
-
20
-
21
-
22
-
23
-
24
-
25
-
26
-
27
-
28
-
29
-
30
-
31
-
32
-
33
-
34
-
35
-
36
-
37
-
 38
38 -
 39
39 -
 40
40 -
 41
41 -
 42
42 -
 43
43 -
 44
44 -
 45
45 -
 46
46 -
 47
47 -
 48
48 -
49
-
50
-
51
-
52
-
53
-
54
-
55
-
56
-
57
-
58
-
59
-
60
-
61
-
62
-
63
-
64
-
65
-
66
-
67
-
68
-
69
-
70
-
71
-
72
-
73
-
74
-
75
-
76
-
77
-
78
-
79
-
80
-
81
-
82
-
83
-
84
-
85
-
86
-
87
-
88
-
89
-
90
-
91
-
92
-
93
-
94
-
95
-
96
-
97
-
98
-
99
-
100
-
101
-
102
-
103
-
104
-
105
-
106
-
107
-
108
-
109
-
110
-
111
-
112
-
113
-
114
-
115
-
116
-
117
-
118
-
119
-
120
-
121
-
122
-
123
-
124
-
125
-
126
-
127
-
128
-
129
-
130
-
131
-
132
-
133
-
134
-
135
-
136
-
137
-
138
-
139
-
140
-
141
-
142
-
143
-
144
-
145
-
146
-
147
-
148
-
149
-
150
-
151
-
152
-
153
-
154
-
155
-
156
-
157
-
158
-
159
-
160
-
161
-
162
-
163
-
164
-
165
-
166
-
167
-
168
-
169
-
170
-
171
-
172
-
173
-
174
-
175
-
176
-
177
-
178
-
179
-
180
-
181
-
182
-
183
-
184
-
185
-
186
-
187
-
188
-
189
-
190
-
191
-
192
-
193
-
194
-
195
-
196
-
197
-
198
-
199
-
200
-
201
-
202
-
203
-
204
-
205
-
206
-
207
-
208
-
209
-
210
-
211
-
212
-
213
-
214
-
215
-
216
-
217
-
218
-
219
-
220
-
221
-
222
 |
 |

1-23
3
When the cartridges are successfully installed, the plotter automatically runs the
cartridge alignment procedure.
When the front-panel displays
STATUS / Ready
,
the procedure is complete.
You can throw away the small print produced during
the cartridge alignment procedure.
To make your cartridges last as long as possible, you should not remove them once
they are installed, except to replace them.
Now that the cartridge(s) are loaded,
never
turn the plotter upside down, or
ink will spill.
Setting Up Your Plotter
Task 5: Load the Print Cartridge(s)
SETUP
1
C A U T I O N