HP 750c HP DesignJet 700 user guide - Page 69
Description of the Menus Plot
 |
View all HP 750c manuals
Add to My Manuals
Save this manual to your list of manuals |
Page 69 highlights
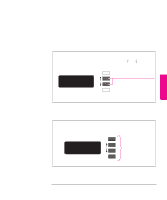
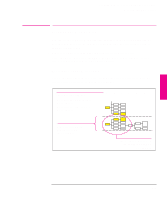
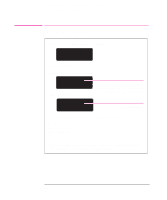
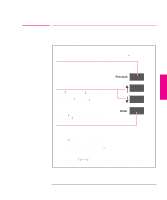
FRONT-PANEL 2 TUTORIAL Learning How To Use the Front-Panel Display Printing the Menus Plot Printing the Menus Plot You can see the complete menu structure available on the plotter by printing the Front Panel Menus plot. To help you understand the menu structure and how to navigate it, print it now 1 Check that media is loaded. See page 3-10 for loading information. 2 Select the Menu option from the DEMO PLOTS menu, as described in chapter 1, task 6. The Front-Panel Menus plot will be printed. Description of the Menus Plot Look at the Front-Panel Menus plot . It shows the full menu structure. Here is a sample section of it (concerned with pen settings): There are six columns: 1 contains the highest level menu options. 6 contains the lowest level menu options. 1 234 5 6 Row associated with first level menu A (Pen settings). A Area expanded for use in the navigation example on page 2-8. 2-5
-
 1
1 -
2
-
3
-
4
-
5
-
6
-
7
-
8
-
9
-
10
-
11
-
12
-
13
-
14
-
15
-
16
-
17
-
18
-
19
-
20
-
21
-
22
-
23
-
24
-
25
-
26
-
27
-
28
-
29
-
30
-
31
-
32
-
33
-
34
-
35
-
36
-
37
-
38
-
39
-
40
-
41
-
42
-
43
-
44
-
45
-
46
-
47
-
48
-
49
-
50
-
51
-
52
-
53
-
54
-
55
-
56
-
57
-
58
-
59
-
60
-
61
-
62
-
63
-
 64
64 -
 65
65 -
 66
66 -
 67
67 -
 68
68 -
 69
69 -
 70
70 -
 71
71 -
 72
72 -
 73
73 -
 74
74 -
75
-
76
-
77
-
78
-
79
-
80
-
81
-
82
-
83
-
84
-
85
-
86
-
87
-
88
-
89
-
90
-
91
-
92
-
93
-
94
-
95
-
96
-
97
-
98
-
99
-
100
-
101
-
102
-
103
-
104
-
105
-
106
-
107
-
108
-
109
-
110
-
111
-
112
-
113
-
114
-
115
-
116
-
117
-
118
-
119
-
120
-
121
-
122
-
123
-
124
-
125
-
126
-
127
-
128
-
129
-
130
-
131
-
132
-
133
-
134
-
135
-
136
-
137
-
138
-
139
-
140
-
141
-
142
-
143
-
144
-
145
-
146
-
147
-
148
-
149
-
150
-
151
-
152
-
153
-
154
-
155
-
156
-
157
-
158
-
159
-
160
-
161
-
162
-
163
-
164
-
165
-
166
-
167
-
168
-
169
-
170
-
171
-
172
-
173
-
174
-
175
-
176
-
177
-
178
-
179
-
180
-
181
-
182
-
183
-
184
-
185
-
186
-
187
-
188
-
189
-
190
-
191
-
192
-
193
-
194
-
195
-
196
-
197
-
198
-
199
-
200
-
201
-
202
-
203
-
204
-
205
-
206
-
207
-
208
-
209
-
210
-
211
-
212
-
213
-
214
-
215
-
216
-
217
-
218
-
219
-
220
-
221
-
222
 |
 |
