HP 750c HP DesignJet 700 user guide - Page 169
If The Automatic Cutter Does Not Cut Immediately When a Plot
 |
View all HP 750c manuals
Add to My Manuals
Save this manual to your list of manuals |
Page 169 highlights
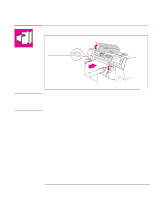
TROUBLE- 9 SHOOTING Troubleshooting Solving Media-Handling Problems If Media Crumples When You Load it Clear any obstructions in the media path. Be sure the leading edge is straight and free of tears. Cut a straight edge with the knife if necessary. If your media is curled, and if both sides are the same, load it with the curved (hollow) side towards you (Certain media types - for example coated paper - have a plotting side and a non-plotting side and these must be loaded plotting side down.) When loading media, hold each edge and push the media into the plotter evenly against the stops until a slight buckle develops evenly across the media. Let go as soon as it starts to feed into the plotter. If you have just moved the plotter or your media from an environment with a different humidity level, let the media stabilize for at least 15 minutes before loading it. Roll media only. Open the roll cover and raise the lever. Unload the leading edge of the roll. Push the media all the way to the right so that it is flush against the media stop on the roll core. Then reload the media. If Plots Do Not Feed Out Properly From the Plotter Make sure the roll cover is completely closed before you plot. If The Automatic Cutter Does Not Cut Immediately When a Plot Has Finished Check the Page format / Margins setting. When this is set to Smaller, the plotter waits until the next plot begins plotting so it can create a 10 mm margin between both plots or nesting sets. Press the Form Feed and Cut key if you need to cut the media before the ink-drying time has passed or before the next plot begins plotting. Use caution to avoid smearing the ink. Check the ink-drying time and change if necessary (Device setup / Drying time). 9-5
-
 1
1 -
2
-
3
-
4
-
5
-
6
-
7
-
8
-
9
-
10
-
11
-
12
-
13
-
14
-
15
-
16
-
17
-
18
-
19
-
20
-
21
-
22
-
23
-
24
-
25
-
26
-
27
-
28
-
29
-
30
-
31
-
32
-
33
-
34
-
35
-
36
-
37
-
38
-
39
-
40
-
41
-
42
-
43
-
44
-
45
-
46
-
47
-
48
-
49
-
50
-
51
-
52
-
53
-
54
-
55
-
56
-
57
-
58
-
59
-
60
-
61
-
62
-
63
-
64
-
65
-
66
-
67
-
68
-
69
-
70
-
71
-
72
-
73
-
74
-
75
-
76
-
77
-
78
-
79
-
80
-
81
-
82
-
83
-
84
-
85
-
86
-
87
-
88
-
89
-
90
-
91
-
92
-
93
-
94
-
95
-
96
-
97
-
98
-
99
-
100
-
101
-
102
-
103
-
104
-
105
-
106
-
107
-
108
-
109
-
110
-
111
-
112
-
113
-
114
-
115
-
116
-
117
-
118
-
119
-
120
-
121
-
122
-
123
-
124
-
125
-
126
-
127
-
128
-
129
-
130
-
131
-
132
-
133
-
134
-
135
-
136
-
137
-
138
-
139
-
140
-
141
-
142
-
143
-
144
-
145
-
146
-
147
-
148
-
149
-
150
-
151
-
152
-
153
-
154
-
155
-
156
-
157
-
158
-
159
-
160
-
161
-
162
-
163
-
 164
164 -
 165
165 -
 166
166 -
 167
167 -
 168
168 -
 169
169 -
 170
170 -
 171
171 -
 172
172 -
 173
173 -
 174
174 -
175
-
176
-
177
-
178
-
179
-
180
-
181
-
182
-
183
-
184
-
185
-
186
-
187
-
188
-
189
-
190
-
191
-
192
-
193
-
194
-
195
-
196
-
197
-
198
-
199
-
200
-
201
-
202
-
203
-
204
-
205
-
206
-
207
-
208
-
209
-
210
-
211
-
212
-
213
-
214
-
215
-
216
-
217
-
218
-
219
-
220
-
221
-
222
 |
 |