HP 750c HP DesignJet 755CM Printer User's Guide - C3198-60051 - Page 164
Carefully pull the rest of the roll or sheet
 |
View all HP 750c manuals
Add to My Manuals
Save this manual to your list of manuals |
Page 164 highlights
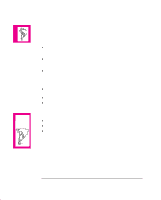
Troubleshooting Clearing a Media Jam Clearing a Media Jam 1 Switch OFF the printer, open the window and raise the media lever. off WARNING 1867 Don't touch the stainless steel strip that runs the length of the printer behind the cartridge carriage; its edge is very sharp. Keep hair, jewelry, clothing, and foreign objects away from the printer mechanisms. When moving the cartridge carriage, touch only the black plastic parts. 2 Carefully move the cartridge carriage out of the way - if possible all the way to the enclosed area on the left or the right. Which way you are able to move it depends on where the media is jammed. If the printer was in the process of cutting media at the time of the jam, the cutter carriage will be attached to the cartridge carriage and will move with it. 3 Carefully remove any of the jammed media which you can easily lift up and out from the top of the printer. 4 Carefully pull the rest of the roll or sheet down and out of the media entry slot. 5 Lower the window and the lever and switch on the printer. Press the Form Feed and Cut key to eject any pieces of media that are still in the media path. 6 Reload the media as normal - see page 3-9. Remember that, if it's a roll, you may need to trim the edge. 9-8
-
 1
1 -
2
-
3
-
4
-
5
-
6
-
7
-
8
-
9
-
10
-
11
-
12
-
13
-
14
-
15
-
16
-
17
-
18
-
19
-
20
-
21
-
22
-
23
-
24
-
25
-
26
-
27
-
28
-
29
-
30
-
31
-
32
-
33
-
34
-
35
-
36
-
37
-
38
-
39
-
40
-
41
-
42
-
43
-
44
-
45
-
46
-
47
-
48
-
49
-
50
-
51
-
52
-
53
-
54
-
55
-
56
-
57
-
58
-
59
-
60
-
61
-
62
-
63
-
64
-
65
-
66
-
67
-
68
-
69
-
70
-
71
-
72
-
73
-
74
-
75
-
76
-
77
-
78
-
79
-
80
-
81
-
82
-
83
-
84
-
85
-
86
-
87
-
88
-
89
-
90
-
91
-
92
-
93
-
94
-
95
-
96
-
97
-
98
-
99
-
100
-
101
-
102
-
103
-
104
-
105
-
106
-
107
-
108
-
109
-
110
-
111
-
112
-
113
-
114
-
115
-
116
-
117
-
118
-
119
-
120
-
121
-
122
-
123
-
124
-
125
-
126
-
127
-
128
-
129
-
130
-
131
-
132
-
133
-
134
-
135
-
136
-
137
-
138
-
139
-
140
-
141
-
142
-
143
-
144
-
145
-
146
-
147
-
148
-
149
-
150
-
151
-
152
-
153
-
154
-
155
-
156
-
157
-
158
-
 159
159 -
 160
160 -
 161
161 -
 162
162 -
 163
163 -
 164
164 -
 165
165 -
 166
166 -
 167
167 -
 168
168 -
 169
169 -
170
-
171
-
172
-
173
-
174
-
175
-
176
-
177
-
178
-
179
-
180
-
181
-
182
-
183
-
184
-
185
-
186
-
187
-
188
-
189
-
190
-
191
-
192
-
193
-
194
-
195
-
196
-
197
-
198
-
199
-
200
-
201
-
202
-
203
-
204
-
205
-
206
-
207
-
208
-
209
-
210
-
211
-
212
-
213
-
214
-
215
-
216
-
217
-
218
-
219
-
220
 |
 |
