HP 750c HP DesignJet 755CM Printer User's Guide - C3198-60051 - Page 171
If the Printer Has Printed a Different Print Than the One You, Were Expecting, If the Quality Of
 |
View all HP 750c manuals
Add to My Manuals
Save this manual to your list of manuals |
Page 171 highlights
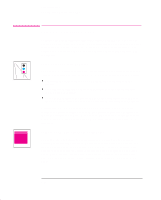
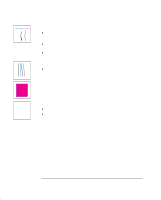
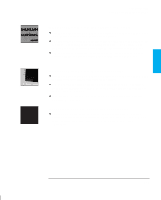
TROUBLE- 9 SHOOTING ?! Troubleshooting Solving Problems With Image Position or Content If the Printer Has Printed a Different Print Than the One You Were Expecting One possibility is that you have accidentally initiated one of the printer's internal prints: The Cartridge Alignment Print. (A small pattern of colored lines without text.) This is printed automatically every time you replace, or even reseat a cartridge. The Current Configuration Print. This is printed by simultaneously pressing the two arrow keys on the front-panel. The Demos. These are printed from the front-panel menu options Demos / PostScript and Demos / Samples. The Front-Panel Menu Print. This is printed from the front-panel menu Demos / Menu. The Palette Print. This is printed from the front-panel menu Demos / Palette. The Service Configuration Print. This is printed from the front-panel menu Demos / Service Config. If the Quality Of A Color Print Is Not as Sharp as You Were Expecting Select Best on the front-panel Print Quality key and print again. Did you specify the correct media type when loading? The highest line quality is only produced using Opaque Bond, Coated Paper or Matte Film. For details of media types, see page 3-3. To find out the printers' current media type setting, see page 7-2. Your application-software driver may be overriding the Sharp lines selection on the front-panel menu. Are you printing something other than a line drawing, for example a CorelDRAW! file? If so, you may want to experiment to improve the output quality by setting Sharp lines to Off on the front-panel menu, and print again. Are you printing a CAD drawing with small raster images? Try setting Sharp lines to On and print again. When loading the paper, specify "Heavy coated paper" on the front panel, rather than "Coated paper". 9-15
-
 1
1 -
2
-
3
-
4
-
5
-
6
-
7
-
8
-
9
-
10
-
11
-
12
-
13
-
14
-
15
-
16
-
17
-
18
-
19
-
20
-
21
-
22
-
23
-
24
-
25
-
26
-
27
-
28
-
29
-
30
-
31
-
32
-
33
-
34
-
35
-
36
-
37
-
38
-
39
-
40
-
41
-
42
-
43
-
44
-
45
-
46
-
47
-
48
-
49
-
50
-
51
-
52
-
53
-
54
-
55
-
56
-
57
-
58
-
59
-
60
-
61
-
62
-
63
-
64
-
65
-
66
-
67
-
68
-
69
-
70
-
71
-
72
-
73
-
74
-
75
-
76
-
77
-
78
-
79
-
80
-
81
-
82
-
83
-
84
-
85
-
86
-
87
-
88
-
89
-
90
-
91
-
92
-
93
-
94
-
95
-
96
-
97
-
98
-
99
-
100
-
101
-
102
-
103
-
104
-
105
-
106
-
107
-
108
-
109
-
110
-
111
-
112
-
113
-
114
-
115
-
116
-
117
-
118
-
119
-
120
-
121
-
122
-
123
-
124
-
125
-
126
-
127
-
128
-
129
-
130
-
131
-
132
-
133
-
134
-
135
-
136
-
137
-
138
-
139
-
140
-
141
-
142
-
143
-
144
-
145
-
146
-
147
-
148
-
149
-
150
-
151
-
152
-
153
-
154
-
155
-
156
-
157
-
158
-
159
-
160
-
161
-
162
-
163
-
164
-
165
-
 166
166 -
 167
167 -
 168
168 -
 169
169 -
 170
170 -
 171
171 -
 172
172 -
 173
173 -
 174
174 -
 175
175 -
 176
176 -
177
-
178
-
179
-
180
-
181
-
182
-
183
-
184
-
185
-
186
-
187
-
188
-
189
-
190
-
191
-
192
-
193
-
194
-
195
-
196
-
197
-
198
-
199
-
200
-
201
-
202
-
203
-
204
-
205
-
206
-
207
-
208
-
209
-
210
-
211
-
212
-
213
-
214
-
215
-
216
-
217
-
218
-
219
-
220
 |
 |
