HP Designjet 10000s HP Designjet 10000 Series - User's Guide - Page 210
You will need to make sure that a valid storage liquid cartridge has been installed correctly
 |
View all HP Designjet 10000s manuals
Add to My Manuals
Save this manual to your list of manuals |
Page 210 highlights
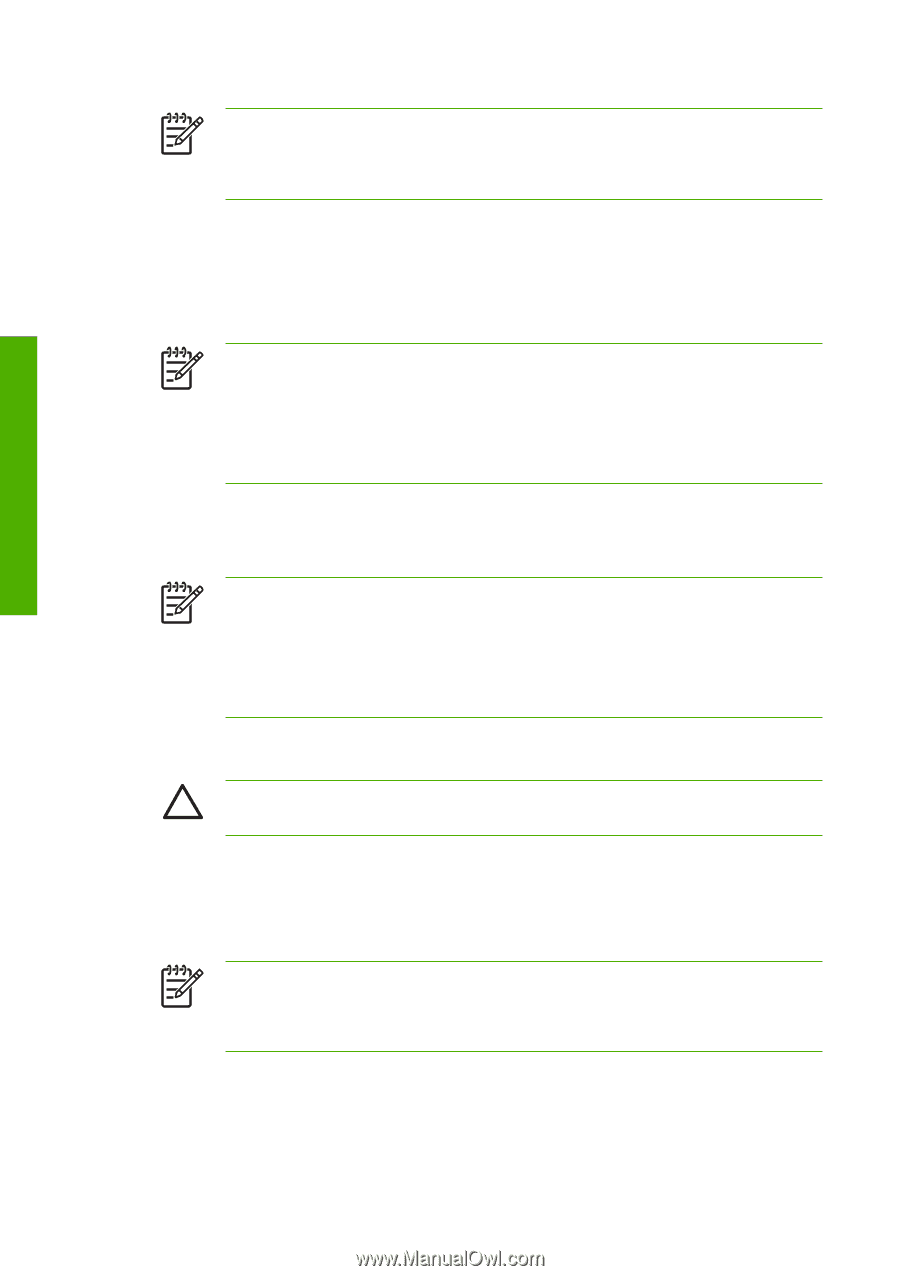
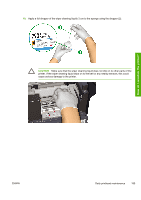
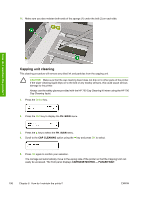
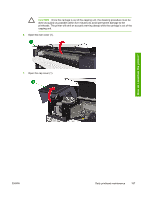
How do I maintain the printer? NOTE If the printer detects that an ink system purging cartridge has been installed incorrectly or if an invalid cartridge has been installed, a warning message will be displayed on the front panel. You will need to make sure that a valid ink system purging cartridge has been installed correctly before you can continue. 11. The ink extraction process starts and you need to recheck whether the waste ink bottle is present and make sure it is empty. Press the OK key once the waste ink bottle has been checked. 12. When prompted by the front panel, open the left ink cartridge door and remove all three ink system purging cartridges. 13. Install a new storage liquid cartridge in each slot and close the left ink cartridge door. NOTE If the printer detects that a storage liquid cartridge has been installed incorrectly, or if any of the storage liquid cartridges contain less than 500 cc of liquid, or if an invalid storage liquid cartridge has been installed, a warning message will be displayed on the front panel. You will need to make sure that a valid storage liquid has been installed correctly before you can continue. 14. When prompted by the front panel, open the right ink cartridge door and remove all three ink system purging cartridges. 15. Install a new storage liquid cartridge in to each slot and close the right ink cartridge door. NOTE If the printer detects that a storage liquid cartridge has been installed incorrectly, or if any of the storage liquid cartridges contain less than 500 cc of liquid, or if an invalid storage liquid cartridge has been installed, a warning message will be displayed on the front panel. You will need to make sure that a valid storage liquid cartridge has been installed correctly before you can continue. 16. When the front panel displays the waste ink bottle warning message, check whether the waste ink bottle is present and make sure it is empty. CAUTION This process will produce over 3 liters of waste liquid so the waste ink bottle must be empty. 17. Press the OK key once the waste ink bottle has been checked. 18. When prompted by the front panel, open the left ink cartridge door and remove all three purging liquid cartridges. 19. Install an ink system purging cartridge in to each slot and close the left ink cartridge door. NOTE If the printer detects that an ink system purging cartridge has been installed incorrectly or if an invalid cartridge has been installed, a warning message will be displayed on the front panel. You will need to make sure that a valid ink system purging cartridge has been installed correctly before you can continue. 20. Open the right ink cartridge door and remove ALL three purging liquid cartridges. 200 Chapter 6 How do I maintain the printer? ENWW
-
 1
1 -
2
-
3
-
4
-
5
-
6
-
7
-
8
-
9
-
10
-
11
-
12
-
13
-
14
-
15
-
16
-
17
-
18
-
19
-
20
-
21
-
22
-
23
-
24
-
25
-
26
-
27
-
28
-
29
-
30
-
31
-
32
-
33
-
34
-
35
-
36
-
37
-
38
-
39
-
40
-
41
-
42
-
43
-
44
-
45
-
46
-
47
-
48
-
49
-
50
-
51
-
52
-
53
-
54
-
55
-
56
-
57
-
58
-
59
-
60
-
61
-
62
-
63
-
64
-
65
-
66
-
67
-
68
-
69
-
70
-
71
-
72
-
73
-
74
-
75
-
76
-
77
-
78
-
79
-
80
-
81
-
82
-
83
-
84
-
85
-
86
-
87
-
88
-
89
-
90
-
91
-
92
-
93
-
94
-
95
-
96
-
97
-
98
-
99
-
100
-
101
-
102
-
103
-
104
-
105
-
106
-
107
-
108
-
109
-
110
-
111
-
112
-
113
-
114
-
115
-
116
-
117
-
118
-
119
-
120
-
121
-
122
-
123
-
124
-
125
-
126
-
127
-
128
-
129
-
130
-
131
-
132
-
133
-
134
-
135
-
136
-
137
-
138
-
139
-
140
-
141
-
142
-
143
-
144
-
145
-
146
-
147
-
148
-
149
-
150
-
151
-
152
-
153
-
154
-
155
-
156
-
157
-
158
-
159
-
160
-
161
-
162
-
163
-
164
-
165
-
166
-
167
-
168
-
169
-
170
-
171
-
172
-
173
-
174
-
175
-
176
-
177
-
178
-
179
-
180
-
181
-
182
-
183
-
184
-
185
-
186
-
187
-
188
-
189
-
190
-
191
-
192
-
193
-
194
-
195
-
196
-
197
-
198
-
199
-
200
-
201
-
202
-
203
-
204
-
 205
205 -
 206
206 -
 207
207 -
 208
208 -
 209
209 -
 210
210 -
 211
211 -
 212
212 -
 213
213 -
 214
214 -
 215
215 -
216
-
217
-
218
-
219
-
220
-
221
-
222
-
223
-
224
-
225
-
226
-
227
-
228
-
229
-
230
-
231
-
232
-
233
-
234
-
235
-
236
-
237
-
238
-
239
-
240
-
241
-
242
-
243
-
244
-
245
-
246
-
247
-
248
-
249
-
250
-
251
-
252
-
253
-
254
-
255
-
256
-
257
-
258
-
259
-
260
-
261
-
262
-
263
-
264
-
265
-
266
-
267
-
268
-
269
-
270
-
271
-
272
-
273
-
274
-
275
-
276
-
277
-
278
-
279
-
280
-
281
-
282
-
283
-
284
-
285
-
286
-
287
-
288
-
289
-
290
-
291
-
292
-
293
-
294
-
295
-
296
-
297
-
298
-
299
-
300
-
301
-
302
-
303
-
304
-
305
-
306
-
307
-
308
-
309
-
310
-
311
-
312
-
313
-
314
-
315
-
316
-
317
-
318
-
319
-
320
-
321
-
322
-
323
-
324
-
325
-
326
-
327
-
328
-
329
-
330
 |
 |