HP Deskjet 990c HP DeskJet 990C Series Printer - (English) Online User's Guide - Page 28
Printing using a Windows CE Device, Printing Basics: Infrared Ir Printing, Print, PCL Inkjet, JetSend
 |
View all HP Deskjet 990c manuals
Add to My Manuals
Save this manual to your list of manuals |
Page 28 highlights
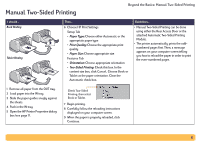
Printing using a Windows CE Device 1 Locate the infrared lens on the Windows CE device. This is typically found on one of the sides of the device. 2 Align the infrared lens of the Windows CE device with the printer's infrared lens. Position the Windows CE device up to 3 feet (1 meter) from the printer and within a 30-degree total angle from the printer's infrared lens. Note: The path between the two infrared devices must be clear of obstacles. 3 In the program from which to print, click File Print. 4 In the Printer box, choose either PCL Inkjet or JetSend (if installed). Note: The JetSend program can greatly enhance the appearance of your printed information. For information on JetSend, go to the following web site: http://www.jetsend.com. Printing Basics: Infrared (Ir) Printing 5 In the Port box, choose IRDA. 6 Click OK. The infrared light on the printer displays a solid beam during the transfer process. When finished printing, the light will turn off. Note: If the Windows CE device is moved out of range of the printer's infrared lens at any time during the printing process, the infrared light will turn off and the printer may stop printing. If you realign the devices within approximately 3-30 seconds (depending on the device), the print job will resume. 28
-
 1
1 -
2
-
3
-
4
-
5
-
6
-
7
-
8
-
9
-
10
-
11
-
12
-
13
-
14
-
15
-
16
-
17
-
18
-
19
-
20
-
21
-
22
-
 23
23 -
 24
24 -
 25
25 -
 26
26 -
 27
27 -
 28
28 -
 29
29 -
 30
30 -
 31
31 -
 32
32 -
 33
33 -
34
-
35
-
36
-
37
-
38
-
39
-
40
-
41
-
42
-
43
-
44
-
45
-
46
-
47
-
48
-
49
-
50
-
51
-
52
-
53
-
54
-
55
-
56
-
57
-
58
-
59
-
60
-
61
-
62
-
63
-
64
-
65
-
66
-
67
-
68
-
69
-
70
-
71
-
72
-
73
-
74
-
75
-
76
-
77
-
78
-
79
-
80
-
81
-
82
-
83
-
84
-
85
-
86
-
87
-
88
-
89
-
90
-
91
-
92
-
93
-
94
-
95
-
96
-
97
-
98
-
99
-
100
-
101
-
102
 |
 |
