HP Hx4700 HP iPAQ hx4700 series Pocket PC - User's Guide - Page 111
Starting VPN Server Connections, Setting Up Proxy Server Settings - ipaq manual
 |
UPC - 829160650166
View all HP Hx4700 manuals
Add to My Manuals
Save this manual to your list of manuals |
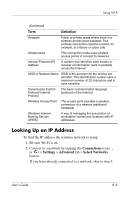
Page 111 highlights
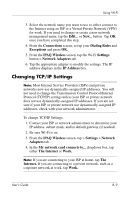
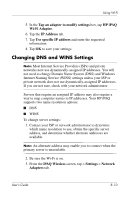
Using Wi-Fi 11. To change advanced settings, tap the Advanced button. Note: You will not need to change advanced settings unless: ■ The server to which you are connecting does not use dynamically-assigned IP addresses and you need to enter your TCP/IP settings, or ■ You need to change server DNS or WINS settings. 12. Tap the Finish button to save the changes. Starting VPN Server Connections To start a connection through a VPN server, be sure Wi-Fi is powered on and connected, and then select the VPN network. Setting Up Proxy Server Settings If you are connected to your ISP or private network during synchronization, your HP iPAQ should download proper proxy settings from your computer. If these settings are not on your computer or need to be changed, you will need to set them up manually. To set up proxy server settings: 1. Contact your ISP or network administrator for the proxy server name, server type, port, type of Socks protocol used, and your user name and password. 2. Be sure Wi-Fi is on. 3. Tap the Connections icon ( or ) >in the Navigation bar, and then Settings > Task tab. 4. Under My Work Network, tap Edit my proxy server > Proxy Settings tab. 5. Tap the This network connects to the Internet and This network uses a proxy server to connect to the Internet checkboxes. 6. In the Proxy server box, enter the proxy server name. User's Guide 8-13
-
 1
1 -
2
-
3
-
4
-
5
-
6
-
7
-
8
-
9
-
10
-
11
-
12
-
13
-
14
-
15
-
16
-
17
-
18
-
19
-
20
-
21
-
22
-
23
-
24
-
25
-
26
-
27
-
28
-
29
-
30
-
31
-
32
-
33
-
34
-
35
-
36
-
37
-
38
-
39
-
40
-
41
-
42
-
43
-
44
-
45
-
46
-
47
-
48
-
49
-
50
-
51
-
52
-
53
-
54
-
55
-
56
-
57
-
58
-
59
-
60
-
61
-
62
-
63
-
64
-
65
-
66
-
67
-
68
-
69
-
70
-
71
-
72
-
73
-
74
-
75
-
76
-
77
-
78
-
79
-
80
-
81
-
82
-
83
-
84
-
85
-
86
-
87
-
88
-
89
-
90
-
91
-
92
-
93
-
94
-
95
-
96
-
97
-
98
-
99
-
100
-
101
-
102
-
103
-
104
-
105
-
 106
106 -
 107
107 -
 108
108 -
 109
109 -
 110
110 -
 111
111 -
 112
112 -
 113
113 -
 114
114 -
 115
115 -
 116
116 -
117
-
118
-
119
-
120
-
121
-
122
-
123
-
124
-
125
-
126
-
127
-
128
-
129
-
130
-
131
-
132
-
133
-
134
-
135
-
136
-
137
-
138
-
139
-
140
-
141
-
142
-
143
-
144
-
145
-
146
-
147
-
148
-
149
-
150
-
151
-
152
-
153
-
154
-
155
-
156
-
157
-
158
-
159
-
160
-
161
-
162
-
163
-
164
-
165
-
166
-
167
-
168
-
169
 |
 |
