HP Hx4700 HP iPAQ hx4700 series Pocket PC - User's Guide - Page 121
Automatically Enabling Service, File Transfer, Information Exchange, Serial Port
 |
UPC - 829160650166
View all HP Hx4700 manuals
Add to My Manuals
Save this manual to your list of manuals |
Page 121 highlights
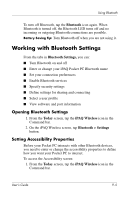
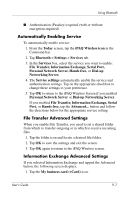
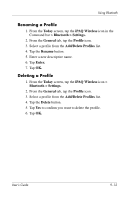
Using Bluetooth ■ Authentication (Passkey) required (with or without encryption required) Automatically Enabling Service To automatically enable service: 1. From the Today screen, tap the iPAQ Wireless icon in the Command bar. 2. Tap Bluetooth > Settings > Services tab. 3. In the Services box, select the service you want to enable: File Transfer, Information Exchange, Serial Port, Personal Network Server, Hands free, or Dial-up Networking Server. 4. The Service settings automatically enable the service and authentication settings. Tap on the appropriate checkbox to change these settings to your preference. 5. Tap OK to return to the iPAQ Wireless Screen if you enabled Personal Network Server or Dial-up Networking Server. If you enabled File Transfer, Information Exchange, Serial Port, or Hands free, tap the Advanced... button and follow the directions below for the appropriate service setting. File Transfer Advanced Settings When you enable File Transfer, you need to set a shared folder from which to transfer outgoing or in which to receive incoming files. 1. Tap the folder icon and locate a desired file folder. 2. Tap OK to save the settings and exit the screen. 3. Tap OK again to return to the iPAQ Wireless screen. Information Exchange Advanced Settings If you selected Information Exchange and tapped the Advanced button, the following screen displays. 1. Tap the My business card (vCard) icon. User's Guide 9-7
-
 1
1 -
2
-
3
-
4
-
5
-
6
-
7
-
8
-
9
-
10
-
11
-
12
-
13
-
14
-
15
-
16
-
17
-
18
-
19
-
20
-
21
-
22
-
23
-
24
-
25
-
26
-
27
-
28
-
29
-
30
-
31
-
32
-
33
-
34
-
35
-
36
-
37
-
38
-
39
-
40
-
41
-
42
-
43
-
44
-
45
-
46
-
47
-
48
-
49
-
50
-
51
-
52
-
53
-
54
-
55
-
56
-
57
-
58
-
59
-
60
-
61
-
62
-
63
-
64
-
65
-
66
-
67
-
68
-
69
-
70
-
71
-
72
-
73
-
74
-
75
-
76
-
77
-
78
-
79
-
80
-
81
-
82
-
83
-
84
-
85
-
86
-
87
-
88
-
89
-
90
-
91
-
92
-
93
-
94
-
95
-
96
-
97
-
98
-
99
-
100
-
101
-
102
-
103
-
104
-
105
-
106
-
107
-
108
-
109
-
110
-
111
-
112
-
113
-
114
-
115
-
 116
116 -
 117
117 -
 118
118 -
 119
119 -
 120
120 -
 121
121 -
 122
122 -
 123
123 -
 124
124 -
 125
125 -
 126
126 -
127
-
128
-
129
-
130
-
131
-
132
-
133
-
134
-
135
-
136
-
137
-
138
-
139
-
140
-
141
-
142
-
143
-
144
-
145
-
146
-
147
-
148
-
149
-
150
-
151
-
152
-
153
-
154
-
155
-
156
-
157
-
158
-
159
-
160
-
161
-
162
-
163
-
164
-
165
-
166
-
167
-
168
-
169
 |
 |