HP Integrity rx2620 Installation Guide, Third Edition - HP Integrity rx2620 (A - Page 36
Replacing the Top Metal Cover, Aligning the Top Metal Cover
 |
View all HP Integrity rx2620 manuals
Add to My Manuals
Save this manual to your list of manuals |
Page 36 highlights
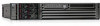
Installing Additional Components Removing and Replacing the Top Metal Cover Replacing the Top Metal Cover CAUTION Secure any wires or cables in your server so they do not get cut or interfere with the replacement of the top metal cover. Step 1. Align the front edge of the top metal cover with the alignment mark on the optical drive bay. See Figure 3-3 for more information. Figure 3-3 Aligning the Top Metal Cover To replace cover, align front edge here then slide forward Front of server Step 2. Grasp the blue release lever and slide the top metal cover toward the front of the system until the lever snaps into place. See Figure 3-4 for more information. Figure 3-4 Closing the Top Metal Cover Front of server Step 3. Lock the top metal cover and return the key to its stored position. 36 Chapter 3
-
 1
1 -
2
-
3
-
4
-
5
-
6
-
7
-
8
-
9
-
10
-
11
-
12
-
13
-
14
-
15
-
16
-
17
-
18
-
19
-
20
-
21
-
22
-
23
-
24
-
25
-
26
-
27
-
28
-
29
-
30
-
 31
31 -
 32
32 -
 33
33 -
 34
34 -
 35
35 -
 36
36 -
 37
37 -
 38
38 -
 39
39 -
 40
40 -
 41
41 -
42
-
43
-
44
-
45
-
46
-
47
-
48
-
49
-
50
-
51
-
52
-
53
-
54
-
55
-
56
-
57
-
58
-
59
-
60
-
61
-
62
-
63
-
64
-
65
-
66
-
67
-
68
-
69
-
70
-
71
-
72
-
73
-
74
-
75
-
76
-
77
-
78
-
79
-
80
-
81
-
82
-
83
-
84
-
85
-
86
-
87
-
88
-
89
-
90
-
91
-
92
-
93
-
94
-
95
-
96
-
97
-
98
-
99
-
100
-
101
-
102
-
103
-
104
-
105
-
106
-
107
-
108
-
109
 |
 |
